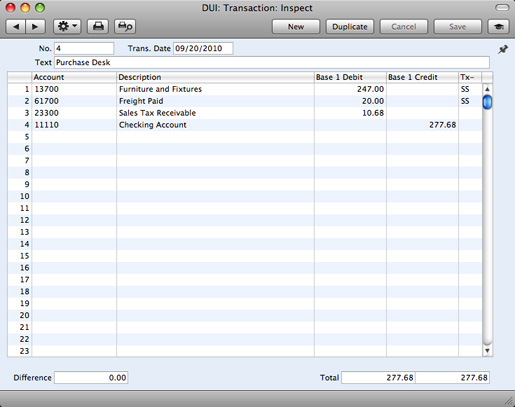
Entering a Transaction - Transaction Rows (Journal Postings)

The majority of the Transaction record window contains the rows of the Transaction, where you should list the postings to the individual Accounts. These must balance (the debits must equal the credits) before you can save the Transaction.
To add rows to a Transaction, click in any field in the first blank row and enter appropriate text. To remove a row, click on the row number on the left of the row and press the Backspace key. To insert a row, click on the row number where the insertion is to be made and press Return.
- Account
- Paste Special
Account register, General Ledger/System module
- Specify here the Account used by the Transaction row.
- You can also enter an Autotransaction Code in this field. You can use Autotransactions to automate the entry of frequently used Transactions, not only reducing labor but also ensuring the correct Accounts are used every time. Autotransactions are fully described here.
- Description
- The Account Name will be entered here automatically when you specify the Account above. You can change it in a particular Transaction row if necessary.
- Base 1 Debit, Base 2 Credit
- For each row, enter a debit or credit amount. The debits total must equal the credits total before you can save the Transaction: each Transaction must therefore have at least two rows.
- Tx-Cd
- Paste Special
Tax Codes setting, General Ledger
- Default taken from Account
- You can mark each row in a Transaction with a Tax Code. The Tax Code may be brought in automatically when you enter an Account number, or you can enter it yourself. No calculation ensues: the field is for reporting purposes only. Nevertheless, take care to ensure you enter the correct Tax Code (if any), since it will affect the accuracy of the figures for Net Sales and Net Purchases in the Tax Report.
---
In this chapter:
Go back to:
