Printing Sales Orders
It is often necessary to print Orders, perhaps for the purpose of confirmation or acknowledgement, or to gain an authorisation signature. There are three ways to print an Order.
- While entering or inspecting an Order, click the Printer icon in the Button Bar (Windows/Mac OS X) or select 'Print' from the File menu (all platforms). If you want to print to screen, click the Preview icon (Windows/Mac OS X only).
- If you need to print several Orders at once, first ensure you are in the Sales Orders module. Then, if you are using Windows or Mac OS X, click the [Forms] button in the Navigation Centre and double-click 'Orders' in the 'Forms' list window. If you are using iOS or Android, tap the [Routines] button in the Navigation Centre and then tap [Forms]. Tap 'Orders' in the 'Forms' list window. Enter the Order Number (or range of Order Numbers) to be printed and press the [Run] button.
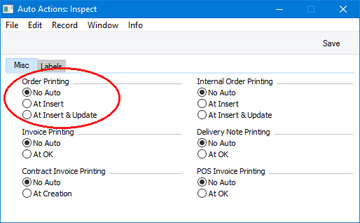
- You can have Orders printed automatically. This is controlled using the Auto Actions setting in the System module. Choose the At Insert option if you would like an Order to be printed only when you save it for the first time, or the At Insert & Update option if you would like it to be printed every time you save it.
When you print an Order using any of the methods described above, it will be printed using a Form Template. The Form Template contains the graphic layout design of the printed output i.e. it determines where on the page each piece of information will be placed. Therefore, before you can begin printing Orders, you should design a Form Template (step 1 below), and then specify that the particular Form Template will be used when printing Orders (steps 2-7). You can only follow this process using Windows or Mac OS X, not iOS or Android.
- Design the sales order Form Template using the Form Template register in the System module. Use the 'Properties' function on the Operations menu to name the Form Template (in this description, we have used the name "ORDER") and to assign it a Form Type of "Order". You might want to design different Form Templates for use with different Languages.
A file containing samples of each Form Template including a sample "ORDER" is supplied with Standard ERP: if you want to use these samples as templates for your own designs, import the "UKForms.txt" file as described on the Importing Set-up Data page.
- Having designed the Sales Order Form Template, you should now specify that it should be used when printing Orders. Select the Sales Orders module using the [Switch Module] button in the Navigation Centre or the Ctrl-0 (Windows) or ⌘-0 (Mac OS X) keyboard shortcut.
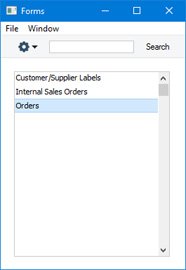
- Click the [Forms] button in the Navigation Centre or use the Ctrl-D/⌘-D key combination. The 'Forms' list window will be opened: highlight 'Orders'.
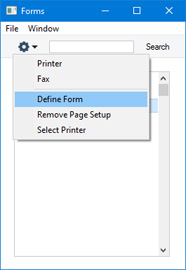
- Select 'Define Form' from the Operations menu (with "cog" icon):
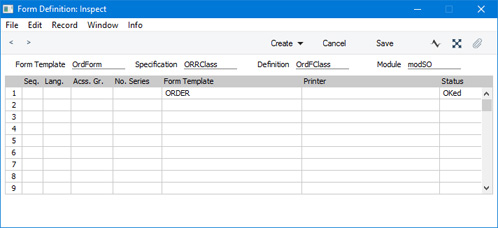
- In the subsequent 'Form Definition' window, enter "ORDER" in the Form Template field in the first row (you can use 'Paste Special' to ensure the spelling is correct). If appropriate, you can specify a different Form Template in the second row, to ensure both an order acknowledgement and an order authorisation are printed at all times, using different Form Templates. If so, you should also specify a numeric Seq. in both rows (for example, "1" and "2").
If you only want to be able to print Orders that have been marked as OK, enter 'OKed' in the Status column in every row in the 'Form Definition' window. This will prevent the printing of Orders that have not yet been marked as OK. If you have also used Access Groups to control which users are able to mark Orders as OK, this feature helps prevent the fraudulent creation and printing of unauthorised Orders.
You can also use this feature to use a different Form Template when printing Orders that have not been marked as OK, as shown below:

- Click [Save] to save the Order Form definition. From now on, the Order Form Template that you have designed will be used whenever you print an Order.
If you need Orders to pass through an approval process before you can print them, you can configure such a process using the Approval Rules register in the Business Alerts module. Please refer to the description of the Approval Status options on the
'Inv. Address' card for brief details about the approval process and
here for full details.
---
The Sales Order register in Standard ERP:
Go back to: