Adjusting Elements in the POS Invoice Window
This page describes the adjustments you can make to the appearance of the POS Invoice window so that it best suits your requirements.
---
The 'POS' and 'POS Appearance' cards in the Local Machine setting in the User Settings module contain various options that you can use to change and move the elements in the POS Invoice and Bar Tab windows. As the Local Machine setting is stored separately in each client database, you will need to make these changes on each till or cash machine (or you can have different settings on each till). If a till will have a live-sync connection with the server, you can make these changes in the Local Settings setting in the Technics module before connecting the till to the server. The changes will then be sent to the till as part of the synchronisation process.
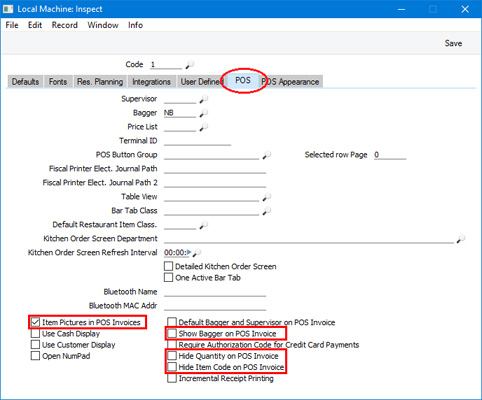
The following options are available on the 'POS' card in the Local Machine setting:
For brevity, only the options that are used in the POS Invoice window have been mentioned in the descriptions below. Some of these options are also used in the Bar Tab window: please refer
here for details. Similarly, only the Local Machine setting has been mentioned, without referring to the Local Settings setting.
- Item Pictures in POS Invoices
- Select this option if you would like Item pictures to be shown in the POS Invoice window. You should also set the Item Pictures on Cashier Screen option in the POS Settings setting to "Default" or "On”.
- The pictures will be brought in from the Item register as the cashier scans the Items to add them to a POS Invoice. Please refer here for details about adding pictures to Item records.
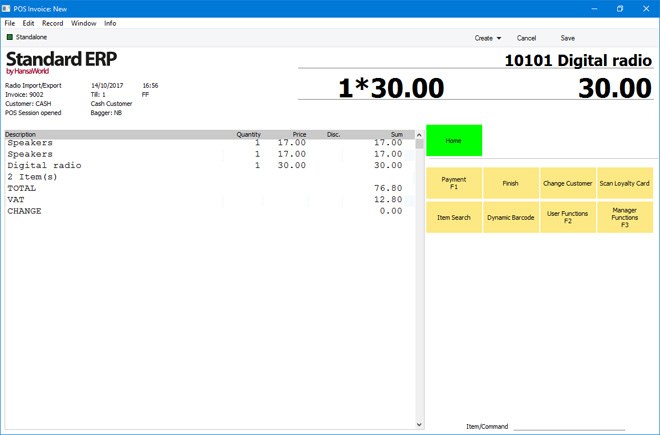
- If you select this option, Item pictures will be shown in the button area above the Item/Command field, so they will reduce the area that is available for buttons:

If you need to use this option on a till or cash machine that has a live-sync connection to the server, select the Sync Item Images option in the Synchronisation Settings setting in the Technics module before connecting the till to the server for the first time. This will ensure that the Item picture files will be sent to the till by the synchronisation process.
- Show Bagger on POS Invoice
- Baggers are the members of staff who pack Customers' Items into bags or boxes after they have been scanned by the cashiers. You can specify a Bagger for a till or cash machine using the Bagger field on the 'POS' card in the Local Machine setting. Cashiers will be able to change this Bagger if you add a "Bagger Search" button to the POS Invoice window. If you would like the Bagger to be shown in the POS Invoice window, select this option:

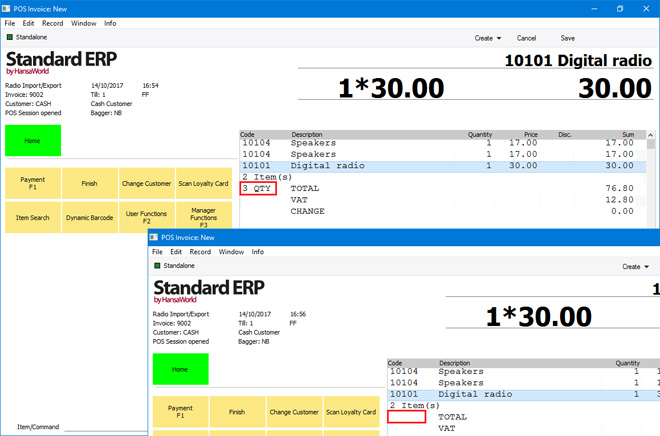
- Hide Quantity on POS Invoice
- As cashiers add Items to a POS Invoice, two quantities will be updated: the number of units purchased by the Customer, and the number of different Items purchased by the Customer. If you select this option, the number of units purchased by the Customer will not be visible in the POS Invoice window:
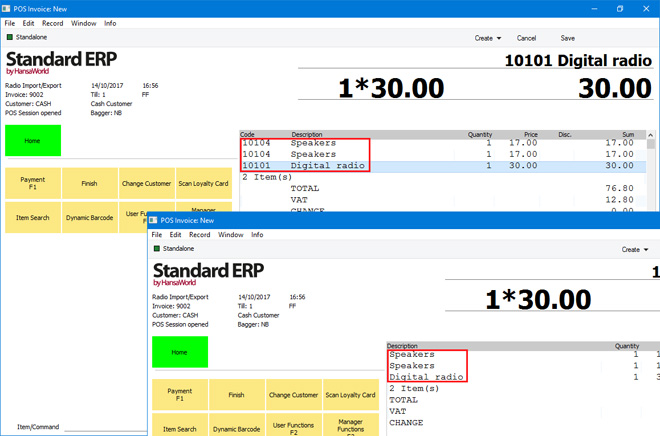
- Hide Item Code on POS Invoice
- By default, when a cashier scans an Item, its Item Number and Name will both be shown in the POS Invoice window. Select this option if you don't want the Item Number to be shown, making more room for the Name:
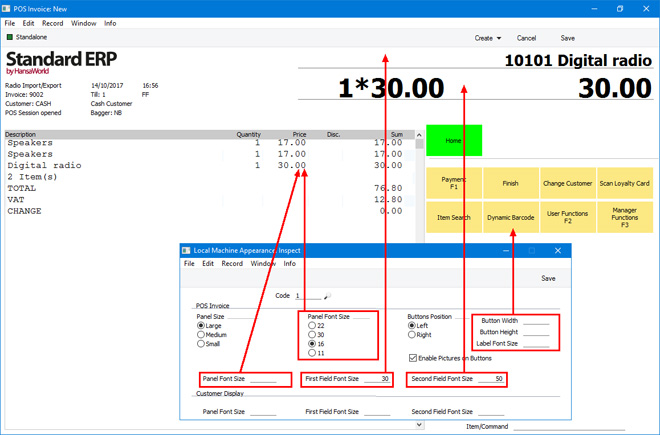
The following options are available on the 'POS Appearance' card in the Local Machine setting (you can also find these options in a separate Local Machine Appearance setting in the User Settings module, illustrated below):
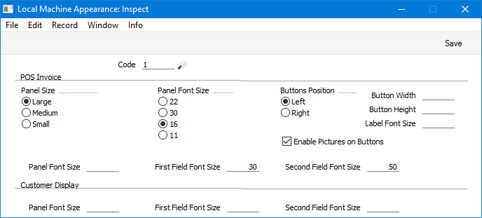
- Panel Size
- The panel is the area in the POS Invoice that lists the Items that have been scanned by the cashier. You can choose to reduce the size of the panel if you need a larger button area. If you select this option, you may need to reduce the Panel Font Size using the options below as well.

- Panel Font Size
- Use these options to set the font size of the text in the panel. If you need to use a size that doesn't have its own option, enter that size in the Panel Font Size field below.
- Buttons Position
- Use these options to specify whether the button area should be placed on the left side of the POS Invoice or on the right. If you choose the Right option, the POS Invoice will appear as follows:
The Buttons Position options also control the position of the numeric keypad in many of the windows that pop up when cashiers click or touch buttons in the POS Invoice window.
- Button Width, Button Height
- By default, the buttons in the POS Invoice window will be 93 x 50 pixels in size, excluding the border (98 x 55 pixels including the border). If you need the buttons on a particular till or cash machine to be a different size, enter that size in pixels in these fields.
- Label Font Size
- Specify the font size that is to be used for the button labels.
- Enable Pictures on Buttons
- Select this option if you would like the buttons in the POS Invoice window to contain images or pictures, instead of text labels. Please refer to the description of the POS Button Pictures setting here for more details.
- First Field Font Size, Second Field Font Size
- Use these fields to set the font size of the text in the two fields above the panel. If you leave these fields empty, the font sizes will be 20 for the first field and 30 for the second on small screens and 30 and 50 respectively on larger screens.
---
Configuring the POS Invoice Window:
Go back to: