The Appearance of the Report - Adding Fields to the Report
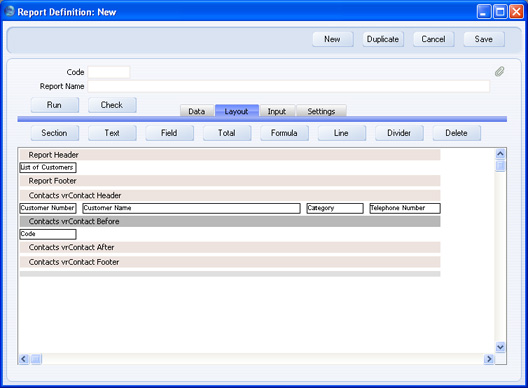
The next step is to place fields for the Contact Number, Name and Telephone Number in the report. These fields will print information from each Contact record, and therefore will be printed as many times as necessary (i.e. once for each record). They should therefore be placed in the Contact Before section, which is printed once for each Contact record.
- Click the Contact Before section (marked "Contacts vrContact Before" in our example) to select it.
- Click the [Field] button above the report display area. The 'Field' dialogue box opens:
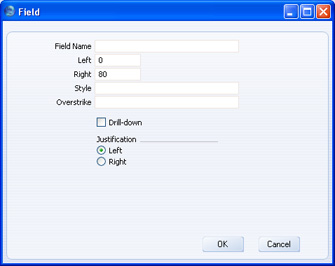
- Field Name
- Paste Special
Fields in the register
- Choose the field that is to be printed. The 'Paste Special' list will show all the fields in the register you are working with (in this case, the Contact register). You cannot use fields from any other register: if you want to print information from another register you will need to use variables as described here.
- Left
- Specify here where the left-hand edge of the field is to appear on the page, by entering a number of pixels from the left-hand edge of the page. If you're not yet sure where you want the field to appear, don't change the default. You will be able to move the field later by clicking and dragging. To align the field with its column heading, enter the same left and right measurements here as you did for the heading.
- Right
- Specify here where the right-hand edge of the field is to appear on the page, by entering a number of pixels from the left-hand edge of the page.
- Style
- Paste Special
Styles setting, System module or Style register, Report Generator module
- Use this field to assign a font and font style to the field. If you do not enter a Style, the font and font size specified in the Company Info setting in the System module will be used.
- Overstrike
- You can have the field printed with a red line drawn through it, depending on a condition that you enter here. This is described in more detail on the page.
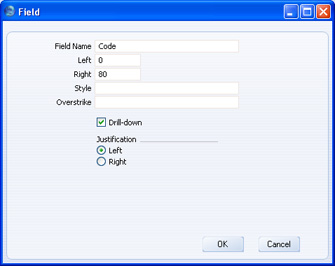
- Drill-down
- Check this box if you want to be able to drill down from the report into the register, when the report is printed to screen. In the example list of Customers, it might be useful to be able to click on a Contact Number in the report to open the relevant Contact record.
- Justification
- Use these options to choose whether the text is to be left- or right-justified within the field. Usually fields containing alphanumeric information or text should be left justified, while those containing figures should be right justified.
- When the 'Field' dialogue box is complete, click the [OK] button to close it. The field now appears in the report display area, in the Contact Before section:
- Repeat steps 2 and 3 three times to add fields for the Contact Name, Category and Telephone Number:
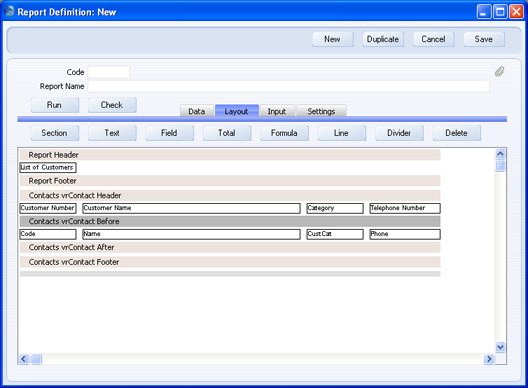
Having added the fields, please click the links below for more details about: