Autotransactions - Creating a new Autotransaction
Double-click 'Autotransactions' in the 'Settings' list. A list of existing Autotransactions appears. Click [New] in the Button Bar to enter a new record. When the Autotransaction has been entered, save it using the [Save] button and close the window by clicking the close box. Then, close the browse window using the close box again.
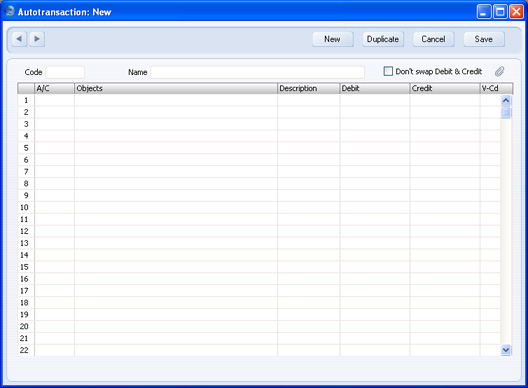
- Code
- This is the code that identifies this particular template. The code can consist of up to six alphanumeric characters. Each template must have a unique code, and you should use codes that do not duplicate Account numbers.
- When you need to use the Autotransaction in a Transaction, Simulation, Purchase Invoice or Expense record, enter this code in the Account field. When you press Tab or Return, the calculations defined in the grid of the Autotransaction record will be applied to the Transaction, Simulation, Purchase Invoice or Expense record.
- Name
- Assign a descriptive name to the template, e.g. "Sales VAT included". The name is then shown in the 'Autotransactions: Browse' window.
- Don't swap Debit & Credit
- Please refer to the description of the Debit and Credit fields below for details of this option.
Use the grid area that takes up the majority of the window to define the Autotransaction. Usually this will require several rows.
When you use an Autotransaction in a Transaction, you will do so by entering the Autotransaction Code in the Account field in a Transaction row. When you press Tab or Return, the Autotransaction will be applied to the Transaction. Usually, the result of the first row of the Autotransaction will appear in the Transaction row where you entered the Autotransaction Code. The exception is when the Account field in the first Autotransaction row contains !. In this case, the result of the first row of the Autotransaction will appear in the Transaction row above the one where you entered the Autotransaction Code, overwriting what was previously there. The results of the other rows of the Autotransaction will appear in new Transaction rows underneath. Each Autotransaction row will therefore generate a corresponding Transaction row. There is an example here.
- Account
- Paste Special
Account register, Nominal Ledger/System module
- You can make three types of entry in this field, as follows:
- An Account Number
- You can enter an Account number, using 'Paste Special' if necessary to choose the correct one.
- This Account Number will be copied to the corresponding Transaction row.
- The hash sign (#)
- # in this field will cause the Account to be copied from the preceding line of the Transaction when you use the template. # is obtained using Alt-3 on a UK Macintosh keyboard.
- The exclamation mark (!)
- ! in this field will cause the amount in the previous line of the Transaction is to be overwritten by the result of the Autotransaction row. See the following example for a detailed description of how this works.
- Object
- Paste Special
Object register, Nominal Ledger/System module
- The Object(s) specified here will be copied to the corresponding Transaction row. You can also enter a # sign to copy the Objects from the preceding line of the Transaction.
- Description
- By default, the Description in the corresponding Transaction row will be taken from the relevant Account record as usual. If you need this default to be overwritten, enter the new Description here. You can also enter a # sign to copy the Description from the preceding line of the Transaction.
- Debit, Credit
- Paste Special
Calculation Formulae setting, Nominal Ledger
- You can enter a fixed amount here (e.g. a salary or a rent), or a formula for a calculation. You can enter a percentage as a number followed by a % sign (e.g. 30%). The Autotransaction will then apply the specified percentage to the amount on the preceding line of the Transaction. If you enter a number followed by two % signs (e.g. 30%%), the result of the percentage calculation will be rounded to the nearest whole number. You can also define a more complex formula using the Calculation Formulae setting and then enter the Code of that formula here. The Autotransaction will then apply the specified formula to the amount on the preceding line of the Transaction.
- By default, if you enter the amount or percentage in the Debit field, the calculated amount will be entered on the same side of the Transaction as the original amount. If you enter the amount or percentage in the Credit field, the calculated amount will be entered on the opposite side. But, if you use the Don't Swap Debit & Credit option in the Autoransaction header, if you enter the amount or percentage in the Debit field, the calculated amount will be entered on the debit side, irrespective of whether the original amount was a debit or credit. If you enter the amount or percentage in the Credit field, the calculated amount will be entered on the Credit side.
- However, if you enter a Calculation Formula in the Debit field, it will calculate an amount based on the figure in the row above and enter the result as a Debit. If you enter the Calculation Formula in the Credit field, the calculated amount will be entered as a Credit. In other words, if you enter a Calculation Formula in an Autotransaction row, that row will always behave as if you are using the Don't Swap Debit & Credit option.
- You can balance all the preceding lines of the Transaction by entering an equal sign (=) in the Debit or Credit field.
- V-Cd
- Paste Special
VAT Codes setting, Nominal Ledger
- By default, the VAT Code in the corresponding Transaction row will be taken from the relevant Account record as usual. If you need this default to be overwritten, or if there is no default in the relevant Account record, enter the new VAT Code here. You can also enter a # sign to copy the VAT Code from the preceding line of the Transaction, if the A/C is ! or #.