|
Search HansaManuals.com HansaManuals Home >> Standard ERP >> Introduction and Installation >> Starting Standard ERP Previous Next Entire Chapter in Printable Form Search This text refers to program version 8.0 Creating a New Database - The Program Mode Register The Program Mode register allows you to control the operation of the server. It is in the Technics module, so if you working from a client you must make sure you are the only user logged into the system, and you should be logged in as a system administrator as described here. You can also work on the server itself using the GUI application.Use the [Switch Module] button in the Navigation Centre or the Ctrl-0/⌘-0 keyboard shortcut to go into the Technics module, then click the [Registers] button, also in the Navigation Centre. Double-click 'Program Mode' in the resulting list.
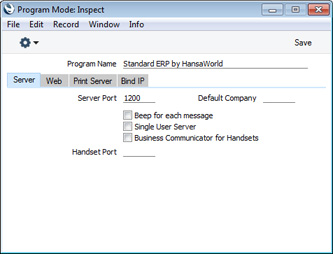
Server Card
Bind IP Card
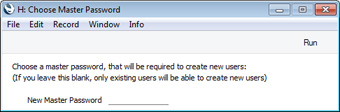
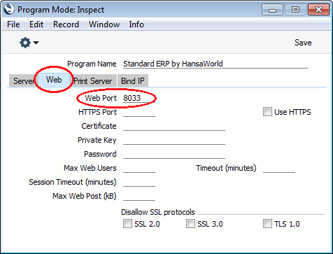
Other CardsThe remaining fields in this register are only used in the specialised situations when setting up the Web Shop and Print and Fax servers. You can leave them blank when setting up a standard data server (unless you want to allow access to your database from a browser, in which case you should specify a Web Port on the 'Web' card).For details about setting up Print and Fax servers, please refer to the description of the Printers setting. For details about setting up a Web Shop, please refer to your local HansaWorld representative. Once the 'Server' card of this register is complete, click the [Save] button in the Button Bar to save. If you have entered a Server Port number for the first time (or changed the one that was already there), quit Standard ERP and restart to allow the change to take effect. Changing the Master PasswordWhen you use a client machine to log in to the server, you will be able to log in as an existing user, or you will be able to use a [New User] button to create a new User Account in the server database. When you do this, you will be asked to enter the Master Password before you can create the new User Account. If you have not specified a Master Password, you will not be able to use this feature.If you need to specify a Master Password for the first time, or want to change the Master Password, follow these steps:
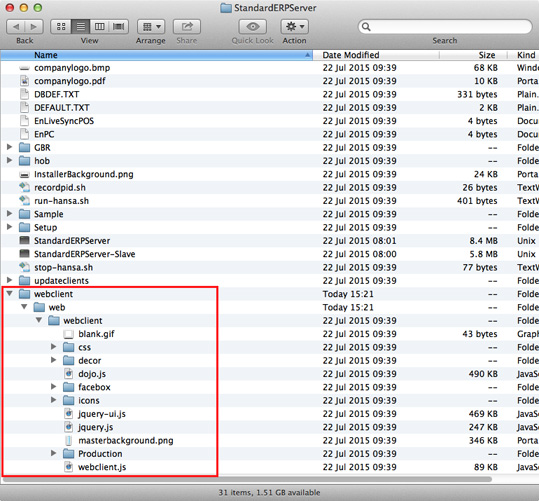
Allowing Logging in from a Browser (Web Client)If you installed your server application as described here , the necessary files should already be in place to allow users to log on to your server from a browser. In the folder containing the server application, there will be a “webclient” folder that contains a “web” folder that itself contains a second “webclient” folder. This contains the necessary web files (java scripts, stylesheets and images). If this directory/folder structure is missing from your server application folder, refer to the original installer file. The Mac OS X server folder shown below illustrates this directory/folder structure:
Go back to:
|