Placing tools and functions in the POS Invoice window
Illustrated below is the POS Invoice window as it will appear in a new installation of Standard POS:

As shown in the illustration, the POS Invoice window contains an area where you can place buttons for the tools and functions that you need. This area is termed the "button area" in this documentation. In this illustration, the button area contains four active buttons (marked "Payments", "Manager Functions", "Change User" and "Item Search") and several grey dummy buttons. You can keep these buttons as they are, or you can change them to suit your requirements.
You are not limited to the number of buttons that will fit in the button area. If you need more buttons, you can create several sets of buttons. Each button can therefore perform one of two operations:
- It can activate a particular function (in the illustration, "Change User" and "Item Search" are examples); or
- It can replace the currently visible set of buttons with a different set (in the illustration, "Payments" and "Manager Functions" are examples).
You should spend some time planning the structure of your sets of buttons. When you create a new POS Invoice, you will need buttons representing the most important and commonly-used tools and functions to be visible immediately. For example, you might need buttons to activate cash and credit card payments always to be available. But, if you will add Items to POS Invoices by scanning the Items' barcodes, then a button that you will use to find Items by Item Number or Name will be less necessary and won't need to be visible immediately.
Above the button area, there is a single "parent button" (marked "Main" in the illustration). If you click a button such as "Payments" in the example, the currently visible set of buttons will be replaced with a different set. A second parent button will appear, whose label will remind you which set of buttons you are using. This situation is illustrated below:

The "Main" button will remain: click this button to return to the original set of buttons.
The button definitions are contained in the POS Buttons setting. This setting will contain a separate record for each set of buttons (a set of buttons is sometimes known as a "button page").
To add a function to the first dummy button, follow these steps:
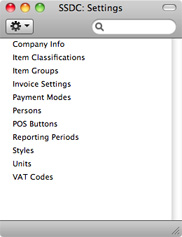
- Open the Master Control panel using the ⌘-M keyboard shortcut, and then click the [Settings] button. Alternatively, use the ⌘-S keyboard shortcut. In both cases, the 'Settings' list opens:

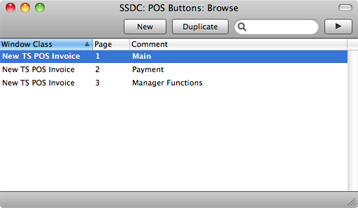
- Double-click 'POS Buttons' in the list. The 'POS Buttons: Browse' window opens, listing the three records that already exist:

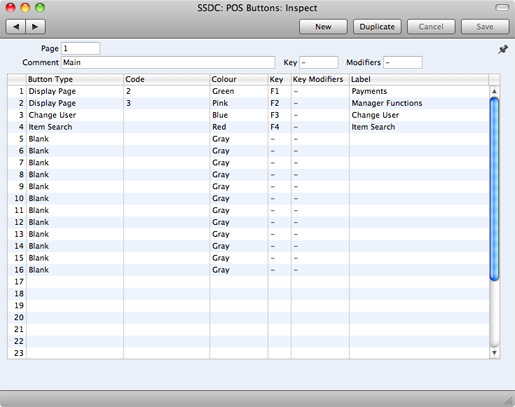
The first record in this list (with "1" in the Page column) contains the set of buttons that you will see when you open a new POS Invoice. For this reason, you must have a POS Button record in which the Page is "1" (sometimes described as the "Page 1" record in this documentation). At the moment, this record contains the four active buttons and several dummy buttons shown in the illustration at the beginning of this page.
The other two records contain secondary sets of buttons. For example, the second record contains the set of buttons that will be shown when you touch or click "Payments" on the first page. These two records have arbitrary but unique values in the Page column ("2" and "3").
- Double-click the first record in the list to open it:

The top part of the window (the "header") contains four fields that relate to the POS Button record as a whole. The majority of the window contains a matrix in which the individual buttons are listed, one row for each button.
- If you need to change the header information (or are entering a new POS Button record), complete the four header fields as follows:
- Page
- Use this field to assign a unique identifying code to the POS Button record.
- In most cases, you can use an arbitrary code. However, you must have one POS Button record in which the Page is "1" (i.e. a "Page 1" record), as shown in the illustration. This will contain the buttons that will be displayed in new POS Invoices.
- Comment
- This Comment will be used as the button label for the parent button (the button above the button area). In this example, the button label will be "Main", as shown in the illustration at the beginning of this page.
- Key, Modifiers
- Paste Special
Choice of possible entries
- As an option, use the Key field to specify a Function Key that you can use to activate the set of buttons. In practice, it is only useful to do this in the "Page 1" set of buttons, because the Page 1 parent button is always visible and therefore the Function Key will always be active.
- Be sure to choose a Function Key that isn't already used by the operating system. If necessary, add a Modifier to the Function Key (e.g. Cmd or Shift).
- Use the matrix that takes up the majority of the 'POS Button: New' window to list the buttons that you want to be included in the set of buttons. In the "Page 1" POS Button record, these are the buttons that will be shown each time on opening a new POS Invoice.
The buttons will be shown in the POS Invoice in the order in which you list them in the POS Button record. The first four buttons in the list in the POS Button record will appear in the first row of buttons in the POS Invoice, and so on.
To add a button, click in any field in the first blank row and enter an appropriate value. To remove a button, click on the row number on the left of the row and press the Backspace key. To insert a button, click on the row number where the insertion is to be made and press Return.
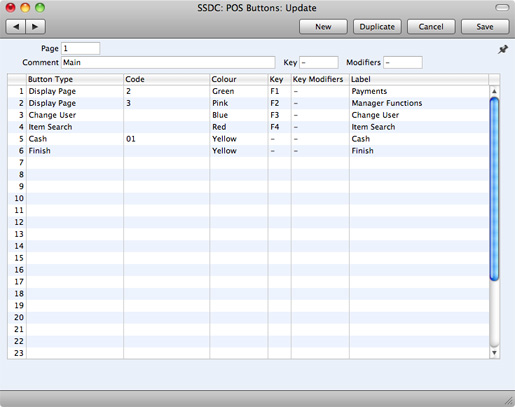
To assign a function to the first dummy button in the example, change the attributes in the relevant row in the matrix (row 5 for the first dummy button) as follows:
- Button Type
- Paste Special
Choice of possible entries
- Use 'Paste Special' to specify the task or function that should be carried out when you touch or press the button. Please refer to the Available Tools and Functions (POS Button Types) page for descriptions of each option.
- Code
- Paste Special
Depends on Button Type
- Depending on the Button Type you have chosen in the field to the left, you may need to make an entry in this field. For example, if the Button Type is "Display Page", use this field to specify the page that is to be displayed when you touch or press the button. If the Button Type is "Cash" or "Credit Card", use 'Paste Special' to choose a Payment Mode for the payment. Please refer to the Available Tools and Functions (POS Button Types) page for details.
- Colour
- Paste Special
Choice of possible entries
- Enter the colour of the button, as it will appear in the POS Invoice window.
- Key, Key Modifiers
- Paste Special
Choice of possible entries
- As an option, use the Key field to specify a Function Key that you can use instead of touching or pressing the button.
- Be sure to choose a Function Key that isn't already used by the operating system. If necessary, add a Modifier to the Function Key (e.g. Cmd or Shift).
- Label
- Enter the name of the button, as it will appear in the POS Invoice window.
In the illustration below, we have replaced the first two dummy buttons with a "Cash" button and a "Finish" button, and removed the other dummy buttons:

- To save the POS Button record, click the [Save] button in the top right-hand corner of the window, or use the Shift-Enter or Shift-Return keyboard shortcuts.
- The new buttons will appear in the next new POS Invoice:

The new buttons will appear immediately. However, you will need to quit and restart in order to register the removal of the other dummy buttons.
---
In this chapter:
Go back to:
