Installation - Linux and Macintosh OS X Server Installation
The FirstOffice server applications for Linux and Macintosh OS X can only be run with the machine in "Terminal" mode. However, you can install them either using the usual graphical interface or using the "Terminal" mode.
To install the FirstOffice server application on a Linux or Macintosh OS X machine using the graphical interface, follow the instructions on the Single-user page.
Otherwise, to install the FirstOffice server application using the "Terminal" mode, follow these steps:
- Download the latest version of FirstOffice that is correct for your platform and operating system. Create a new folder on your hard disk, and move the file that you have downloaded into this folder.
- Put the machine into "Terminal" mode.
On a Macintosh OS X machine, double-click the Terminal application that will usually be found in the Utilities folder in the Applications folder, or use the Terminal icon in the Dock:

On a Linux machine, use the Terminal icon in the Dock or Panel. The appearance of these icons will vary depending on your interface: shown below are typical icons for KDE and GNOME:


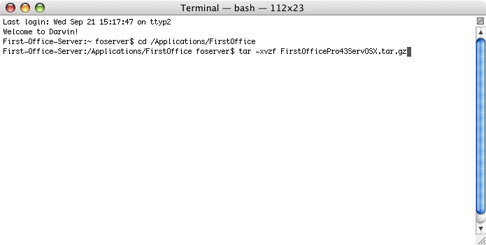
- Type the following, remembering that the Terminal environment on Linux is case-sensitive:
- cd /Applications/FirstOffice
- changes to the directory where you have placed the installer file, in this case the "FirstOffice" directory inside the "Applications" directory at the root level.
- tar -xvzf FirstOfficeProAdv43Serv.tar.gz (Linux), or
- tar -xvzf FirstOfficePro43ServOSX.tar.gz (OS X)
- where FirstOfficePro43ServOSX.tar.gz is the name of the installer file that you have downloaded
When you press the Return key, the installer will create a new directory in your FirstOffice directory. This new directory will be named 1OfficeProAdv43Serv (Linux) or 1OfficePro43ServOSX (Macintosh OS X). This will contain the application and the necessary auxiliary files.