Mailboxes
Each Person can have their own personal Mailbox, which they will use for sending and receiving Mail. This cannot be accessed by any other user, except by the system's administrator through the Technics module.
You can create Mailboxes using the following methods:
- Select 'Technics' using the [Select Module] button in the Master Control panel. Then, click the [Settings] button, also in the Master Control panel (or select 'Settings' from the File menu). In the resulting list, double-click 'Mailboxes'. This will open the 'Conferences' window that shows the Mailboxes that already exist. Click the [New] button in the Button Bar.
- In the System module, open the Person register and highlight a record in the 'Persons: Browse' window. Select 'Create Mailbox' from the Operations menu.
In both cases, the 'Conference/Mailbox: New' window is opened:
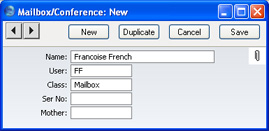
Complete the fields as follows:
- Name
- Enter the unique name by which the Mailbox is to be identified from elsewhere in FirstOffice. Usually this will be the name of the Person owning the Mailbox. When Mail is sent to this Mailbox, this Name will be used as the address of the Mail. It will also be shown in the 'Paste Special' list of possible addresses. Make sure you type the name correctly because you can't change it once the Mailbox has received Mail for the first time.
- As shown in the example, it can be a good idea not to use special characters in this field. If you have a mixed network (Windows, Linux and/or Macintosh), special characters may not appear as expected on all machines or platforms.
- User
- Paste Special
Person register, System module
- Enter the Signature (initials) of the Person owning this Mailbox. Access to the Mailbox is only granted to this Person (and to system administrators with access to the Technics module).
- Class
- Ensure this is set to "Mailbox" (the default).
- Ser Nr
- This unique identifying number is generated automatically when the Mailbox is saved for the first time. It cannot be changed.
- Mother
- This field is not used for Mailboxes, and must be left blank.
Save the Mailbox by clicking the [Save] button in the Button Bar. You are returned to the 'Conferences' window, which now shows the Mailbox that you have just created.
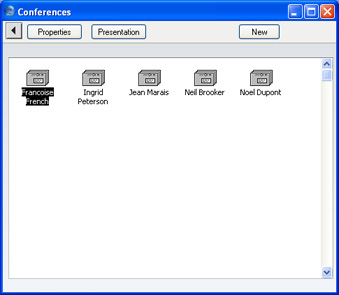
Once a Mailbox has been created, you can only change its specifications in the Technics module. Open the 'Conferences' window as described earlier in this section and click on the Mailbox to be changed. Then, click [Properties] in the top left-hand corner of the window. Make the changes as necessary and save in the usual way, or, to delete the Mailbox, select 'Delete' from the Record menu. You can only delete Mailboxes if they don't contain any Mail. You can check the contents of a Mailbox by double-clicking a Mailbox in the 'Conferences' window. You can empty a Mailbox using the
'Clean Up Mail Registers' Maintenance function in the System module.