Attachments
You can connect files, notes or other records to any record in Hansa. These connected objects are known as "Attachments".
All record windows contain an [Attachments] button:

If a record has an Attachment, the button has a different icon:

Click this button to work with Attachments (or select 'Attachments' from the Record menu). A list of objects currently attached to the record is opened:
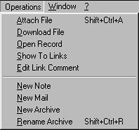
This list has its own Operations menu, which contains the functions necessary to attach, view and remove Attachments:
In the case of records whose unique identifying codes are not generated automatically (e.g. the Item Number of Items), you must save the record at least once before you can add any Attachments.
Attaching Files to Records
To attach a file to a record, open the record in question and click the [Attachments] button. Select 'Attach File' from the Operations menu. An 'Open File' dialogue box will open, allowing you to locate the file to be attached. Find the file and click [Open]. The file will be attached to the record. Its filename will appear in the list of Attachments with the prefix "File:". You can attach as many files as you like to a single record.
The 'Attach File' function attaches a file to a record by copying the file into a folder called "Attach" that is in the same folder as your Hansa application. In multi-user systems, the "Attach" folder should be on the server. This means that you will still be able to download and read the attached file, even after the original has been deleted. If you want to attach a large file to a record, make sure (using the disk space indicator in the 'About Hansa' window) that the hard disk containing your Hansa application has sufficient space. As the file is uploaded to the server, a progress indicator appears so that you can monitor its progress.
! | The "Attach" folder must be present in the folder containing your Hansa application if you want to attach files to records. Do not rename any of the files in the "Attach" folder. |
|
Reading Files
A file that has been attached to a record can be read in one of two ways. Whichever method is used, a 'Save File' dialogue box is opened, asking you where the file is to be saved.
- By double-clicking on the file in the list of Attachments. When the file has been saved to your hard disk, your default browser will be opened so that the file can be opened using the appropriate helper application (not Macintosh).
- By clicking on the file in the list of Attachments and selecting 'Download File' from the Operations menu. The file is saved to your hard disk, but no attempt is made to open it using a helper application.
Attaching Notes or Comments to Records
You can attach notes or comments to records. To do this, open the record in question and click the [Attachments] button. Select 'New Note' from the Operations menu. A window will open, where you can type in your comment.
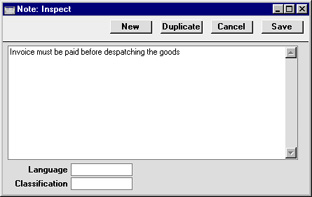
Click [Save] to save. The note will appear in the list of Attachments with the prefix "Note:". If you want to identify the note with a name, refer to the 'Changing the Names of Attachments' section below. You can attach as many notes as you like to a single record.
Reading and Changing Notes
A note or comment that has been attached to a record can be read in one of two ways:
- By clicking on the note in the list of Attachments and selecting 'OK' from the Record menu; and
- By double-clicking on the note in the list of Attachments.
Whichever method is used, the note is opened in its own window where it can be read or edited.
Printing Notes
A note or comment that has been attached to a record can be printed when the record is printed. For example, a note that has been attached to an Invoice can be printed on the Invoice document. If more than one note has been attached to a record, only the first note will be printed.
If you want notes and comments to be printed in this way, you should include the "Note" field in each of your Form designs. Form design in fully described here.
Changing the Names of Attachments
When a file is attached to a record, its file name will be shown in the list of attachments. When a note is attached to a record, it is not immediately given its own name in the list.
If you want to rename a file or note, highlight it in the list of Attachments and select 'Edit Link Comment' from the Operations menu. A window opens where you can type in a new name.
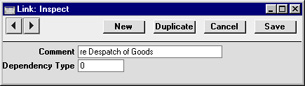
Click [Save] to save and close the window, or [Cancel] if you don't want to save changes. You may have to close and re-open the list of Attachments for the change to take effect.
Attaching Records to Other Records
You can attach records to other records by dragging and dropping from the browse window of one register onto the [Attachments] button of another. For example, to attach a Customer record to an Invoice, open the Invoice in a record window and then open the 'Customers: Browse' window. Find the correct Customer in the list, click on the Customer Number and drag it to the [Attachments] button of the Invoice. The Customer record will then appear in the Invoice's list of attachments. Alternatively, if the Customer record is already open, you can drag its [Attachments] button onto that of the Invoice.
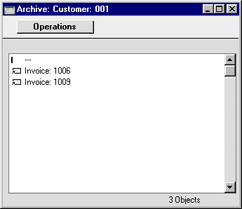
Later, when viewing the Customer record in the example above, you might wish to see which other records it has been attached to. Open the list of Attachments and select 'Show To Links' from the Operations menu. The records the Customer has been attached to will be listed below a dotted line.
Viewing Attached Records
A record that has been attached to another record can be read in one of three ways:
- By clicking on the record in the list of Attachments and selecting 'Open Record' from the Operations menu;
- By clicking on the record in the list of Attachments and selecting 'OK' from the Record menu (or pressing the Enter key); and
- By double-clicking on the record in the list of Attachments.
Whichever method is used, the linked record is opened in its own window where it can be read or edited in the usual manner.
Removing Attachments
To remove an attachment of any kind from a record, highlight it in the list of Attachments and select 'Clear' from the Edit menu.
Attaching Records to Mails
Records can be attached to Mails in one of two ways:
- Where the Mail already exists, the record can be dragged from its browse window to the [Attachments] button of the Mail, as described in the 'Attaching Records to Other Records' section above.
- Where the Mail does not exist, open the record and click its [Attachments] button. Select 'New Mail' from the Operations menu. A new Mail is opened. Complete the Mail in the usual way and save. The new Mail will be attached to the record automatically, and the recipient of the Mail will be able to open the record using the 'Show To Links' Operations menu function.
Remember that Mails themselves are records. Therefore Mails can be attached to other Mails or to other records. Every feature described in this section applies to Mails as much as to other records.
Mails are fully described here.
Copying Attachments from one Record to Another
You can copy an Attachment of any kind from one record to another as follows:
- Open the record with the Attachment (the 'source' record) and click its [Attachments] button.
- Open the record that is to receive the Attachment (the 'destination' record).
- Drag the Attachment from the list of Attachments to the [Attachments] button of the 'destination' record (or to its list of Attachments).
- Hold down the Shift key while dragging if you do not want to remove the Attachment from the 'source' record.
Organising Attachments: Archives
When a record has many Attachments, you can organise them into Archives. An Archive is a folder that can contain Attachments of all kinds, including other Archives.
- Open the list of Attachments.
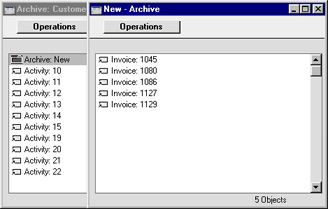
- Select 'New Archive' from the Operations menu. A new Archive will appear at the top of the list of Attachments, named "Archive: New".

- Move the Attachments into the Archive by dragging and dropping onto "Archive: New".
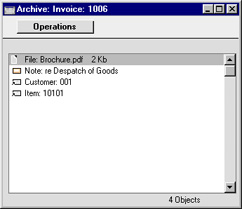
- If you want to work with an Attachment that is in an Archive, double-click the Archive. A new window is opened, listing the Attachments that are in the Archive. This window has the same properties, features and functions as the main list of Attachments, so you can work with it in the manner described in the preceding sections.
- If you want to rename the Archive, first open it as described in step 4 above and then select 'Rename Archive' from the Operations menu.
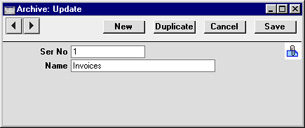
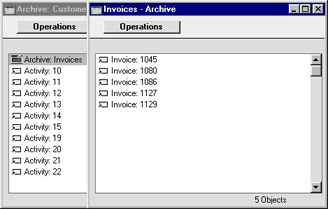
Enter the new Name of the Archive and click [Save]. The new name will replace the text "New," both in the title bar of the Archive and in the main list of Attachments:
- You can remove an Attachment from an Archive in one of two ways. If you want the Attachment to remain attached to the record, drag it to the main list of Attachments or to another Archive. To remove the Attachment altogether, click on it and select 'Clear' from the Edit menu.
- To remove an Archive, click on it in the main list of Attachments and select 'Clear' from the Edit menu. You can only remove empty Archives. To empty an Archive, you must remove its contents item by item as described in step 6 above.