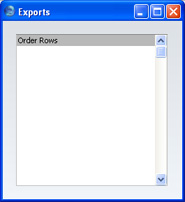
Language:


Operations Menu - Create Invoice

To raise an Invoice from a Sales Order, select 'Create Invoice' from the Operations menu. For the function to have any effect, you must first save all changes to the Sales Order (use the [Save] button), and there must be at least one approved Delivery.

A new record will be created in the Invoice register (in the Sales Ledger). It will be opened in a new window, entitled 'Invoice: Inspect'. This means that it has been created and saved and is being opened for amendment and approval.

The Invoice takes its information from the Order, and, as a default, assumes that all delivered Items are to be invoiced. If you have made and approved a part Delivery, the Invoice will default to the Quantity of that Delivery. If you have made and approved two part Deliveries, the Invoice will be for the aggregate Quantity of both Deliveries. If you have made two part Deliveries, only one of which is approved, the Invoice will be for the Quantity on the approved Delivery only.

You can change the Quantity of one or more rows on the Invoice screen as appropriate, but not to a Quantity that is greater than that delivered. You can also remove entire rows, by clicking on the row number to the left and pressing the Backspace key, or add new rows. If you need to invoice a greater Quantity than was delivered, you must do so by adding a new row to the Invoice. Ensure that the Update Stock box on the 'Delivery' card of the Invoice is checked so that stock levels are updated accordingly and, if appropriate, to cause cost accounting transactions to be created in the Nominal Ledger for the extra quantity. The Update Stock box will only apply to Invoice rows that are not related to the Order.

To print an Invoice, click the Printer icon. If the Invoice has not been approved and if you are not using the No Test Printout option in the Configuration setting in the System module, the printed Invoice will be marked as a test print, so that it cannot be confused with the final version of the Invoice.

When the Invoice is complete, click the OK check box and save. This signifies that the Invoice has been approved. Associated transactions in the Nominal Ledger (including cost accounting transactions if you are using this option) will be raised and you will no longer be able to modify the Invoice. If you are raising part Invoices from an Order, you will be able to raise further Invoices even if the previous one has not been approved.

Please click for a full description of the Invoice screen and of approving and printing Invoices.

To close the screen and return to the Order, click the close box. You will be asked if you want to save any changes. The Invoiced field of the Order (visible on flip D) will be updated automatically (you will need to close the Order and re-open it to see this).

If you run the 'Create Invoice' function from the Operations menu of the 'Orders: Browse' window, it will only create an Invoice for the first highlighted Order. You can also create an Invoice by dragging an Order from the 'Orders: Browse' window to the 'Invoices: Browse' window. In this case, the new Invoice will not be opened automatically for checking and approval.

If the function does not create an Invoice, the probable causes are:

  1. There are no Items on the Order awaiting invoicing.

  2. You have logged in as a user that is not permitted to create Invoices from Orders. This is controlled using Access Groups. To do this, deny access to the 'Invoice from Order' Action.

  3. There is no valid record in the Number Series - Invoices setting (in the Sales Ledger). This might be a fault in the setting itself, or it might be because the default Invoice Number in the Number Series Defaults setting (in the System module) is not in a valid Number Series. This problem will usually occur at the beginning of a new year.
If you create an Invoice by mistake using this function, you can delete it using this procedure:
  1. Set the value of the Invoice to zero. Do this by removing every row from the Invoice or by changing all quantities to zero.

  2. Delete the Invoice using the 'Delete' command on the Record menu.