Working with Records
To work with individual records, open an App as described on the
Opening an App and Working with Lists page and proceed as follows:
- To create a new record, select Options > Record >New;
- To create a new record that is a copy of an existing one, highlight the existing record in the list and select Options > Record > Duplicate; or
- To view or modify an existing record, highlight the existing record in the list and press the Enter key. If the record does not open and instead you are told, "A register must be part of an app, this one is not", the probable reason is that the register does not belong to an App (the App field in the Register Definition is empty). Please refer to the Creating an App page (and step 5 in particular) for details about rectifying this problem, and then synchronise again.
Use the Enter or Tab keys to move from field to field. When you click in a field, its contents will be highlighted, and the contents will be replaced as soon as you start typing. If you do not want to replace the entire contents of a field but instead want to insert or delete specific characters, move the cursor to that point using the scroll key, and then start typing. The scroll key also allows you to select other screen objects such as radio buttons, check boxes, tabs and the archive.
If you need to change the setting of a check box, use the scroll key to highlight the check box, then press the Enter key to change its setting. Similarly, to choose a radio button option, use the scroll key to highlight the option you want, then press the Enter key.
If there is a date field, you can type in a date as normal, or you may be able to select a date using the 'Paste Special' feature. With the cursor in the date field, press the Ctrl-Enter key combination to open a calendar:
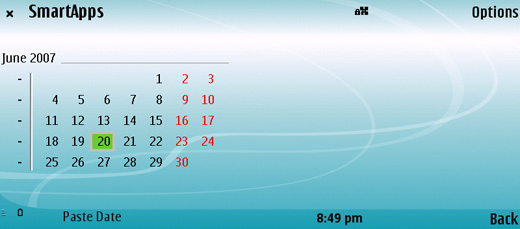
The current date is marked with a square. Press the Enter key to bring the current date into the date field. If you need a different date, use the scroll key to move the highlight to the date you need:
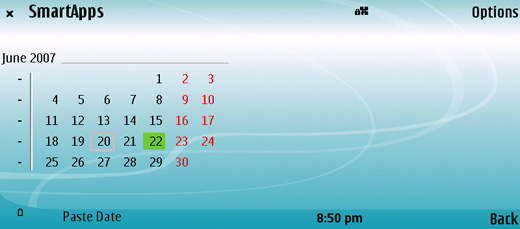
The grey square marks the current date. Use
Options > Record > Next and
Options > Record > Previous to change to a different month, or move up or down using the scroll key. Press the Enter key to bring your chosen date into the date field.
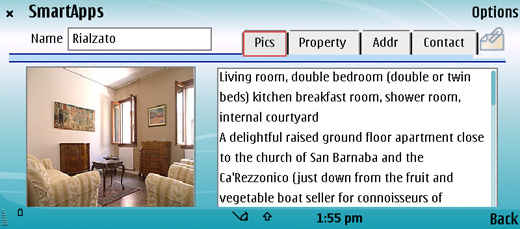
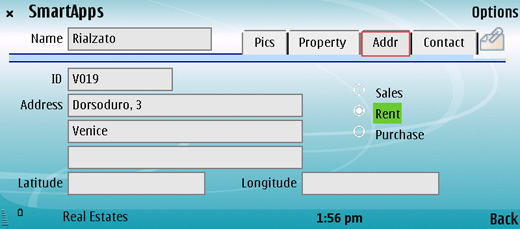
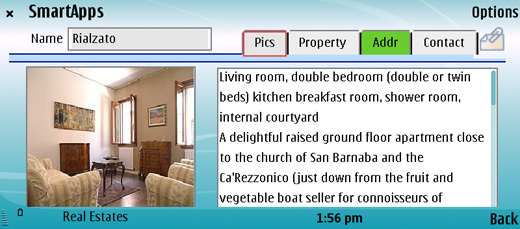
Depending on the App you are working with, a record can contain more information than can be shown on screen at once. If this is the case, there will be a series of tabs (marked 'Pics', 'Property', 'Addr' and 'Contact' in the example illustrated above) that you can use to see more pages of information. Use the scroll key to highlight a tab (it will change colour to your highlight colour), and then press the Enter key to move to that tab. The tab that you are currently looking at has a red border. In the example illustrated below, the 'Pics' tab is the current tab with the red border, while pressing the Enter key will select the 'Addr' tab:
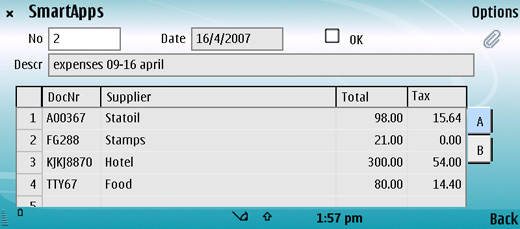
Again depending on the App you are working with, some records, such as that in the illustration below, are divided into two sections: the top half shows details of the parent record (in this case, an Expense claim) and the lower half contains the individual items (or rows) that are listed on that Expense claim, arranged in a grid format:
Move the cursor into the grid using the Enter key as normal. The left-hand field in the first row will be highlighted. Use the Tab or Enter keys to move the cursor across the grid, and then use the Enter key to move it to the next row. Alternatively, use the scroll key to move the cursor around the grid in a less linear fashion.
There may also be a series of flips (marked 'A' and 'B' in the illustration) that you can use to see more information for the rows. Use the scroll key to highlight a flip, and then press the Enter key to move to that flip.
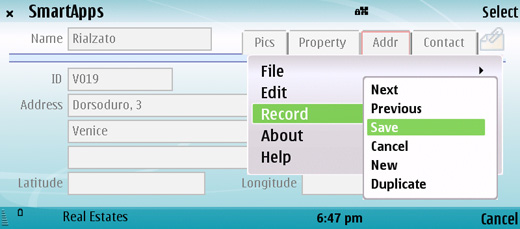
Use Options > Record to work with the record, as follows:
- Next
- This command will save all changes made to the record, close it, and open the next record in the list.
- Previous
- This command will save all changes made to the record, close it, and open the previous record in the list.
- Save
- This command saves all changes made to the record. You can also use the Shift-Enter key combination to save a record (use the Enter key in the bottom right-hand corner of the keyboard, not the one in the centre of the scroll key).
- Cancel
- If you have not yet saved the record for the first time, this command will cancel the data entry process and close the record window. The record will not be saved, and you will be returned to the list view. If you have previously saved the record, this command will discard all changes made since it was last saved. In this case, the record will remain on screen and you will not be returned to the list view.
- New
- Use this command to save the current record and to close it. A new blank record is then opened for data entry.
- Duplicate
- Use this command to save the current record and then to create a copy of it. The original record is closed and the new copy is opened.
- Delete
- Use this command to delete, i.e. remove, an existing record. You must open a record to be able to delete it: you cannot delete a record from a list. You must save or cancel any changes made in the record first.
- When you delete a record, the next record in the list will be displayed.
! | Remember that you cannot undo the deletion of a record. |
- Attachments
- This command allows you to connect files or notes to a record. These connected objects are known as "Attachments". Please refer to the Archives and Attachments page for full details.
- You must have saved a record at least once before you can attach objects to it.
In all cases, you will not be able to save the record and and instead you will be told, "A register must be part of an app, this one is not" if the register does not belong to an App (the App field in the Register Definition is empty). Please refer to the
Creating an App page (and step 5 in particular) for details about rectifying this problem, and then
synchronise again.
To close the record and return to the list view, select Back. You will be asked if you want to save any changes made to the record since it was last saved.

---
In this chapter:
See also:
---
Go back to:
See also: