Browse Window
Browse windows are used to display lists of records. Clicking a register button in the Master Control panel will open a browse window listing every record stored in that register. In a browse window, you can search for a certain record and select a specific record for processing. You can have several different browse windows open at any time.
For example, if you click the [Contacts] button in the Master Control panel while working in the Contact module, the window that opens is a browse window, entitled 'Contacts: Browse'. This window lists all the Contacts in the register:
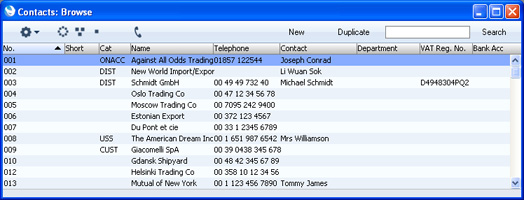
You can scroll through the list using the scroll bar on the right. You can scroll down or up a screen at a time by selecting 'Next' or 'Previous' respectively from the Record menu, or using the PgDn or PgUp keys.
You can change the sort order of the list. Click the heading of the column you want to sort by, and the list will re-sort immediately. The heading of the column will be coloured blue to show the selected sort order. If you click on the heading a second time, the sort order will be reversed.
At the top of each browse window there is an area known as the Button Bar. This contains a set of buttons:


- This button only appears in some browse windows. Click it to open the Operations drop-down menu. Highlight one or more records in the list (hold down the Shift key while clicking) and then choose a function from this menu. The function will be applied to all highlighted records. The contents of the Operations menu will vary depending on the browse window. Each function is described in full on the appropriate web page.

- This button appears in the 'Contacts: Browse' window. You can use it when you need to communicate with a Contact. Please refer to the Business Communicator Window page for details.
- [New]
- Windows keyboard shortcut: Ctrl-N
- Mac OS X keyboard shortcut: ⌘-N
- Click this button to open a new blank record for data entry.
- [Duplicate]
- Windows keyboard shortcut: Ctrl-K
- Mac OS X keyboard shortcut: ⌘-Y
- If you need to create a new record that is a copy of one that already exists, first find the earlier record in the list and highlight it by clicking once. Then, click this button. A new record will be opened, a duplicate of that highlighted. In many cases, the new record will contain the current date, not the date of the copied record.
- [Search]
- Use the Search field and button (on the right of the Button Bar) to find a particular record in the list. First, sort the list by the column that you want to use for the search. In the illustration above, for example, the list is sorted by No. allowing you to search for a Contact with a certain Number. Then, type a letter, word, number, or date in the Search field (there is no need to click in the field before typing). Then press Enter or click [Search] (Mac OS X users must press Enter or Return). The first row with an exact match in the sort column (or, if there is no exact match, with the nearest match) will be highlighted. If you are not certain of the exact spelling, use the * character as a wildcard. For example, in the illustration shown above, if you want to find Mutual of New York but are not sure of the exact name, sort the list by the Name column, type "*New York" in the Search field and press the Enter key. If the first record found is not the one you want, press the Shift-Enter key combination to search again.
If you want to view or modify an existing record, first find it using the Search facility described above. Then, open it by double-clicking its line in the list, or by first selecting the line and then pressing the Enter key.
! | It is not possible to delete a record directly from the browse window. You must open the record first. |
|
Some browse windows have three extra buttons in the centre of their Button Bars (Windows version on the left, Mac OS X on the right):

You can use these buttons if you have the Limited Access Extra Feature (i.e. if you are using the Limited Access option in the Configuration setting in the System module), as follows:

- Lists all records in the register.

- Lists records belonging to members of the same Sales Group as the current user (i.e. records whose Sales Group is the same as that of the current user).

- Lists records belonging to the current user (i.e. records whose Person field contains the initials of the current user).
You can use the Person register to prevent a user from seeing every record in the register by restricting their view to their own records or to those of their Sales Group. This feature is described
here.
If you are using Mac OS X, browse windows have the following extra features:
- You can drag the column headings to change the order of the columns.
- You can remove columns from a browse window. First, click the button with the arrow icon in the top right-hand corner of the window:

The drawer opens:
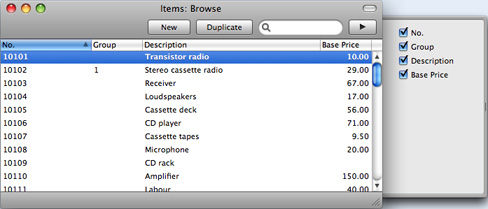
Remove the tick (√) from a check box to remove the corresponding column from the browse window.
---
In this chapter:
Go back to: