The Report Generator and SmartApps
As well as being part of HansaWorld Enterprise, the Report Generator is included in HansaWorld SmartApps. HansaWorld SmartApps allows you to design stand-alone applications (known as "Apps") that you can then use on hand-held devices such as the Nokia E90. You can use the Report Generator to design reports that you can then incorporate in your Apps.
To incorporate a Report in an App, follow these steps:
- The first step in designing any new App should be to create the App itself. In the HansaWorld SmartApps application, open the App register by clicking the [Apps] button in the Master Control panel. In HansaWorld Enterprise, first change to the SmartApps module, and then click the [Apps] button in the Master Control panel. Click the [New] button to create the new App:
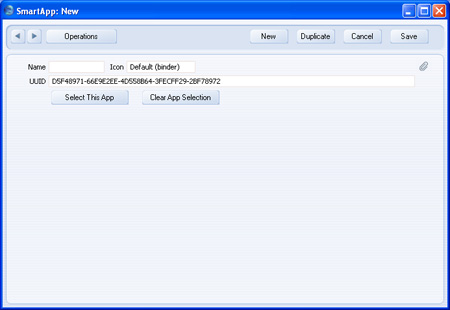
The UUID (Universally Unique Identifier) will be generated automatically. Enter a Name for the App and save.
- Enter the Register Definition and the Window Definitions for the App as described here.
- When you enter the Report Definition, go to the 'Settings' card and copy the UUID from the App (step 1) to the App field:

This connects the Report Definition to the App. The Report Definition will have its own UUID that will be generated automatically.
- Apart from step 3 above, the process of designing reports for Apps is the same as that described in these web pages. When you add a Register to a Report Definition on the 'Data' card, the Register Definition that you created in step 2 will be added to the 'Paste Special' list of Registers.
When designing reports for Apps, bear in mind that the screen size of a hand-held device is quite small. On the Nokia E90, for example, there is probably only sufficient vertical space in a specification window for one variable.
Remember to take the screen width into account when designing the report output on the 'Layout' card and the specification window on the 'Input' card. You may want to enter appropriate Width and Spec Window Width on the 'Settings' card. The Width will cause the width of the grey bars marking each section on the 'Layout' card to change, providing a reminder of the size of the screen for which you are designing the report. The Spec Window Width will cause the shaded area on the right-hand side of the 'Input' card to change, again providing a reminder of the screen width. Maximum widths are as follows:
- Nokia E90
- 390
- Series 60
- 320
- Series 80
- 465
- Series 90
- 640
- Windows CE
- 240
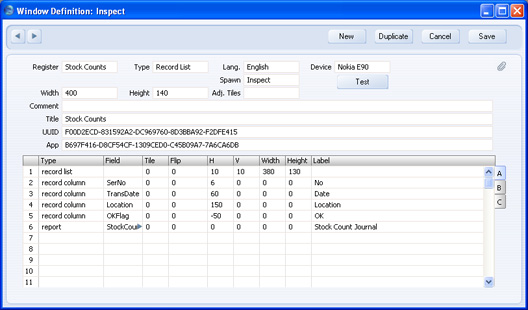
- After defining the Report, you should attach it to one of the App's Window Definitions. Usually, you will attach it to the App's browse window. Open the Window Definition for the browse window and add a row where the Type is "report". In the Field column, specify the Code from the Report Definition record, and in the Label column, specify the name of the command users will select when they want to produce the report. On the Nokia E90, they will select a command with this name on the Operations sub-menu of the Options menu.
- If you need to export the App (e.g. to transfer it from the desktop computer where it was designed to a hand-held device where it will be used), the Report Definition will be included in the export file together with the App itself and the Register and Window Definitions. If any of these elements is missing from the export file, the probable reason is that the App field in the missing element is empty or contains the wrong UUID. To export an App, return to the App itself as created in step 1 above and choose 'Export' from the Operations menu.