Routines - Documents
Documents are more formal printouts, usually printed using forms, such as Quotations. They are often directed to third parties (e.g. Customers or Suppliers). Standard CRM offers several documents in each module.
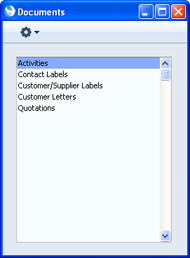
When you click the [Documents] button in the Master Control panel or use the Ctrl-D (Windows) or ⌘-D (Mac OS X) keyboard shortcut, a window will be opened, containing a list of the available documents. The documents available vary with the selected module: the illustration below shows those in the Contact module (if you have any Value Packs or Extra Features, you may see more documents than are shown in the illustration):
Choose a document by clicking an item in the list once. If you need to set the page size, number of copies and other printer options for the document, choose 'Page Setup' from the File menu. You can also use this function to choose the printer on which the document is to be printed. These settings will be used whenever you print the particular document until you choose 'Page Setup' once again, or until you choose 'Remove Page Setup' from the Operations menu.
Once you have done this, double-click the document name in the list. A specification window will open, where you can choose the information that you want to be shown in the report. For example, when printing Quotations, you can use the specification window (illustrated below) to choose the Quotations that you want to print.

While the specification window is open, you can choose the destination of the printout by selecting one of the Media options at the bottom of the window. If your database is in restricted mode, you can only use the Screen option. You can only use the Fax option on a Windows machine with Fax Services installed.
Once you have specified the documents that you want to be printed and have chosen a print destination, click [Run] to print the documents.
Defining Documents
You must assign a Form to each document before you print it for the first time. The Form is the design or layout of the document. You can have a single Form for each document, or you may have several versions of a particular type of document, to be used on different occasions. To assign a Form or Forms to a document, open the 'Documents' list as described above, highlight the document in the list, and select 'Define Document' function from the Operations menu. Click the button in the top left-hand corner of the 'Documents' list window and illustrated below to access the Operations menu:

Before you can specify when each Form is to be used, you should design the Forms using the Form register in the System module. Full details of this design process can be found
here.
Having designed your Forms, use the 'Define Document' function to specify when each one will be used, as described below. In this example, we will imagine that we have designed a Form named "QUOTATION", and we want this Form to be used whenever we print an Quotation:
- Use the [Module] button in the Master Control panel or the Ctrl-0/⌘-0 keyboard shortcut to choose the module in which the document is to be found. In the case of the Quotation document, this is the Contact module.
- Click the [Documents] button in the Master Control panel or use the Ctrl-D/⌘-D keyboard shortcut. The 'Documents' list window will be opened showing a list of available documents. Highlight the document that you need to define ('Quotations' in the example).
- Select 'Define Document' from the Operations menu. Specify "QUOTATION" as the Form on the first row, and enter the following:
- Seq
- Use this column if you want to print two (or more) different documents from a single command. For example, you might want to print Quotations on two printers: one containing plain paper and one containing headed paper. If you want a Quotation to be printed on plain paper first, allocate Seq. no. 1, to this row and Seq. no 2 to the row with the Printer with headed paper.
- Form
- Enter the Form Code of the relevant Form in this field. This field is case sensitive: you should only use upper case characters. Use 'Paste Special' to select from a list of Forms as set up in the System module. Please refer to the description of the Form register for details about designing Forms, and here for details about the 'Paste Special' feature.
- Click [Save] to save the document definition. In this example, when you print Quotations from now on, they will always be printed using the "QUOTATION" Form, without further user intervention.
You can repeat this process for almost all documents as required.
Individual Documents
Please click the links for details about the individual documents, descriptions of which have been divided into the following categories:
In this chapter:
Go back to: