Adding Check Boxes to the Specification Window - Inclusive Search Controlled by Check Boxes
Inclusive searches start from the point where no records in a particular register will be listed in a report, and records are then added to the report if they meet the criteria controlled by the check boxes. In this section, we will illustrate an inclusive search in a Contact List report by adding a check box that will include companies that have been marked as Customers. Follow these steps:
- Create a new report. On the 'Data' card, specify that the Contact register is to be the primary register. On the 'Layout' card, design the output of the report as required.
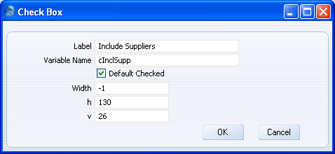
- Go to the 'Input' card and click the [Check Box] button above the report display area. Complete the 'Check Box' dialogue box as described here and illustrated below:

- Click the [OK] button. The check box is placed in the report display area as previously described.
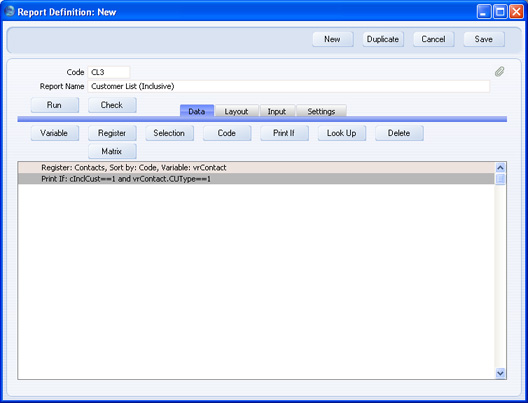
- Change to the 'Data' card. Click on the line in the report display area marked "Register: Contacts..." to specify that a search is to be carried out in the Contact register, and then click the [Print If] button.
- Enter a formula in the 'Print If' dialogue box as shown below:
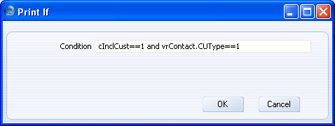
The formula is:
- cInclCust == 1 and vrContact.CUType == 1
This states that if the check box (cInclCust) is checked, there will be a search in the Contact register for records that have been marked as Customers. "CUType" is the internal name for the Customer check box in the header of each Contact record. If cInclCust is not checked, the search will not take place.
- Click the [OK] button to add the Selection to the Contact register section of the report display area:
- When the report is produced without using the new option, it will be empty. When the report is produced using the new option, it only lists records in the Contact register that that have been marked as Customers.
Adding a Second Check Box
You can add extra check boxes to the report, but they should also initiate inclusive searches (searches that add records to the initial selection). In this example, we will add a check box that will include companies marked as Suppliers in the report.
- On the 'Input' card, add a new check box to the specification window of the report, as described in step 2 above.
- As mentioned in the section describing exclusive searches, when there is more than one "Print If:" line in the report display area on the 'Data' card, they are treated as having the logical operator "and". There will be a search for records that meet the first condition and that meet the second condition. This is acceptable when there are two exclusive searches, but not when there are two inclusive searches. In this case, there should be a search for records that meet condition one or that meet condition two. Therefore, you cannot add a new "Print If:" line to the Contact register section, and instead you should double-click the existing "Print If:" line to modify it.
Enter this formula:
- (cInclCust == 1 and vrContact.CUType == 1) or (cInclSupp == 1 and vrContact.VEType == 1)
Note that each check box condition is enclosed in its own set of brackets. The two parts of a single inclusive check box condition are joined by "and", while several inclusive check box conditions are joined together using "or". This makes sure that there will be a search for records that meet condition one or that meet condition two. "VEType" is the internal name for the Supplier check box in the header of each Contact record.
The specification window will now contain two options that you can use in the following ways:
- Neither option checked
- The report will not list any records in the Contact register.
- One option checked
- The report will list Customers or Suppliers (including those that are both), depending on the option chosen.
- Both options checked
- The report will list Customers and Suppliers, including those that are both.
For details about the syntax that you should use when entering a formula in the 'Print If' dialogue box, please refer to the
Syntax page.
Please click the links below for more details about: