Naming Address Fields
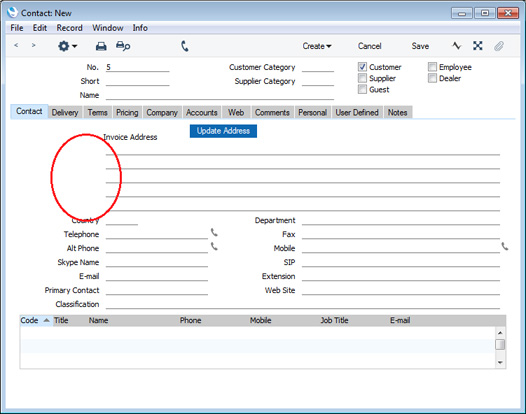
In a new database, the address fields (for both the Invoice and Delivery Addresses) in the 'Contact: New' and 'Contact: Inspect' windows will be unlabelled:
You can assign names to these fields, to help ensure addresses are entered consistently by every user. Follow these steps:
- Using the [Switch Module] button in the Navigation Centre (or the Ctrl-0 (zero) or ⌘-0 keyboard shortcut), ensure you are in the CRM module.
- Open the list of settings by clicking the [Settings] button in the Navigation Centre or using the Ctrl-S or ⌘-S keyboard shortcut and double-click 'User Defined Field Labels - Contacts'.
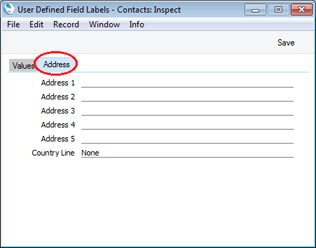
- When the 'User Defined Field Labels - Contacts: Inspect' window opens, click the 'Address' tab in the centre of the screen:
- Assign a name to each address line as appropriate:
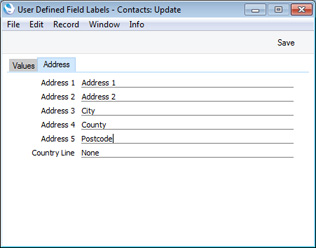
In the UK and US, it is recommended that you use the fifth line of the address for the postcode/ZIP Code. This will enable you to use the [Map] button in the 'Business Communicator' window and (UK only) the "Update Address" feature. In other countries, the [Map] button requires the postcode/ZIP Code equivalent to be in the third line. The [Map] button is described here.
- After saving, these names will appear in the 'Contact: New' and 'Contact: Inspect' windows (and also in the 'Invoice: New' and 'Invoice: Inspect' windows):

In some installations, you may need to close Standard ERP and restart for the change to take effect.
---
In this chapter:
Go back to: