Entering a Person Record - Access Card
This page describes the fields on the 'Access' card of the Person record. Please click the following links for descriptions of the other cards:
---

- Access Groups
- Paste Special
Access Groups setting, System module
- The Access Group that you specify here will control the level of access that the Person has to your Standard ERP system. For example, you may want to give the Person access to the Sales and Purchase Ledgers while preventing them from entering the Nominal Ledger.
- You can enter several Access Groups, separated by commas. This can be useful, for example, if you have configured separate Access Groups for each module.
- After specifying an Access Group, use the Start Access Level field immediately below to choose whether the User will start from No Access or from Full Access.
- Please refer here for full details about Access Groups.
- Start Access Level
- Paste Special
Choices of possible entries
- There are two ways of configuring an Access Group:
- You can exclude members of the Access Group from everywhere in your Standard ERP database except those areas that you list in the Access Group record i.e. you specify what they can do. This is known as "Starting from No Access".
- You can allow members of the Access Group to go everywhere in your Standard ERP database except to those areas that you list in the Access Group record i.e. you specify what they cannot do. This is known as "Starting from Full Access".
Specify here using 'Paste Special' whether the Person should start from No Access or Full Access.
- Single Function
- Paste Special
Single Functions setting, System module
- A Single Function User is one with access to a limited number of Standard ERP functions (e.g. the ability to enter Orders, Invoices and/or Quotations). If this Person is to be treated as a Single Function User when they log in to your Standard ERP system, specify here which function(s) the Person can use, and set the User Type (using the options to the right) to Named. You must also create a Mailbox for them. Named, Concurrent and Single Function Users are described here.
- Sales Group, Limited Access
- Paste Special
Sales Groups setting, System module
- You can assign each Person to a Sales Group. This can help with reporting, as several reports allow you to list sales or purchases made by members of a specified Sales Group.
- The Sales Group is also part of the Limited Access feature. In some browse windows (e.g. those for Contacts, Invoices, Orders, Projects, Project Budgets, Purchase Invoices, Purchase Orders, Quotations, Service Orders, Work Orders and Work Sheets), there is a set of Limited Access buttons that allows any user to reduce the number of records listed in the window. This can be useful where a register contains many records, making it easier to find the correct one.
- The Limited Access buttons are as follows (Windows buttons illustrated on the left, Mac OS X on the right):

- Lists all records in the register.

- Lists records belonging to members of the same Sales Group as the current user (i.e. records in which the Sales Group is the same as that of the current user).

- Lists records belonging to the current user (i.e. records in which the Person field contains the Signature of the current user).
- You can also use the Limited Access feature to control the records that each user will see in browse windows. Using the Limited Access options to the right of the Sales Group field, you can restrict the view of each user to their own records or to those of their Sales Group. This applies to registers whose browse windows feature the Limited Access buttons. The Limited Access options are:
- No Limitation
- Select this option if the Person is to be able to see every record in the register. They will be able to use the Limited Access buttons to reduce the list so that it only shows records belonging to members of their Sales Group or their own records.
- Group Only
- If you select this option, the Person will only be able to see records belonging to members of their Sales Group. They will be able to reduce the list so that it only shows their own records.
- User Only
- Select this option if the Person is only to be able to see their own records.
- The Limited Access module must be active if you want to choose the Group Only or User Only option for any Person, or if you want to use the Limited Access buttons in browse windows. To activate the Limited Access module, select the Limited Access option on the 'Technical' card of the Configuration setting in the System module. Remember that any changes made in this setting will require you to apply for a new Enabler Key.
- Language
- This field is only used in multi-language versions of Standard ERP. Enter the language used by this Person: all screens, menu items, field names and reports will appear in the correct language when this Person signs in to Standard ERP.
- You must enter a language that will be recognised within the Standard ERP application, as follows:
| ARB | Arabic | | CHI | Chinese | | CZE | Czech | | DAN | Danish | | ENG | English | | AUS | English (Australia) | | CAN | English (Canada) | | IND | English (India) | | KEE | English (Kenya) | | NZE | English (New Zealand) | | PHE | English (Philippines) | | SGP | English (Singapore) | | SAF | English (South Africa) | | USA | English (US) | | ZWE | English (Zimbabwe) | | EST | Estonian | | FAR | Farsi | | FIN | Finnish | | FRA | French | | FRC | French (Canada) | | GER | German | | HEB | Hebrew | | HUN | Hungarian | | ICE | Icelandic | | ICE | Icelandic | | ITA | Italian | | LAT | Latvian | | LIT | Lithuanian | | NOR | Norwegian | | POL | Polish | | POR | Portuguese | | AGO | Portuguese (Angola) | | BRA | Portuguese (Brazil) | | ROM | Romanian | | RUS | Russian | | SER | Serbian | | SLO | Slovenian | | SVK | Slovak | | ESP | Spanish | | USS | Spanish (US) | | SWE | Swedish, Finnish-Swedish | | UKR | Ukrainian | | VIE | Vietnamese |
- Multi-language versions of Standard ERP are produced according to need and will usually only contain a few of these languages. If you are using a standard version of Standard ERP, you can leave this field empty as the application will only contain only one language.
- Client Restriction
- Paste Special
Choices of possible entries
- Use this field if you want to ensure the Person can only log into your Standard ERP system using devices with a particular operating system. This field is only used in multi-user installations: it will be ignored in a single-user system.
- Contact Code
- Paste Special
All Contacts in Contact register
- Use this field to connect the Person to a record in the Contact register. This record can contain additional information about the Person, such as Skype Name and SIP Address. You must connect a Person to a record in the Contact register if they will use Standard ERP to make calls through an Asterisk-based or TAPI switchboard, and it is recommended that you do so if the User will use Standard ERP to send text (SMS) messages.
- User Type
- Use these options to specify whether the Person is to be treated as a Named or Concurrent User when they log in to your Standard ERP system.
- If the Person is a Single Function User, specify in the Single Function field above which function(s) the Person can use, and set the User Type to Named.
- You must also create a Mailbox for each Named and Single Function User. If a Named or Single Function User without a Mailbox logs in to your system, other users will not be able to log in and the Named User in question will automatically be logged out after one minute. If you used the 'Named User' function on the Create menu of the 'Persons: Browse' window to create the Person record for a Named User, a Mailbox will be created automatically. If you used the 'New' or 'Duplicate' functions on the same menu, you will need to create the Mailbox yourself, which you can do using the 'Mailbox' function, also on the Create menu.
- Creating a Mailbox for a Concurrent User is optional: if a Concurrent User needs a Mailbox, you can create it using the 'Mailbox' function. You must purchase Mailboxes for Concurrent Users separately and record them in the Extra Concurrent Mailboxes field in the Configuration setting.
- Named, Concurrent and Single Function Users are described here.
- Password never expires
- You can use the Password Security setting to force every user to change their password periodically. If you need to make an exception to this rule for particular users, select this option in their Person records. For example, if you have Person records to allow external TAPI and/or mail gateways to log in to your server automatically, it will not be convenient to force these users to change their passwords.
- Picture, [Add picture]
- You can attach pictures to records in the Person register. Follow these steps:
- Open the record in question. The record must already have been saved at least once (i.e. the window title must be 'Inspect' or 'Update').
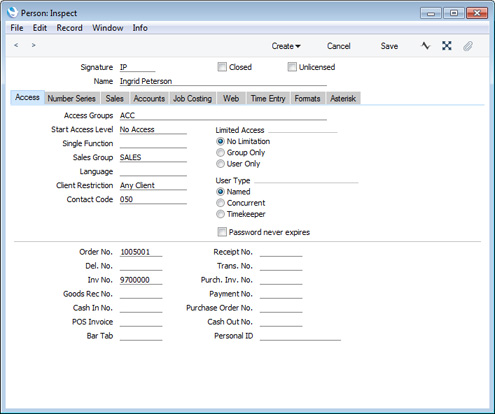
- Click the [Document Manager] button (in the top right-hand corner with the paper clip icon) or select 'Attachments' from the Record menu. A list of objects currently attached to the record is opened.
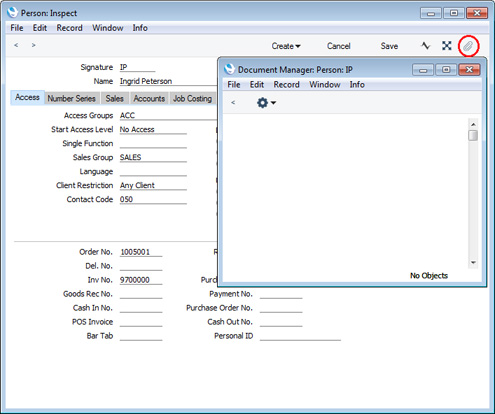
- Choose 'Attach File' from the Operations menu of this list.
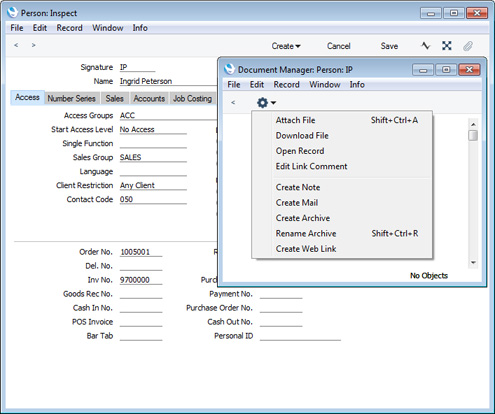
- Locate the picture file on your hard disk and click [Open]. The picture will be attached to the record. It must be a .jpg file (or a .png file if you are using Mac OS X). Pictures larger than 280 x 280 pixels will be scaled.
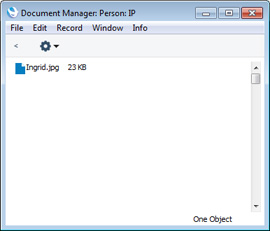
- After the picture file has uploaded, you may need to close and reopen the record to see the picture:
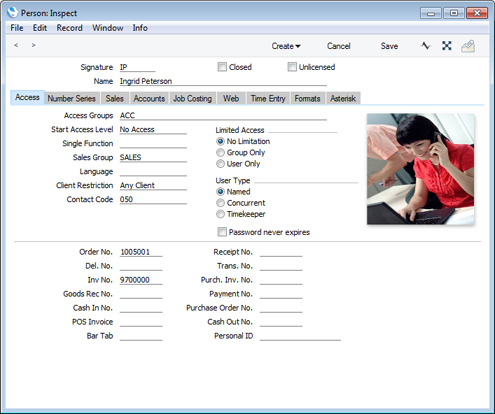
In the Mac OS X version of Standard ERP, you can attach pictures to Person records as described above, but you can also use the [Add picture] button underneath the picture field:
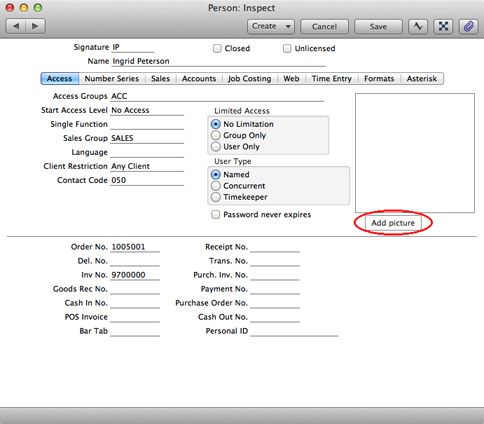
When you click this button, the 'Edit Picture' window opens:
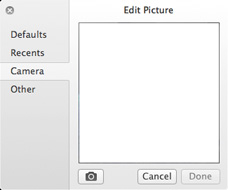
If the picture is already on your hard disk, click the [Other] button to locate it. Alternatively, click the button with the camera icon to take a photograph of the Person using your computer's camera.
- In both cases you can then scale the picture using the slider and, if the picture is too big, move the picture by dragging so that the part you need is in the centre of the frame (the part outside the frame will be cropped).
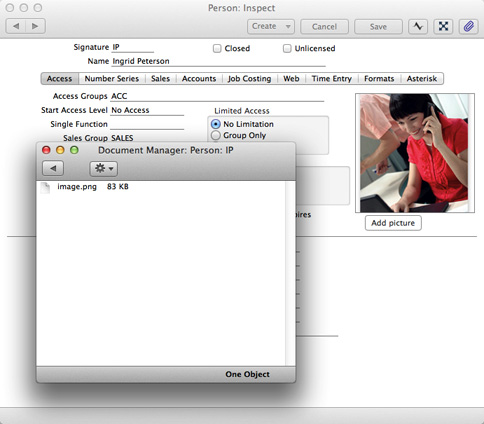
- Finally, click the [Done] button to add the picture to the Item. The picture will be converted to .PNG format and will appear in the Document Manager with the name "image.png":
---
In this chapter:
Go back to:
|
