Entering an Employee record - Contact Card
This page describes the fields on the 'Contact' card of the Employee record. Please follow these links for descriptions of the other cards:
---
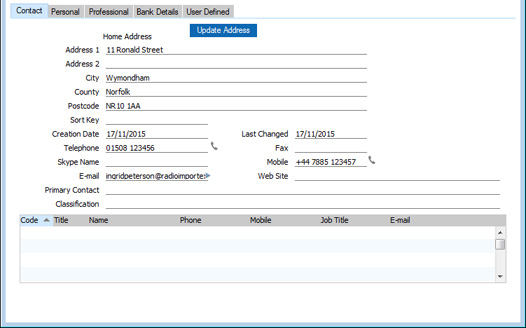
- Home Address
- Enter the Employee's home address here.
- If you want to give a name to each of the individual address lines, use the 'Address' card of the User Defined Fields - Contacts setting in the CRM module. This can be useful if, for example, you want to indicate that the town or city s always to be typed into the third line of the address. This has been done in the illustration above.
In the UK, it is recommended that you use the fifth line of the address for the postcode. This will enable you to use the "Update Address" feature (described immediately below) and also the [Map] button in the Communication Centre.
- Update Address
- In the UK, you can use this button to obtain the Contact's address from a central postcode database. Enter the Contact's postcode (with or without space) on the fifth line of the Invoice Address and then press this button. The street name will be placed in the first line of the address and other address details will be brought in as appropriate. A list of premises will also be opened, where you can select the correct building number, building name or company name by double-clicking. The company name will be copied to the Name field above if this is empty, and the building number or name (if any) will be incorporated into the first line of the address.
- Address Lookup is a chargeable Cloud Service. To use it, you must have registered your database in the UK using the Automatic Internet Enabler method, as described on the Enabler Key page. You can start using the Address Lookup service straight away using the default pricing scheme. Please refer to your local HansaWorld representative if you need to change the pricing scheme to one more suitable for your needs.
- Creation Date
- This field automatically records the date when you created the Employee record and cannot be changed.
- You can use the Contact List report in the CRM module to list Employees that were added or changed after a certain date.
- Last Changed
- This field will be updated automatically whenever you make a modification to the Employee record.
- Telephone, Fax, Skype Name, Mobile, E-mail
- Enter the Employee's main telephone, mobile and fax numbers, email and Skype name here.
- If you are using the Standard ERP Fax Server, the fax number will be used when faxing documents to the Employee. The Fax Server will not send faxes to numbers containing spaces, dashes or other non-numeric characters, so do not use these characters. You can use the 'Update Fax Numbers' Maintenance function in the Technics module to remove illegal characters from all Contacts' Fax Numbers.
- The email address will be used when you select the 'E-Mail' function on the Create menu (Windows/Mac OS X) or + menu (iOS/Android) to send emails to the Employee. If you do not want email addresses to be printed in the Birthday List and Contact List reports or exported by the Contact List and Contact List to Palm3 export functions, check the Exclude All Contact E-mails from Reports option in the Mail and Conference Settings setting in the E-mail and Conferences module.
- If you need to call the Employee, click the [Communicate] button in the Button Bar (Windows/Mac OS X only) or next to the Telephone and Mobile fields:

The Communication Centre opens, showing the Employee's contact details in the area on the right:
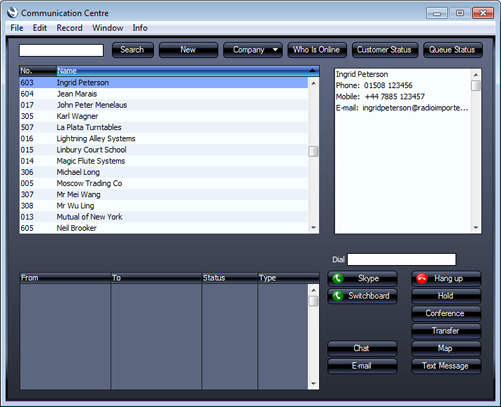
Subject to your computer, device or network having the suitable connection software and hardware, click or tap on a contact method in the list, and then click or tap the appropriate button. For more details, please refer here. If you will use the Communication Centre to communicate with the Contact using methods such as SkypeOut and Asterisk, the Contact's telephone and mobile numbers can only contain numbers, spaces, dashes and the + sign. They must not contain other characters such as full stops, brackets or any alpha characters.
- Web Site
- If the Employee has a website, enter its address (URL) here.
- Classification
- Paste Special
Contact Classifications setting, CRM module
- This field provides a means of grouping Employees of a similar type together. You can use it as a reporting criterion in several reports in the Human Resources Management module. You can assign several Classifications to each Employee record, separated by commas.
- If you have specified a Default Customer Category in the Contact Settings setting in the CRM module, that Customer Category will be assigned to each new Employee. If you have specified some Classification Types in the default Customer Category record, you must enter Classifications belonging to each of those Types in this field before you can save the Employee record.
- Picture, [Add picture]
- If you are using Windows or Mac OS X, you can attach pictures to records in the Employee register. Follow these steps:
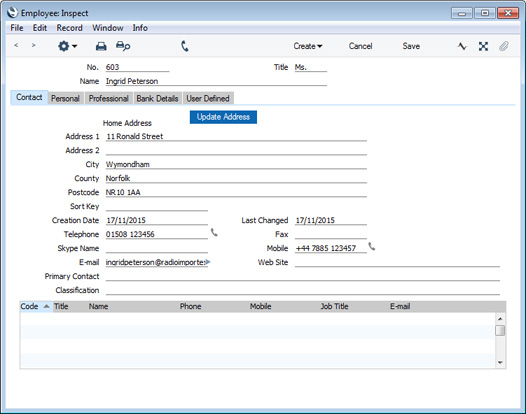
- Open the record in question. The record must already have been saved at least once (i.e. the window title must be 'Inspect' or 'Update').
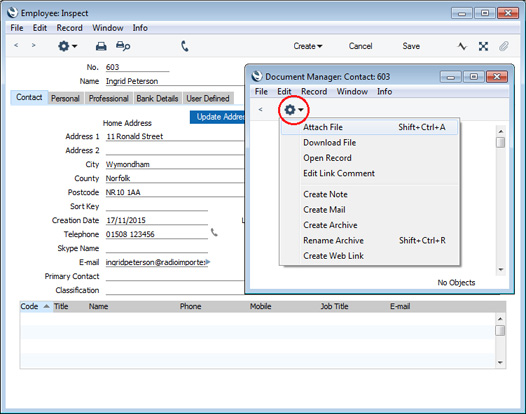
- Click the [Document Manager] button (in the top right-hand corner with the paper clip icon) or select 'Attachments' from the Record menu. A list of objects currently attached to the record is opened.
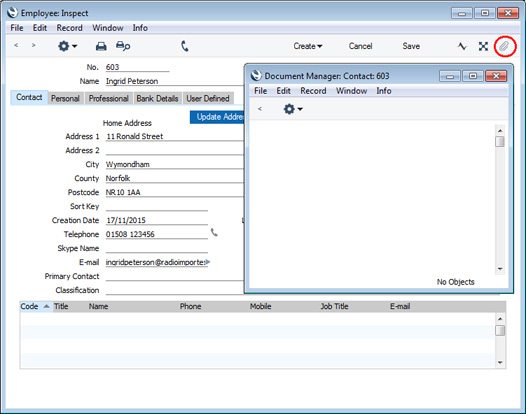
- Choose 'Attach File' from the Operations menu of this list.
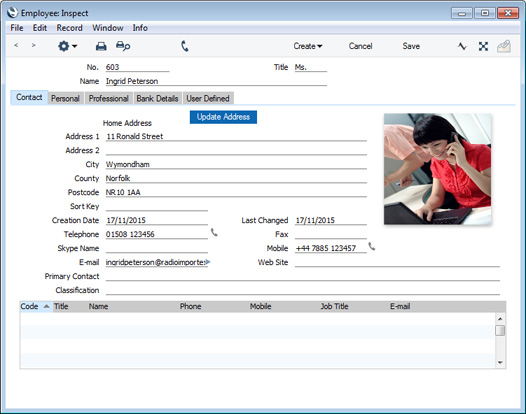
- Locate the picture file on your hard disk and click [Open]. The picture will be attached to the record. It must be a .jpg file (or a .png file if you are using Mac OS X). The maximum picture size is 280 x 280 pixels: larger pictures will be cropped.
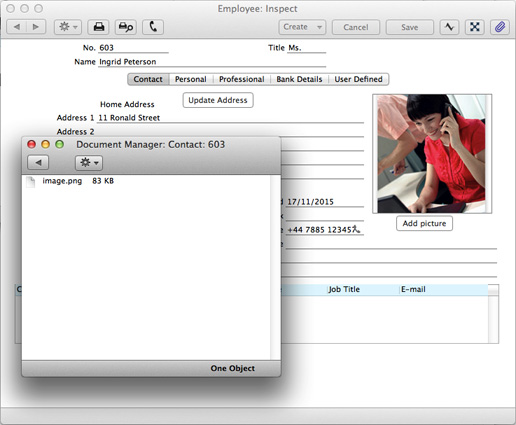
- After the picture file has uploaded, you may need to close and reopen the record to see the picture:
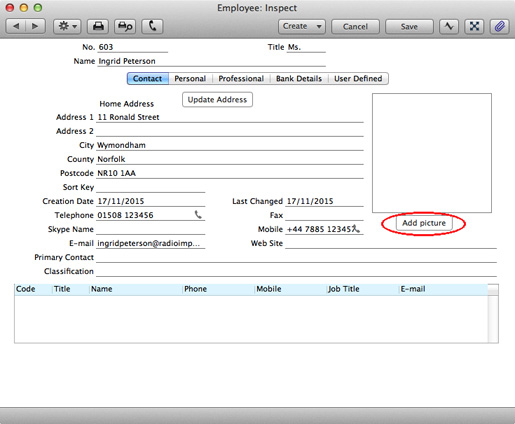
In the Mac OS X version of Standard ERP, you can attach pictures to Employee records as described above, but you can also use the [Add picture] button underneath the picture field:
When you click this button, the 'Edit Picture' window opens:
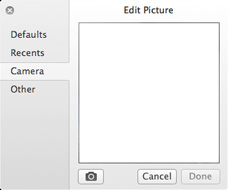
If the picture is already on your hard disk, click the [Other] button to locate it. Alternatively, click the button with the camera icon to take a photograph of the Person using your computer's camera.
- In both cases you can then scale the picture using the slider and, if the picture is too big, move the picture by dragging so that the part you need is in the centre of the frame (the part outside the frame will be cropped).
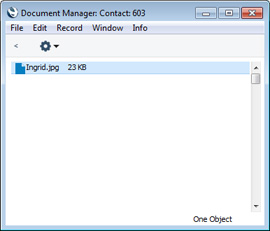
- Finally, click the [Done] button to add the picture to the Item. After uploading, the picture will appear in the Document Manager, with the name "image.jpg" or "image.png":
At the bottom of the 'Contact' card, there is a grid. You can use this grid to list Contact Persons that are connected to the Employee (for example, their spouse, their children and other dependents, their GP or family doctor, their next of kin and their emergency contacts). Please refer to the description of the 'Contact' function on the Create menu (Windows/Mac OS X) or + menu (iOS/Android) for full details.
---
The Employee register in Standard ERP:
Go back to:
|