Units - Selling Items by Area or Volume
This page describes using the Units setting to sell Items by Area or Volume. Please refer
here for descriptions of the fields and options in the Unit record.
---
In this example, the Items are fabrics that are sold by the square metre. Follow these steps:
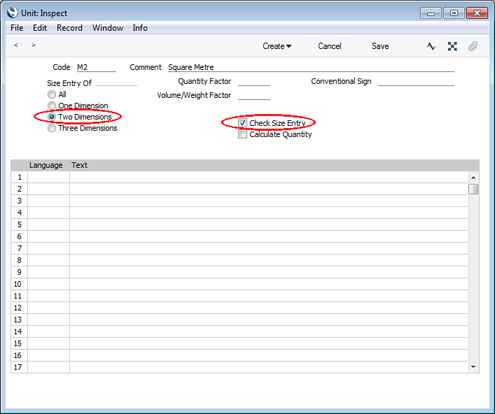
- Create a Unit "M2" (or square metre) in which you have ticked the Check Size Entry box and selected the Two Dimensions option (as the Unit is a measure of area).
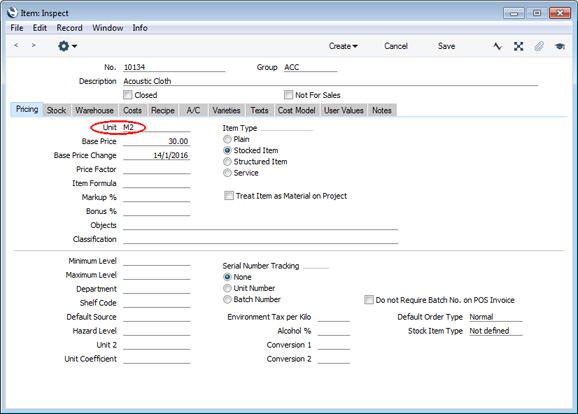
- In your Item records, enter "M2" as the Unit.
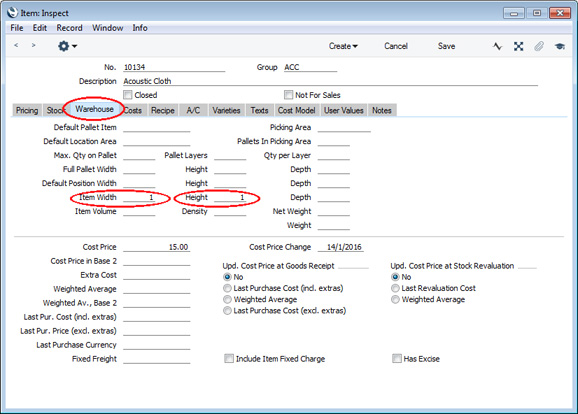
Since the Item is sold by the square metre, enter 1 in the Width and Height fields on the 'Warehouse' card. The Base and Cost Prices should be figures for one square metre.
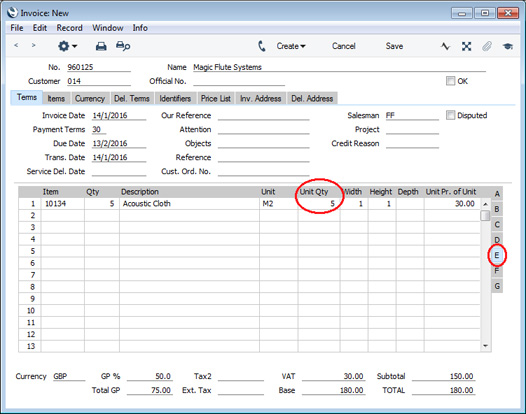
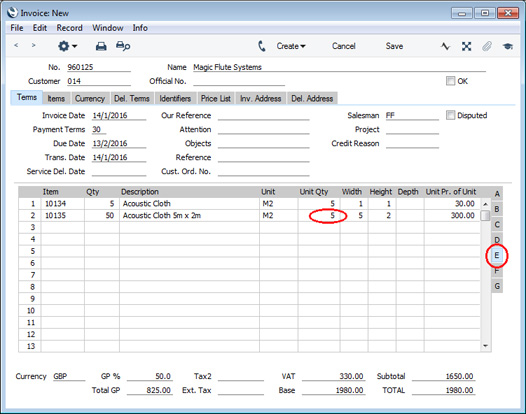
- When you sell the Item, enter the appropriate quantity either to the Quantity field on flip A of the Invoice or to the Unit Qty field on flip E. In the latter case, the Quantity on flip A will be calculated to show the area in square metres and the pricing will be adjusted accordingly.
Certain fabrics might not be sold by the square metre. For example, the basic measurement of a particular fabric might be five metres by two. In this case, you can either create a separate Unit for this size and proceed as described above, or you can use the "M2" Unit as follows:
- In the Item record, enter 5 as the Width and 2 as the Height. The Base and Cost Prices should still be figures for one square metre, because that is the Unit.
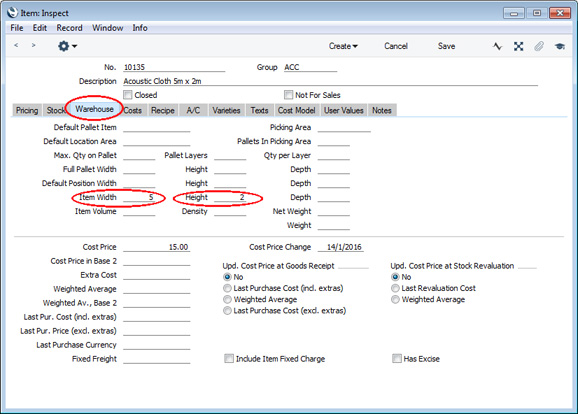
- When you sell the Item, do not enter anything to the Quantity field on flip A of the Invoice. Instead, enter the appropriate quantity to the Unit Qty field on flip E. This should be the quantity of 5 x 2 sheets of fabric purchased by the Customer. The Quantity on flip A will be calculated to show the area in square metres and the pricing will be adjusted accordingly.
Some products might be priced by the square or cubic metre, but they might not be of a uniform size or shape. So, when you sell or buy them, you will enter the dimensions and the quantity (i.e. the number of square or cubic metres) will be calculated from them. An example might be stone. Follow these steps:
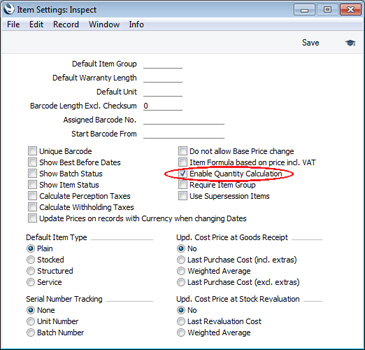
- To enable the ability to have quantities calculated from dimensions, select the Enable Quantity Calculation option in the Item Settings setting.
- Create a Unit "M3" (or cubic metre) in which you have ticked the Check Size Entry and Calculate Quantity boxes and selected the Three Dimensions option (as the Unit is a cubic measure).
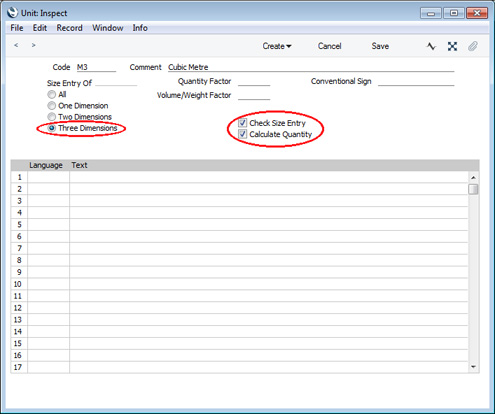
The option that you ticked in step (a) will mean that it is possible to have quantities calculated from dimensions in a general sense. You also need to specify the Units in which you need this feature to be used, hence the need to select the Calculate Quantity option in this step as well.
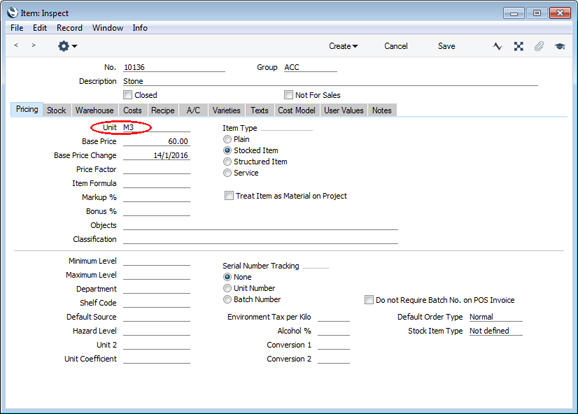
- In the Item record, enter "M3" as the Unit to signify that it is priced by the cubic metre. As the individual Items will not be of uniform size, you can leave the Width, Height and Depth fields on the 'Warehouse' card blank. The Base and Cost Prices should be figures for one cubic metre.
- When you sell the Item, enter the quantity of individual Items (e.g. the number of pieces of stone) in the Unit Qty field on flip E of the Invoice row. If the individual Items are shaped irregularly, it may be necessary to enter several rows each with a Unit Qty of 1. Enter the appropriate dimensions in the Width, Height and Depth fields. Because you are using the Enable Quantity Calculation option, the Quantity on flip A will be calculated to show the volume in cubic metres and the pricing will be adjusted accordingly. Since the Check Size Entry box in the Unit record has been marked, you will not be able to save the Invoice if you fail to enter figures in all three measurement fields and instead you will be informed, "Invalid Size for the Item".
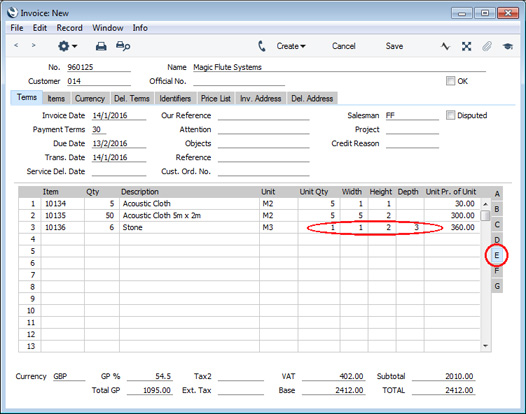
These examples also apply to Orders (flip H) and Quotations (flip E). The third example also applies to Deliveries (flip E), Goods Receipts (flip G) and Productions (flip D).
---
Settings in the Sales Ledger:
Go back to:
