Tax Templates - Workflow and Examples - Using a Tax Template in an Invoice
This example describes using Tax Templates to collect and report sales tax.
The example is based on a store in a county where sales are subject to two taxes: the state sales tax (6%); and a county tax (1%). To begin with, the store will only sell to Customers in the same county.
After following the configuration steps, you will be able to enter an Invoice. Follow these steps:
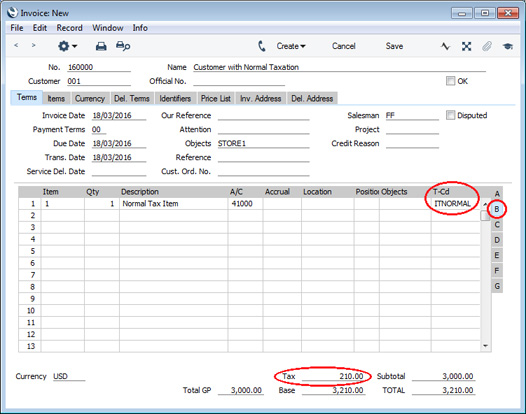
- When you create an Invoice and specify an Item, a Tax Template will be brought in to the T-Cd field on flip B, and the tax value will be shown in the Tax field in the footer:

In this example, the Tax Template is the default Tax Template, brought in from the Account Usage S/L setting (step 4 on the Configuration page).
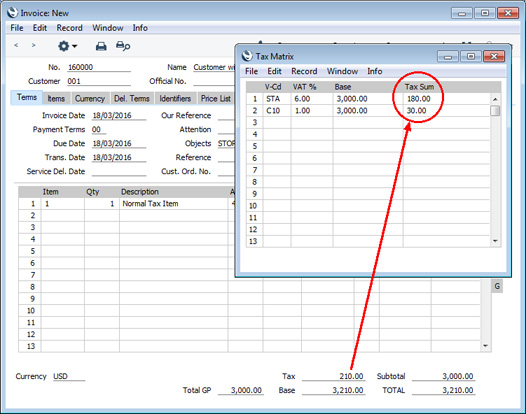
- If you need to see how the tax value is calculated, select 'Open Tax Matrix' from the Operations menu (Windows/Mac OS X) or Tools menu (iOS/Android). A new window will be opened, displaying the tax calculation, as follows:
- If you place the insertion point in an Invoice row, the function will display the tax calculation for that row.
- If you place the insertion point in a header field, the function will display the tax calculation for the Invoice as a whole.

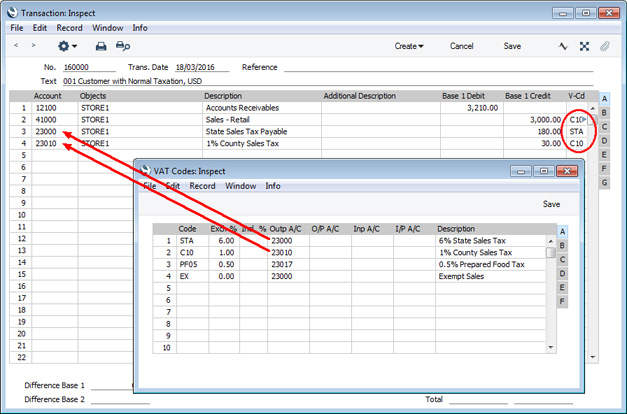
- When you mark the Invoice as OK and save, a Nominal Ledger Transaction will be created in which the tax will be credited to the Output Accounts specified in each VAT Code:

Although not fully visible in the illustration, the T-Cd field in row 2 contains "C10,STA". As we selected the All VAT Codes option in the VAT Code on Transaction rows setting (step 6 on the Configuration page), every VAT Code applying to the sale will be copied to this field.
For clarity, we also selected the Add VAT Code to VAT A/C rows option in the Transaction Settings setting in step 1 on the Configuration page. The effect of this is that the relevant VAT Codes will also be copied to the T-Cd field in rows 3 and 4.
Tax Template Examples:
---
Settings in the Nominal Ledger:
Go back to:
