Tax Templates - Workflow and Examples - Store Has More Than One Branch
This example describes using Tax Templates to collect and report sales tax.
The example has so far been based on a store in a county where sales are subject to two taxes: the state sales tax (6%); and a county tax (1%). In this final example, a second store will be opened in a county where the county tax is 1.5%.
This development again requires some configuration work:
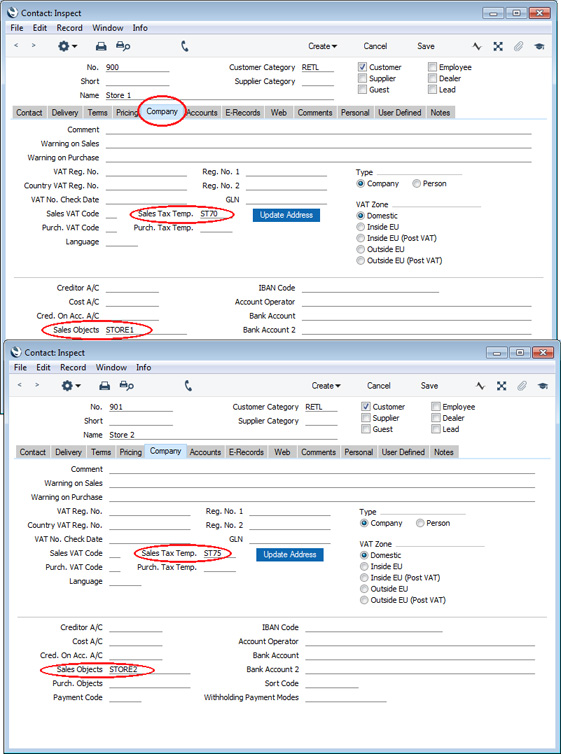
- Enter separate records in the Contact register for each store or other sales location (these are given the term "Branch" in Standard ERP). On the 'Company' card, specify the Sales Tax Template representing the location of the Branch. On the 'Accounts' card, specify a unique Sales Object for each Branch:
- The Local Machine setting in the User Settings module contains some settings specific to a particular client machine (e.g. to a particular terminal or till). On each client machine in each Branch, open the Local Machine setting and specify the relevant Contact record from step 1 above in the Branch field:
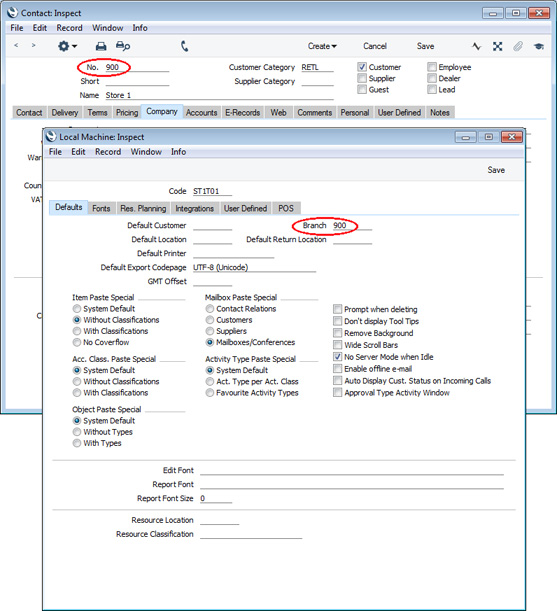
The effect of this is that every sales transaction recorded on any client machine in a particular Branch will be marked with the Object representing that Branch. This will make it possible to keep the transactions separate in reports.
- For tax reporting purposes, you need the Branch Object to be assigned to the rows in the Nominal Ledger Transaction in which tax is credited to the Output Accounts. Select the Objects on VAT Account option on the 'VAT / Tax' card in the Account Usage S/L setting in the Sales Ledger:
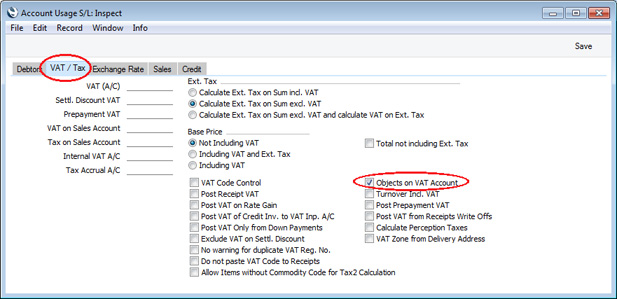
If you only have one Branch, it is recommended that you select the Objects on Tax Account option if you are planning more Branches in the future. This will mean that past Transactions will be compatible with the multi-Branch structure when it is implemented. This has been done in these examples.
- When a Customer walks into one of the stores, they should be charged sales tax at the rate applying in the city or county where the store is located. So, there is no need to specify a Sales Tax Template in the Contact records for such Customers, especially if they are likely to be Customers in more than one store. In an Invoice, this will mean the Customer Tax Template will be taken from the Branch, so tax will be charged at the rate applying in the location of the Branch.
The calculation of sales tax on Items that are delivered out-of-county can vary, depending on the state:
- If the store must charge county tax at the rate in the Customer's location, specify a Sales Tax Template in the Contact records for out-of-county Customers. In an Invoice, this will mean the Customer Tax Template will be taken from those Contact records, so tax will be charged at the rate applying in the location of the Customer.
- If the store must charge the taxes that are common to the Customer's location and the store's location (for example, the store must charge state tax because this is common to both locations, but not county tax), do not specify a Sales Tax Template in the Contact records for out-of-county Customers. Instead, create records in the Delivery Addresses setting in the Sales Orders module for each Customer's Delivery Address(es). Specify the relevant Customer Tax Template in these Delivery Address records (as described above in step 12 on the Selling to a Different Tax Jurisdiction page).
- If the store must charge county tax at the rate in the store's location, steps 1-3 above still apply, but do not assign Sales Tax Templates to Customers or Delivery Addresses unless the Customer will be taxed differently to the norm (e.g. if the Customer holds a certificate of tax exemption).
This completes the configuration work. Proceed now as follows:
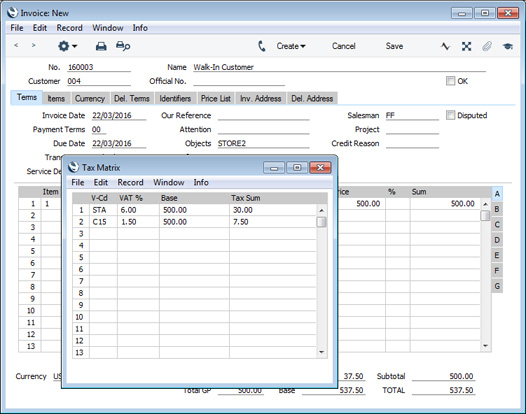
- When you create an Invoice on a client machine in the either store, the relevant Object will be brought in. In this case, the Invoice is being created in the second store:
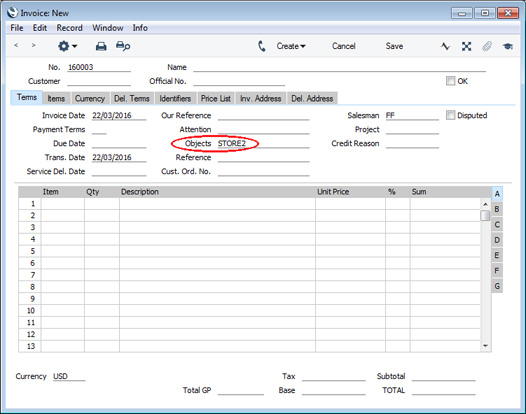
In this example, a walk-in Customer is charged tax at the local rate for the second store:
- In the resulting Nominal Ledger Transaction, having selected the Objects on VAT Account option in the Account Usage S/L setting (step 3 above), the Branch Object will be assigned to the postings to the state and county tax Accounts (as well as to the Sales Account):

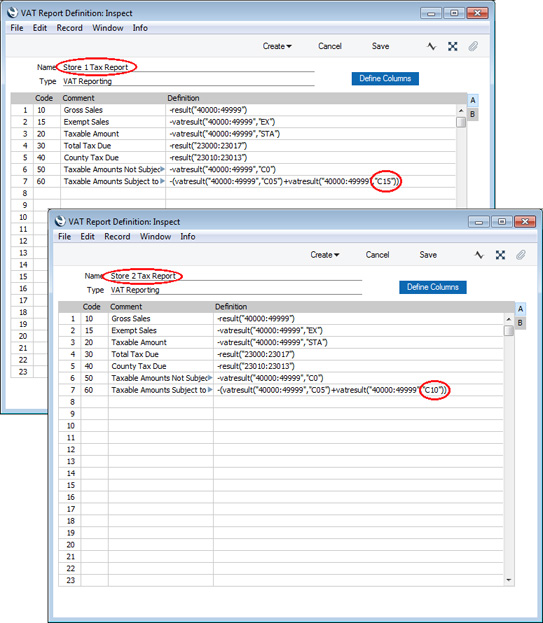
- You will probably need to define separate VAT Reports for each Branch. In our example, row 7 will be different for each store, as this row will print the value of sales where the county tax is different to the rate applying in the county where the store is located:
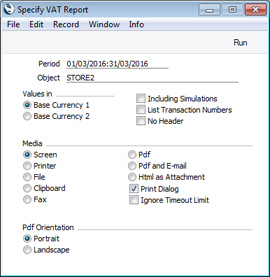
- When running the report for a particular store, enter the relevant Branch Object in the specification window:
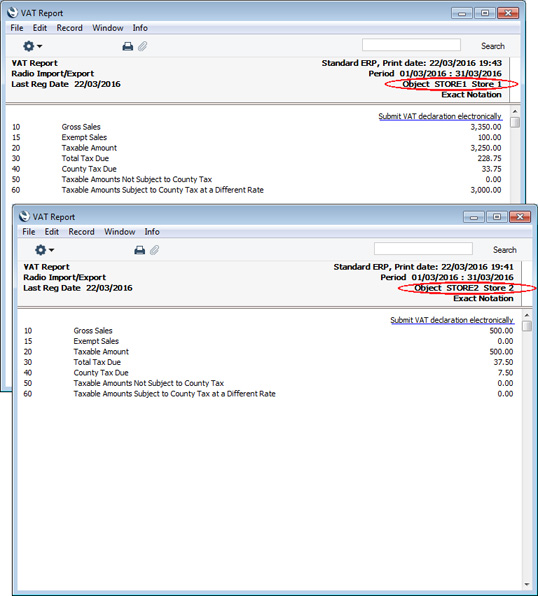
The report will be compiled from Transaction rows with the specified Object (i.e. it will display figures for the store that corresponds to the specified Object):
Tax Template Examples:
---
Settings in the Nominal Ledger:
Go back to: