POS Button Types in Bar Tabs - Payment Methods
This page describes the following POS Button Types in Bar Tabs:
- Cash
- Cheque
- Credit Card
- Debit Card
- Gift Voucher
- Loyalty Points Payment
- On Hotel Guest Account
- Pay
Please refer here for an index of all POS Button Types.
---
Cash - Function
- Allows waiters and bar staff to receive and manage cash payments for Bar Tabs.
- Requirements
- In the row in the POS Button record that adds the "Cash" button to the Bar Tab window, you must specify a Payment Mode in the Code field, using 'Paste Special' if necessary. This Payment Mode will determine the Nominal Ledger Account that will be debited with the value of the cash payment. 'Paste Special' will list the Payment Modes that you have included in the Local Machine Payment Modes setting.
- You must specify that your home Currency is Base Currency 1 in the Base Currency setting in the System module. If you accept cash payments in different Currencies, list the Currencies that you accept in the Payment Currencies setting in the Point of Sales module.
- Workflow
- When every Item has been added to a Bar Tab, click or touch the "Cash" button.
- The 'Cash Payment' window appears:
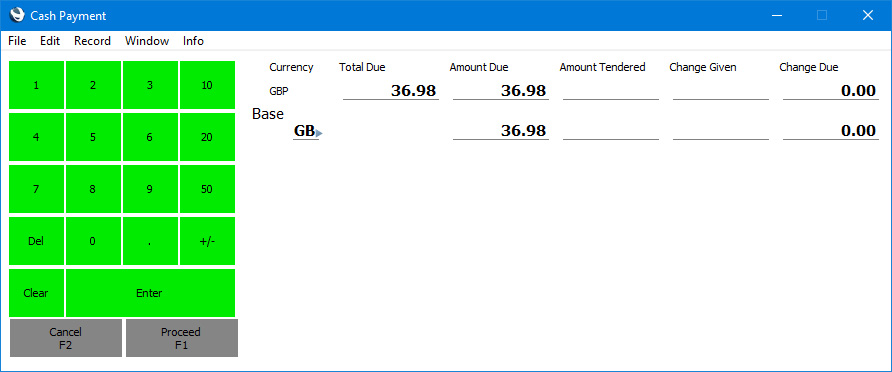
If the Total Due and Amount Due fields do not contain any figures, the probable reason is that you have not specified that your home Currency is Base Currency 1 in the Base Currency setting.
If you accept payment in different Currencies, the 'Cash Payment' window will contain fields for each Currency:
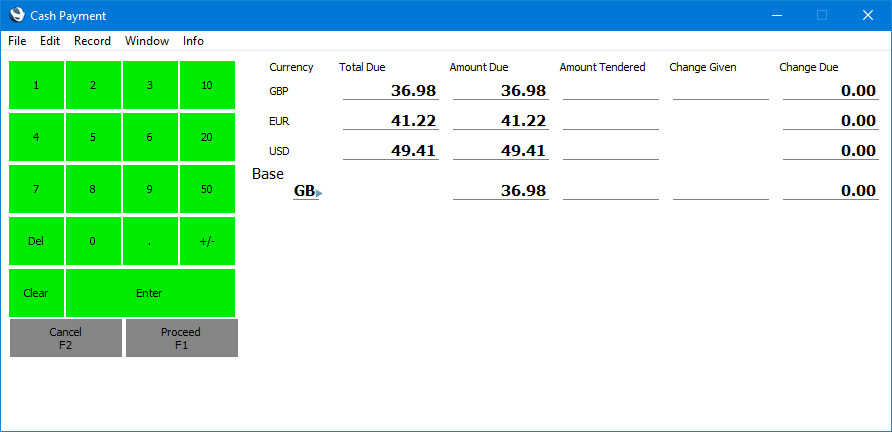
- Enter the value of the cash payment provided by the Customer in the Amount Tendered field (in the field for the relevant Currency if you accept more than one). The Change Due field will show you how much change is needed.
- If you are only using one Currency, you do not need to enter the value of the change that you give to the Customer in the Change Given field. All that is necessary is to click or touch [Proceed] as it will be assumed that you will give the full change value to the Customer.
If you are using more than one Currency, again you do not need enter the value of the change if you give the full value of the change in your home Currency. But if you give change in a different Currency, enter the value of the change in the relevant Change Given field for the relevant Currency.
- If you are using a touch screen, use the numeric keypad to enter amounts, and touch the [Enter] button to move from field to field.
- Click or touch [Proceed] to commit the payment, or [Cancel] to abandon it.
- A line will be added to the bottom of the Bar Tab, showing the value of the cash payment. If you needed to give change, a second added line will show the value of the change (in your home Currency).
- If the value of the cash payment is not correct (e.g. because of operator error or because the Customer needs to add another Item to the Bar Tab), proceed in one of two ways:
- Click or touch the "Cash" button for a second time. The 'Cash Payment' window will show the full Bar Tab value as the Total Due and the new outstanding amount (i.e. the value of the additional Item(s)) as the Amount Due. Repeat the process to add payment for the additional Item(s). An additional line will be added to the bottom of the Bar Tab, showing the value of the second cash payment.
- An alternative is to use the "Delete Row" button to remove the line showing the incorrect cash payment and then use the "Cash" button once again to enter a correct cash payment.
- Notes
- As mentioned under the 'Requirements' heading above, you will need to specify a Payment Mode in the row in the POS Button record that adds the "Cash" button to the Bar Tab window. This Payment Mode will determine the Nominal Ledger Account that will be debited with the value of the cash payment.
- If a till or device has a cash drawer, the drawer can be opened automatically so that the cashier can receive the cash payment. Assign each waiter and member of bar staff to an Access Group in which you have granted Full access to the 'Open Cash Drawer' Action, and create a record for the cash drawer in the Local Machine Serial Port Devices setting in the Technics module.
Cheque- Function
- Allows waiters and bar staff to receive cheque payments for Bar Tabs.
- Requirements
- In the row in the POS Button record that adds the "Cheque" button to the Bar Tab window, you must specify a Payment Mode in the Code field, using 'Paste Special' if necessary. This Payment Mode will determine the Nominal Ledger Account that will be debited with the value of the cheque payment. 'Paste Special' will list the Payment Modes that you have included in the Local Machine Payment Modes.
- Workflow
- When every Item has been added to a Bar Tab, click or touch the "Cheque" button.
- The 'Cheque Payment' window appears:
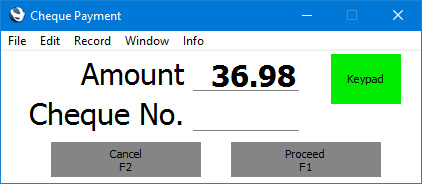
- Enter the value of the cheque payment in the Amount field (this will default to the total of the Bar Tab, or outstanding amount if there is a previous partial payment by another method) and the cheque number in the Cheque No. field.
- If you are using a touch screen, use the [Keypad] button to open a numeric keypad to enter the Amount or Cheque No.
- Click or touch [Proceed] to commit the payment, or [Cancel] to abandon it.
- A line will be added to the bottom of the Bar Tab, showing the value of the cheque payment.
- If the value of the payment is not correct, remove the line showing the value of the cheque payment using the "Delete Row" button.
Credit CardPlease refer here for details about receiving credit card payments for Bar Tabs.
Adding a "Credit Card" button to the Bar Tab window will allow waiters and bar staff to record the fact that a Bar Tab has been paid by credit card, when the credit card payment has been processed using a separate system. Waiters and bar staff can also use the "Pay" button for this purpose, especially when a Customer pays using more than one payment method (e.g. cash and credit card).
Please refer to your HansaWorld representative if you need to control the processing of credit and debit card payments for Bar Tabs from within Standard ERP.
Debit CardPlease refer here for details about receiving debit card payments for Bar Tabs.
Adding a "Debit Card" button to the Bar Tab window will allow waiters and bar staff to record the fact that a Bar Tab has been paid by debit card, when the debit card payment has been processed using a separate system. Waiters and bar staff can also use the "Pay" button for this purpose, especially when a Customer pays using more than one payment method (e.g. cash and debit card).
Please refer to your HansaWorld representative if you need to control the processing of credit and debit card payments for Bar Tabs from within Standard ERP.
Gift Voucher - Function
- Allows waiters and bar staff to receive Gift Vouchers in payment for Bar Tabs.
- Requirements
- In the row in the POS Button record that adds the "Gift Voucher" button to the Bar Tab window, you must specify a Payment Mode in the Code field, using 'Paste Special' if necessary. This Payment Mode will determine the Nominal Ledger Account that will be debited with the value of the payment. 'Paste Special' will list the Payment Modes that you have included in the Local Machine Payment Modes setting.
- Gift Vouchers that you take in payment must have been registered in the Gift Vouchers Sold setting.
- Workflow
- When every Item has been added to a Bar Tab, click or touch the "Gift Voucher" button.
- The 'Gift Voucher Payment' window appears:
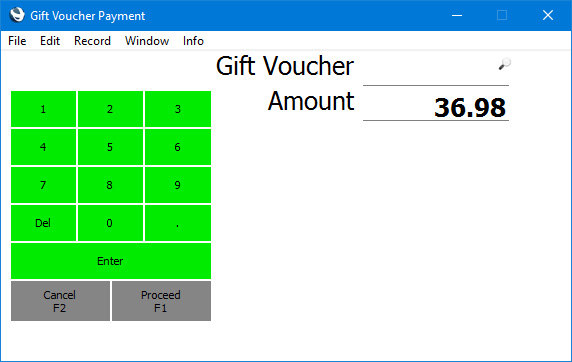
- Enter or scan the Gift Voucher Number or Barcode in the Gift Voucher No. field.
- If the till or device has a touch screen but no keyboard, touch the Gift Voucher No. field and then use the keypad to enter the Gift Voucher Number.
- Click or touch [Proceed] to commit the voucher payment, or [Cancel] to abandon it.
- A line will be added to the bottom of the Bar Tab, showing the value of the voucher payment.
- Note
- Gift Vouchers are described in more detail here.
Loyalty Points Payment- Function
- Allows waiters and bar staff to receive Loyalty Card points in payment for Bar Tabs.
- Requirements
- Requires a supervisor to log in: can only be used by a waiter, member of bar staff or supervisor whose Access Group gives access to the 'Loyalty Payment on Touch Screen POS Invoice/Bar Tab' Action.
- You must add a Loyalty Card to a Bar Tab using the "Loyalty Card" button before you can use the "Loyalty Points Payment" button.
- In the row in the POS Button record that adds the "Loyalty Points Payment" button to the Bar Tab window, you must specify a Payment Mode in the Code field, using 'Paste Special' if necessary. This Payment Mode will determine the Nominal Ledger Account that will be debited with the value of the payment. 'Paste Special' will list the Payment Modes that you have included in the Local Machine Payment Modes setting.
- Workflow
- When every Item has been added to a Bar Tab, and a Loyalty Card has been specified, click or touch the "Loyalty Points Payment" button.
- If the waiter or member of bar staff does not have the necessary access right, the 'Login' window will appear, allowing a supervisor to log in.
- The 'Loyalty Points Payment' window appears:
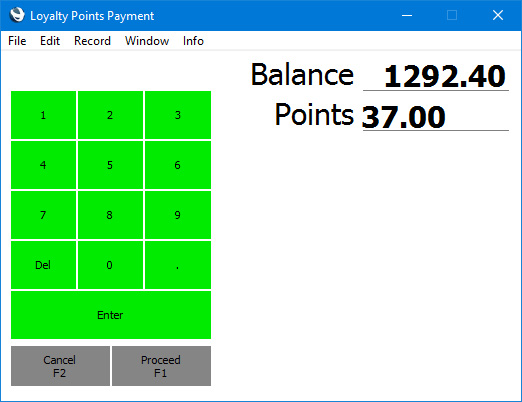
- The Balance field shows the Loyalty Card's total points balance, while the Points field shows the number of points required to pay the Bar Tab (or the card's points balance if this is insufficient to pay the Bar Tab). The supervisor can change the Points field if necessary.
- If you are using a touch screen, use the numeric keypad to enter amounts, and touch the [Enter] button to move from field to field.
- Click or touch [Proceed] to commit the payment, or [Cancel] to abandon it.
- A line will be added to the bottom of the Bar Tab, showing the value of the points payment.
- Control of the till will be passed back to the waiter or member of bar staff.
- Notes
- Note that if a till or cash machine has a live-sync connection to the server, you cannot use Loyalty Cards on that till when it is not connected to the server.
- Loyalty Cards are described in more detail here.
On Hotel Guest Account- Function
- Allows waiters and bar staff to charge Bar Tabs to Hotel Reservations (i.e. to hotel room accounts).
- Workflow
- Click or touch the "On Hotel Guest Account" button.
- The 'Assign to Guest' window appears:

The Amount field shows the value of the Bar Tab.
- One option is to enter the Room Number and Guest and Customer Numbers, using 'Paste Special' if necessary. After entering the Room Number, the 'Paste Special' list from the Guest and Customer fields will only include Guests and Customers that are booked into the room.
If you are using a touch screen, use the [Keypad] button to open a numeric keypad to enter the Room Number and Guest and Customer Numbers.
- A second option is to press the [In House] button. This will print an In-House Guests report to screen that lists the rooms that are occupied, together with Guest Names. If you click or touch a Guest Name, the report window will be closed and you will be returned to the 'Assign to Guest' window with the Room, Guest and Customer fields filled in.
- Click or touch [Proceed] to assign the Bar Tab to the Room/Guest, or [Cancel] to return to the Bar Tab without any assignment.
- You will be returned to the Bar Tab.
- Add any further Items to the Bar Tab as needed.
- Click or touch the "Finish" button. The Bar Tab will be saved and closed, and a new one opened. The Items on the Bar Tab will be added to the hotel room account.
- Notes
- By default, the Items on the Bar Tab will be listed individually on the hotel room account. However, if you specify a Tab Item Code in the Tab Item Group register on a particular till or cash machine, a single line with the Tab Item Code and Item Name and the total value of the Bar Tab will be added to the hotel room account.
- If you do not want it to be possible to assign Bar Tabs to a particular Guest, use 'Paste Special' to select "Do not allow" in the Bar Tabs field in the row representing the Guest on the 'Guest' card in the relevant Hotel Reservation. You will be prevented from assigning the Bar Tab to the Guest when you press [Proceed] in step 5 above.
- An alternative to the "On Hotel Guest Account" button that you can use is the "Show Hotel Guests" button. This opens the In-House Guests report without the intermediate stage of the 'Assign to Guest' window.
- Hotel Reservations are not synchronised. Therefore you can only use this button on a till that has a live connection with the server. You cannot use it on a till that has a live-sync connection with the server.
Pay- Function
- Allows waiters and bar staff to receive and manage payments for Bar Tabs when a Customer uses more than one payment method (e.g. cash and credit card).
- Requirements
- You must list the Payment Modes that can be used on the till in the Local Machine Payment Modes setting.
- If you need the waiter or member of bar staff to record credit card authorisation codes, select the Require Authorization Code for Credit Card Payments option in the Local Machine setting in the User Settings module (or, if a till has a live-sync connection to the server, in the record for the till in the Local Settings setting in the Technics module).
- Workflow
- When every Item has been added to a Bar Tab, click or touch the "Pay" button.
- The 'Payment' window appears:
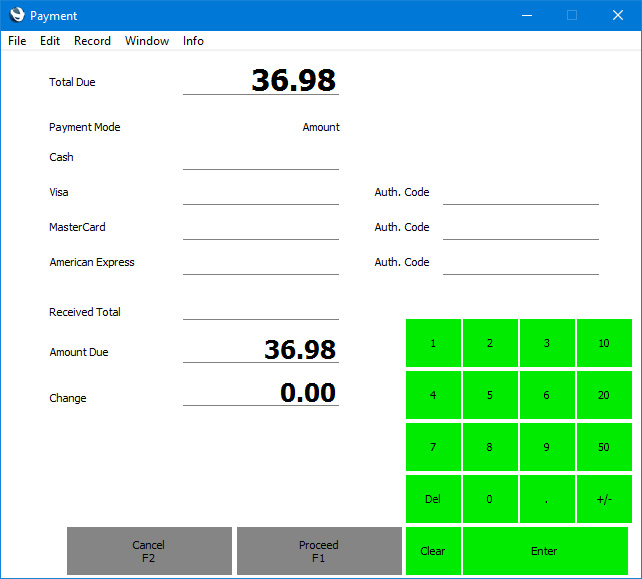
There will be one Amount field for each Payment Mode (payment method) assigned to the till in the Local Machine Payment Modes setting. If appropriate, there will be a field for Authorisation Code as well (e.g. for credit cards).
- Enter the value of the payment in the Amount field(s) for the relevant payment method(s).
- If you are using the Require Authorization Code for Credit Card Payments option on the till, you must enter an Authorisation Code for the relevant Payment Mode before you can proceed. Copy this from the credit card terminal.
- If you are using a touch screen, use the numeric keypad to enter the Amount.
- If a Customer pays cash in different Currencies, enter the amounts in those Currencies as presented by the Customer.
- Click or touch [Proceed] to commit the payment, or [Cancel] to abandon it.
- Lines will be added to the bottom of the Bar Tab (one line for each payment method), showing the value of each payment.
- If the total value of the payment is not the same as the value of the Bar Tab, the remaining amount that is due or the change that should be given will be shown at the top of the Invoice, expressed in your home Currency.
- Notes
- It is not practical to use the "Pay" button if there are many Payment Modes listed for the till in the Local Machine Payment Modes setting. If so, the Received Total and Change fields and some Amount fields will not be visible. In this situation it is recommended that you use individual Button Types instead (e.g. "Cash" and "Credit Card").
- If a till has a cash drawer, the drawer can be opened automatically so that the waiter or member of bar staff can receive the payments. Assign each waiter and member of bar staff to an Access Group in which you have granted Full access to the 'Open Cash Drawer' Action, and create a record for the cash drawer in the Local Machine Serial Port Devices setting in the Technics module.
- Payments registered using the "Pay" button are described in more detail here.
- By default, the Bar Tab will remain on screen after the payment has been registered, allowing the waiter or member of bar staff to continue working with the Bar Tab. The Restaurant Settings setting contains various options that you can use to change this behaviour:
- Print Receipt
- Prints the Bar Tab using the Bar Tab form.
- Create and print Kitchen Order
- Prints the Bar Tab using the Kitchen Order form and creates a Kitchen Order. If a Bar Tab contains Items that are to be printed on different printers (e.g. food Items that are to be printed on the kitchen printer and drinks Items on the bar printer), documents will be printed on the various printers as appropriate. You can specify Printers in the POS Button rows that add "Item" and "Display Page" buttons to the Bar Tab window.
- Save and close Bar Tab
- Closes the Bar Tab and opens a new empty Bar Tab. The Bar Tab will not be marked as finished.
---
Configuring the Bar Tab Window:
Go back to:
|