Drawers
The Drawers setting should contain a list of the till drawers in your cash machines and tills. Enter a separate record for each till drawer. You must do this if you are using
work sessions, because you will need to specify both a Machine and a Drawer when opening and closing sessions and in cash transactions.
After entering a Drawer in this setting, you should configure it as follows:
- Enter a POS Balance record for the Drawer, dated the day before you first use it and with a zero balance (the balance will be calculated to be zero automatically).
- Connect the Drawer to a Local Machine (i.e. to a cash machine or till). You should do this by opening a work session for the Drawer/Local Machine combination. Create a POS Session record and specify the Drawer together with a Local Machine. The Event in the POS Session should be "Open". After saving this record, the Drawer will be assigned to each POS Invoice entered on the till (i.e. each POS Invoice will be recorded as having been entered on the till and the Drawer). If you do not connect a Drawer to a till, POS Invoices entered on that till may be assigned to the wrong Drawer or may not be assigned to a Drawer at all and so will not be included in the cash up routines. The term "Till Drawer" in this documentation refers to a Drawer and Local Machine in combination.
If you will not be using work sessions as part of your usual routine, you should immediately create a second POS Session record for the Drawer/Local Machine combination in which the Event is "Close"
If a till has a live-sync connection to the server, you will need to create these POS Sessions working on the till itself.
Usually, you will need one Drawer for each Local Machine. If you need more than one Drawer per Machine, select the
Allow Multiple Sessions per Machine option in the
POS Settings setting.
To work with Drawers, first ensure you are in the Point of Sales or Restaurant modules. Then, if you are using Windows or Mac OS X, click the [Settings] button in the Navigation Centre (or use the Ctrl-S/⌘-S keyboard shortcut). Double-click 'Drawers' in the resulting list: If you are using iOS or Android, select 'Settings' from the Tools menu (with 'wrench' icon) and tap 'Drawers' in the 'Settings' list. The 'Drawers: Browse' window opens, listing the available Drawers. Select 'New' from the Create menu (Windows/Mac OS X) or + menu (iOS/Android) to create a new record.
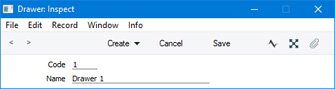
In the Drawer entry window, you should enter a code and a short descriptive text. The code may contain up to five characters, and you may freely mix letters and numbers. Click the [Save] button or tap √ to save changes.
---
Settings related to Point of Sales:
Go back to: