Introduction to the Account Reconciliation Register
You will most commonly use this register to perform bank reconciliations i.e. when you need to check that the postings to the Bank Account that you have recorded in your Standard ERP database are included in your bank statements. To carry out this task, follow these steps:
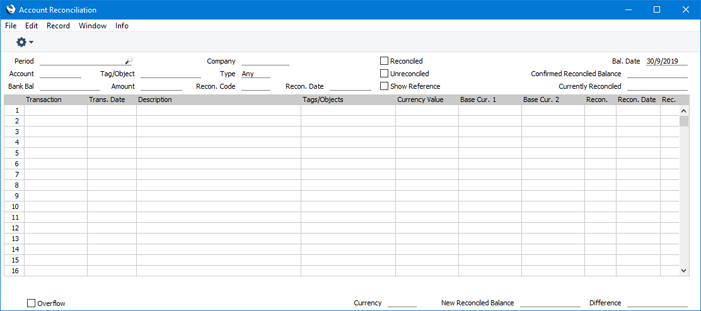
- Ensure you are in the Nominal Ledger or Cash Book module and click (Windows/macOS) or tap (iOS/Android) the [Registers] button in the Navigation Centre. Double-click or tap 'Account Reconciliation' in the resulting list. The 'Account Reconciliation' window will be opened.
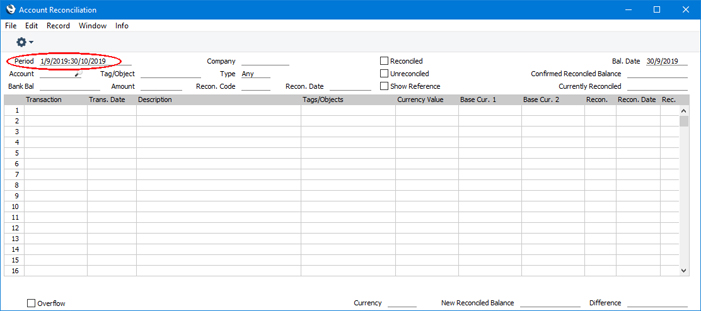
- Enter a Period, using 'Paste Special' if necessary to access a list of reporting periods. The Period should be large enough to include all the postings (Transaction rows) to the Bank Account that you have not yet reconciled.
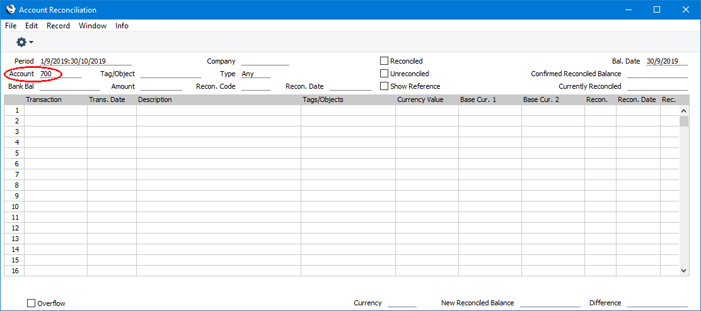
- Enter the Account Number representing your bank account. If necessary, specify a Tag/Object as well.
- Tick the Unreconciled check box. All unreconciled postings with the specified Account/Object combination will be listed.
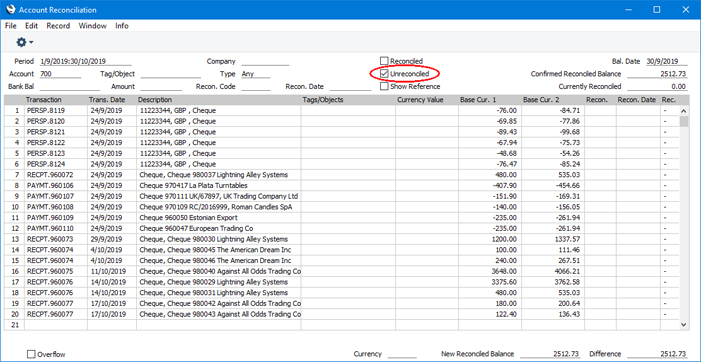
The balance previously reconciled will be placed in the Confirmed Reconciled Balance field in the top right-hand corner of the window. This is the reconciled balance immediately before the Bal. Date (in the field above) and should equal the opening balance in the bank statement. Changing the Bal.Date will cause the Confirmed Reconciled Balance to be updated, but note that the calculation of the Confirmed Reconciled Balance assumes postings are reconciled on their Transaction Dates rather than their Reconciliation Dates.
By default, the list will contain unreconciled postings from the period that you specified in step 2. If you need all unreconciled postings up to the end of the period to be listed (i.e. you need the start date of the period to be ignored), select the Ignore Period Start Date for Unreconciled Transactions option in the Reconciliation Settings setting.
If you would like reconciled postings for the Account and period to be listed as well, tick the Reconciled box.
If you enter a Company and/or a Transaction Type, only postings for the specified Account with the Company/Transaction Type combination (on flip E of the Transaction window) will be listed. Usually, the Company and Transaction Type fields on flip E of a Transaction row will be filled in when posting to the Debtor and/or Creditor Accounts if you are using the Invoice info on N/L Transaction option in the Account Usage S/L setting and/or the Supp. Info. on Trans. option in the Account Usage P/L setting. The Company and Transaction Type fields will not usually be filled in when posting to the Bank Account.
If the number of unreconciled postings is greater than 500, the Overflow box at the bottom of the window will be marked automatically. If this happens, enter a shorter Period to reduce the number of postings in the list.
The list is in chronological order. Select 'Sort by amount' from the Operations menu (with 'cog' icon, Windows/macOS) or Tools menu (with 'wrench' icon, iOS/Android) to sort the list by amount (largest first).
In multi-user systems, you can use Access Groups to prevent postings to sensitive Accounts such as salary Accounts being listed, depending on the user carrying out the reconciliation. To do this, list the sensitive Accounts in the Block A/Cs field in each Access Group as appropriate.
The fields in the Description column will contain both the Text from a Transaction header and the Description from the Transaction row representing the posting, separated by a comma. If you want the Description column to show the Reference from each Transaction header instead, tick the Show Reference box before ticking the Unreconciled and/or Reconciled boxes. If you tick the Show Reference box afterwards, the list will not be redrawn (select 'Refresh' from the Operations or Tools menu to redraw the list with References).
- Compare the list of postings with the bank statement. Where a posting is correctly shown on the statement, enter an "R" to the Rec field, and enter the date in the Recon. Date field. The posting value will be added to the Currently Reconciled total, which shows the total reconciled during the session, and to the New Reconciled Balance figure, which represents the closing balance for the Account. If the Account is a Currency Account, the Currently Reconciled and New Reconciled Balance figures will be in Currency.
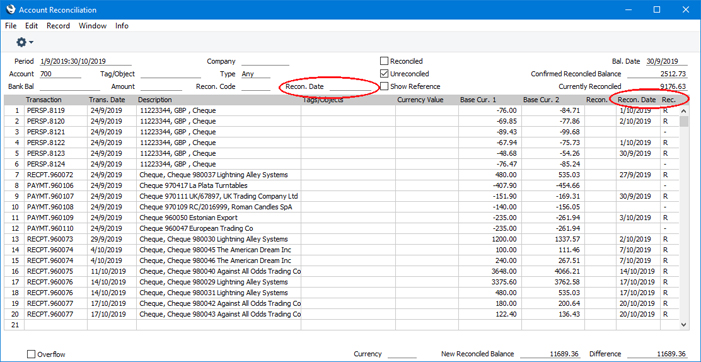
If you need the same date to be used as the Reconciliation Date for all the postings that you reconcile, enter that date in the Recon. Date field in the header. This date will not be copied visibly to the rows that you reconcile, but it will be assigned to each reconciled posting when you comfirm the reconciliation (step 10 below). You can override the header date by entering a date in an individual row. If you need it to be mandatory to specify a Reconciliation Date, select the Require Reconciliation Date option in the Reconciliation Settings setting. When you confirm the reconciliation, the reconciliation will not proceed if there is no Reconciliation Date that can be applied to an individual row (i.e. you have not specified a date in a row or in the header).
If you know that you can reconcile every posting in the list, select 'Mark all rows as Reconciled' from the Operations or Tools menu. An "R" will be placed in the Rec field in every row and the Currently Reconciled and New Reconciled Balance figures will be updated appropriately.
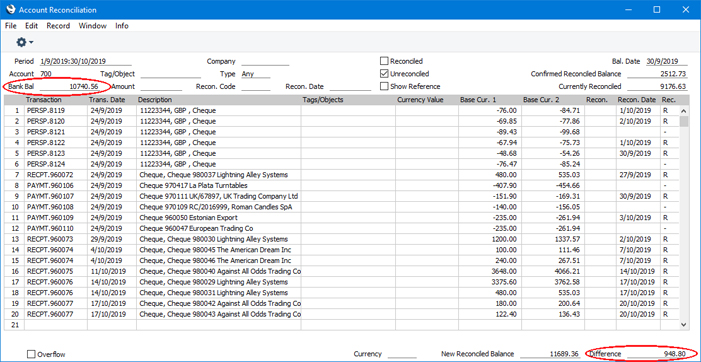
You can enter the closing balance in the bank statement in the Bank Bal field in the top left-hand corner of the window. The Difference field will then show the difference between the Bank Bal and the New Reconciled Balance.
If you enter a Currency in the Currency field in the bottom of the window, the Confirmed Reconciliation Balance, the New Reconciled Balance and the Difference will be calculated from postings made to the specified Account in the specified Currency only.
- If a posting appears in the bank statement but not in the list of unreconciled postings, you should add the posting to the Transaction register. Examples of such postings might be payments into or out of your account by standing order, or bank charges.
You can do this without closing the 'Account Reconciliation' window by selecting 'Create N/L Transaction' from the Operations or Tools menu. Enter the Transaction following the usual procedure described here. When you have saved it, return to the 'Account Reconciliation' window and select 'Update' from the Operations or Tools menu. Any postings to the specified Account in the new Transaction will be added to the list of unreconciled postings.
- If you need to inspect a posting, place the insertion point in the relevant row and select 'Open N/L Transaction' from the Operations or Tools menu. The Transaction will be opened.
- If the value of a posting shown in the 'Account Reconciliation' list differs from that shown in the bank statement, you should use the 'Create N/L Transaction' function to enter a correcting Transaction to the Transaction register. Alternatively, use the 'Open N/L Transaction' function to open and update the Transaction. Please refer to the Correcting Transactions' for full details about correcting and updating Transactions. When you have done this, return to the 'Account Reconciliation' window, select 'Refresh' from the Operations or Tools menu and mark both the original posting and the correction as reconciled.
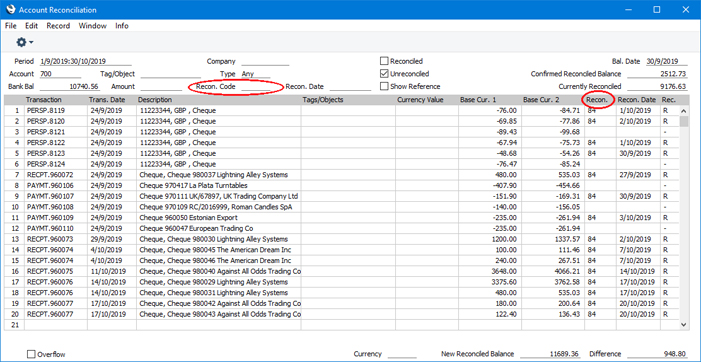
- You can assign an arbitrary code to the postings reconciled on a particular day or from a particular statement so that you can identify them later. Enter the code in the Recon. field in each row. You can also enter a Code in the Recon. field in the header, in which case that Recon. Code will be applied automatically to each reconciled posting when you confirm the reconciliation (step 10 below). You can override that Code in an individual row. If you need it to be mandatory to specify a Reconciliation Code, select the Require Reconciliation Code option in the Reconciliation Settings setting. When you confirm the reconciliation, the reconciliation will not proceed if there is no Reconciliation Code that can be applied to an individual row (i.e. you have not specified a Code in a row or in the header).
In the example illustrated below, the Reconciliation Code is the number of the bank statement in which the postings were listed:
To list reconciled postings with a particular Recon. Code, enter it in the Recon. field in the header before ticking the Reconciled box. Only those postings with the Recon. Code will be included in the resulting list. You can also run the Account Reconciliation report so that it lists reconciled postings with a particular Recon. Code.
If the list includes reconciled postings, you can sort it by Recon. Code by selecting 'Sort by Recon. Code' from the Operations or Tools menu. The sort order will be descending, so Transactions without Recon. Codes will be at the end of the list.
You can use the Reconciliation Descriptions setting to attach longer descriptions to your Recon. Codes. If you are using this setting, you can use 'Paste Special' from the header and from each row to choose the correct Recon. Code. You can have these longer descriptions printed in the .
- When you have checked the postings in the list agree with the bank statement and marked them with "R" in the Rec field, the figure in the New Reconciled Balance field should be the same as the closing balance in the bank statement. If you entered the closing balance in the bank statement in the Bank Bal field, the Difference field should contain zero.
Note that you have not saved anything yet and closing the window now will cause you to lose the reconciliation information you have just entered. To save this information, select 'Confirm Reconciliation' from the Operations or Tools menu. You can do this periodically or at the end of the work session. After selecting 'Confirm Reconciliation', the Confirmed Reconciled Balance, Currently Reconciled, New Reconciled Balance and Difference figures will all be updated and, if you have not ticked the Reconciled box, the reconciled postings will be removed from the list.
! | Closing the 'Account Reconciliation' window without having selected 'Confirm Reconciliation' will lose all changes made. |
|
If a "Type cannot be used" message appears when you select 'Confirm Reconciliation', the probable reason is that you have selected the
Block Subsystem rows on Generated Transactions option in the
Transaction Settings setting. Selecting this option is not compatible with using the Account Reconciliation register, because it will prevent you from being able to mark a Transaction row as Reconciled if it is in a Transaction in which the Type is not "M"
- To close the 'Account Reconciliation' window, click the close box (Windows/macOS) or tap < (iOS/Android).
- The Nominal Ledger contains two reports that you can use to help with the task of reconciling the bank statement.
The Account Reconciliation report is essentially a print-out of the postings listed in the 'Account Reconciliation' window. You can use this report if you prefer to compare a paper print-out with the bank statement.
The Bank Reconciliation report will take the closing balance from your last bank statement and calculate a new balance, taking all unreconciled postings into account. This new balance should be the same as the current balance for the Bank Account in your database. If the two balances are different, the probable reason is that there is still at least one unreconciled posting that you can reconcile with the bank statement.
Useful Options
In order to ease the task of bank reconciliation, it is recommended that, in the Purchase Ledger, you enter separate Payment records to represent each payment (e.g. each cheque) issued and, in the Sales Ledger, you enter a single Receipt record recording every payment paid into the bank on a single paying-in slip. This will ensure that single postings (Transaction rows) will match single lines on the bank statement.
You should also think about the Separate Row per Customer on Bank A/C option in the Account Usage S/L setting, and the equivalent Separate Row per Payment Row on Bank A/C option in the Account Usage P/L setting. If you are using these options, the Nominal Ledger Transaction that results from a Receipt or Payment with several rows will contain a single posting to the Bank Account. If you are using these options, the Transaction will contain separate postings to the Bank Account for each Receipt or Payment row. The Description in each posting will show the Invoice Number and Customer Name (or Purchase Invoice Number and Supplier Name), so you should use these options if you want this information to appear in the 'Account Reconciliation' window and Account Reconciliation report.
Setting the Opening Balance
As mentioned in step 4 above, when you open the 'Account Reconciliation' window, the figure in the Confirmed Reconciled Balance field will show the balance previously reconciled and should equal the opening balance in the bank statement. When you open the 'Account Reconciliation' window for the first time in a new database, the Confirmed Reconciled Balance will be 0.00, so it will not agree with the opening balance in the bank statement. To set the Confirmed Reconciled Balance in a new database, follow these steps:
- Referring to the Opening Balances in the Nominal Ledger page, enter a Nominal Ledger Transaction containing opening balances for each Account. This Transaction should include an opening balance figure for your Bank Account.
- Open the 'Account Reconciliation' window and mark the opening balance figure for your Bank Account as reconciled, with an appropriate Reconciliation Date.
- If you used the Brought Forward Balances setting instead of a Transaction to record your opening balances, the opening balances will not appear in the 'Account Reconciliation' window. In this case, enter a Transaction with the same date as your Brought Forward Balances records containing a double-sided posting to your Bank Account, to the value of the opening balance in the bank statement. For example, if the balance in your bank statement on the date of the opening balance Transaction is 700.00, enter two rows in that Transaction debiting 700.00 from the Bank Account and crediting 700.00 to the same Account. Then, open the 'Account Reconciliation' window and mark the correct posting (debit or credit) as reconciled (with an appropriate Reconciliation Date) and leave the other posting unreconciled.
---
Go back to: