Building a Web Page - Adding a Menu
This page describes adding a menu to each page in your website. Please refer to the following pages for details about each step in the process of building a web page:
Note: all the settings and registers mentioned are located in the Webshop and CMS module unless otherwise specified.
---
This page describes adding a menu to a web page and introduces the following Element Type:
- Web Menu (Element displays a menu as an Unordered List)
After you have created some Nodes and Pages for your website, the next task will be to add a menu that site users will be able to use to navigate from page to page.
A menu will be implemented as an Unordered List, with each menu item as a List Item. The List Items that are shown on screen will automatically be assigned Classes as follows:
- <li class="first odd">First Menu Item</li>
- <li class="even">Second Menu Item</li>
- <li class="odd">Third Menu Item</li>
- <li class="even">Fourth Menu Item</li>
- <li class="odd">Fifth Menu Item</li>
- etc
You can also assign your own Class to each List Item (i.e. to each menu item), and the entire menu will automatically be contained in a
<div>.
Follow these steps:
- Create the Structure records and Pages for each web page.
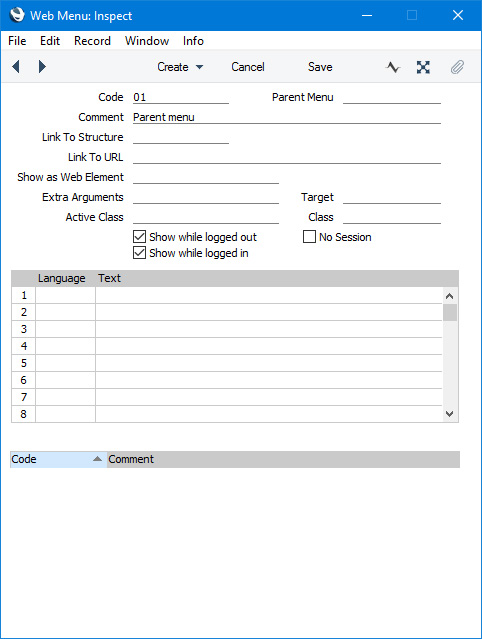
- In the Menu register, you should add one record for the menu as a whole (the "Parent Menu") and separate records for each individual menu item. In this step, add a record to the Menu register for the Parent Menu. You only need specify a Code and a Comment in this record:
- Add separate records to the Menu register for each individual menu item:
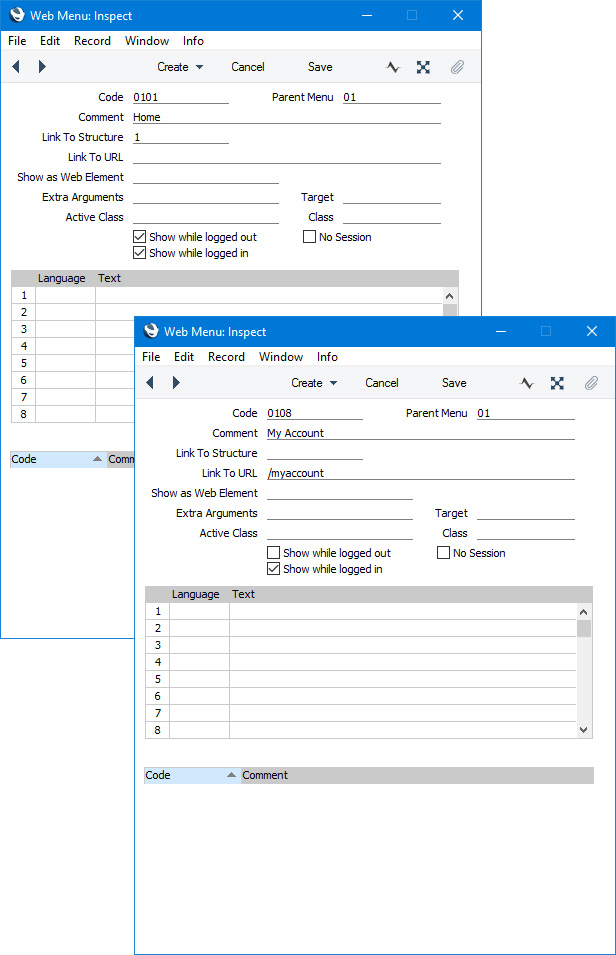
- Code
- The order that the menu items will appear in the menu will depend on their Codes. You will be able to change the Code of a menu item after saving if you need to change its position in the menu.
- Parent Menu
- Paste Special
Menu register, Webshop and CMS module
- Enter the Code of the Parent Menu here.
- Comment
- Enter the name of the menu item that is to be shown on your website. If necessary, enter translations of this name in the matrix below.
- Link to Structure, Link to URL
- Use these fields to specify where the menu item should take the browser user.
- If the menu item should take the user to another page in your website, you can either specify the Structure or Node of that page in the Link to Structure field using 'Paste Special', or you can enter its path in the Link to URL field. You can enter a relative path (/Web_structure_name) or an absolute path (http://server_ip_address:Web Port/Web_structure_name or http://domainname/Web_structure_name).
- If the menu item is to take the user to a page outside your website, enter the URL of that page in the Link to URL field.
- Show as Web Element
- Paste Special
Element register, Webshop and CMS module
- If you need the menu item to be indicated by an image, specify here the Element whose Translation contains a link to the image file.
- Note that the Link to Structure, Link to URL, Extra Arguments and Target fields will not be used if you have specified an Element in this field, so the connected Translation must include the Structure or external URL as an anchor and any Extra Arguments and Target as necessary. A suitable example Translation might be:
- <a href="/home"><img src="/images/logo.jpg"></a>
- Where "home" is the Web structure name in the Structure record for the page to which the browser user will be taken and the image file logo.jpg is stored in a folder named "images" in the "webcust" folder in the folder containing the Standard ERP application.
- Target
- Use this field to specify how the browser user will be taken to the selected page, as follows:
- (empty)
- The selected page will open in the same browser tab.
- _blank
- The selected page will open in a new browser window or tab.
- If you need the page to open in a new window or tab, it is recommended for security reasons that you use the Show as Web Element field. This will allow you to include the rel=noopener noreferrer attribute in the URL.
- Active Class, Class
- If you specify classes in these fields, they will be included in the <li> tags for the menu item. The Active Class will be used when the menu item is pointing to the current web page, otherwise the Class will be used. You can use these classes to control the appearance of the menu items from your .css file.
- Show while logged out, Show while logged in
- Use these options to specify whether the menu item will be displayed to browser users who are logged in, who are not logged in or both.
- No Session
- If you have specified both a Link to Structure and a Link to URL above, they will both be used to construct the URL of the page to which the user will be taken:
- Link to URL/Web_structure_name of the Structure
- If you have specified both but only want the Link to URL to be used, select this option.

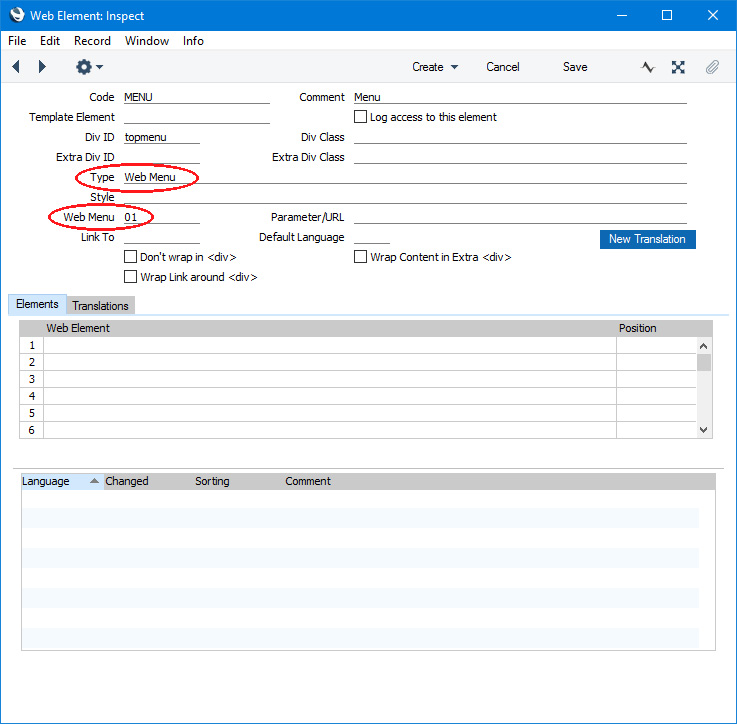
- Create an Element for the menu:
- Div ID, Div Class, Extra Div ID, Extra Div Class, Wrap Content in Extra <div>
- Use these fields and options to assign Div IDs and Div Classes to the menu as a whole. This will allow you to control the appearance of the menu from your .css file.
- Specifying an Extra Div ID or Extra Div Class will have no effect unless you also select the Wrap Content in Extra <div> option.
- Type
- Paste Special
Choices of possible entries
- Use 'Paste Special' to set the Type of the Element to "Web Menu".
- Web Menu
- Paste Special
Menu register, Webshop and CMS module
- Enter the Code of the Parent Menu here.
- Translations
- There is no need to enter Translations for a "Web Menu" Element, as all text will be taken from the Menu records added in step 3.
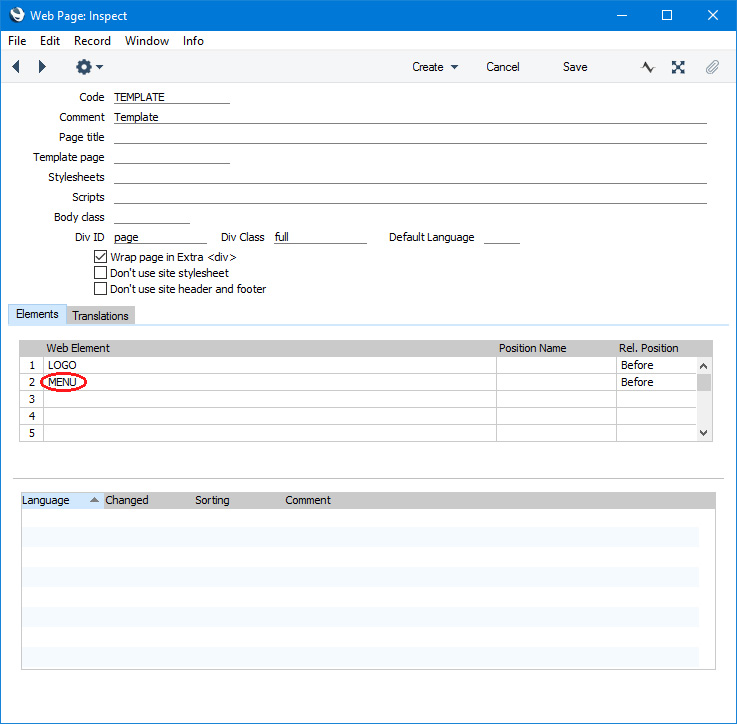
- Add the Element from step 4 to your header Element or template Page:
This is the result in a browser:
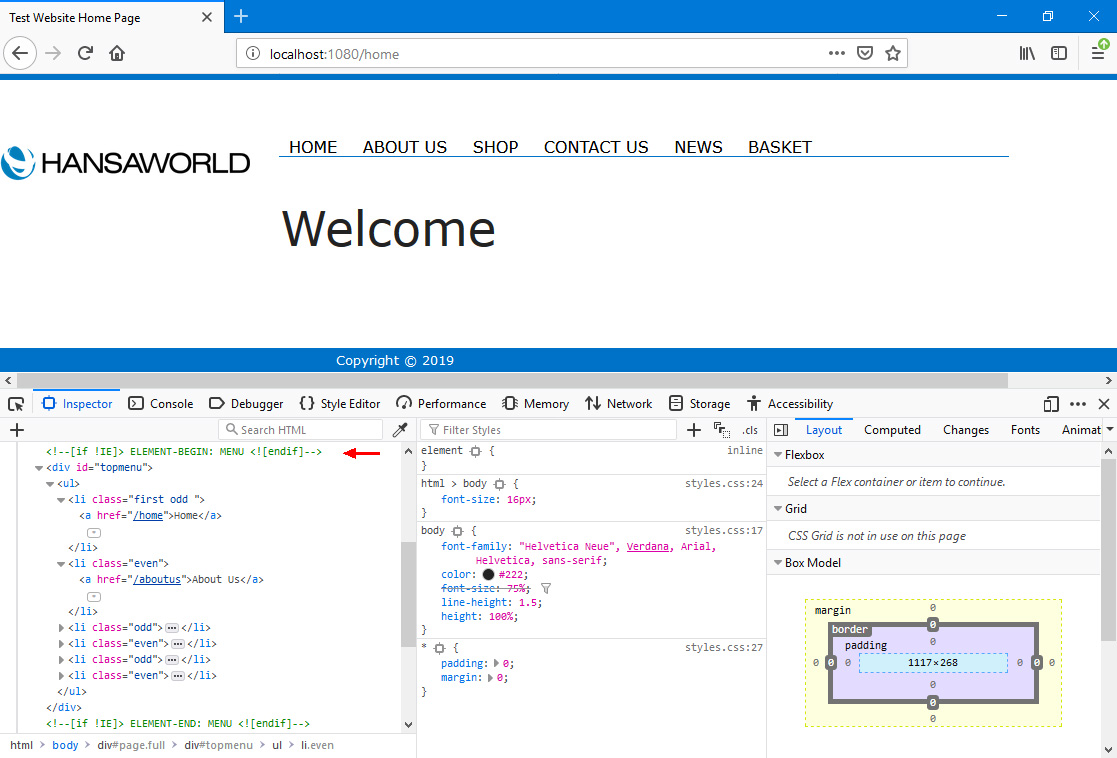
In this illustration, the following
<div> attribute is user-assigned (i.e. you can assign a different attribute or choose not to assign one at all):
- id="topmenu" (specified in the "MENU" Element)
The following attributes are assigned automatically by Standard ERP (i.e. you will not be able to change these attributes, but you will be able to apply styling to them in your .css file):
- <li class="first odd"> (used for the first menu item)
- <li class="even"> (used for the menu items in even-numbered positions)
- <li class="odd"> (used for the menu items in odd-numbered positions)
---
Building a web page in Standard ERP:
Go back to: