Building a Web Page - Using a Template
This page describes using a template for each page in your website. Please refer to the following pages for details about each step in the process of building a web page:
Note: all the settings and registers mentioned are located in the Webshop and CMS module unless otherwise specified.
---
This page describes using templates to ensure the same Elements are included in every web page and introduces the following Element Type:
- Link (Element acts as a link to another page)
Templates allow you to use the same overall design for every page, and will also make the task of implementing and then changing that overall design much simpler.
A template is a record in the Page register that is not directly connected to a Structure record. The template will be a list of the Elements that are to appear by default on every web page. You can place these Elements in the "HTML Head", "Before" and "After" Rel. Positions. Elements in the "HTML Head" Rel. Position will be used in the <head> section of each page, while Elements in the "Before" and "After" Rel. Positions will be used in the <body> section of each page in this order:
- "Before" Element(s) from the Template
- Element(s) from Page record
- "After" Element(s) from the Template
If you have also specified a header and footer in the Sites setting, the Elements will be used in this order:
- Header Element from the Sites setting
- ""Before" Element(s) from the Template
- "Element(s) from Page record
- ""After" Element(s) from the Template
- "Footer Element from the Sites setting
To use templates, follow these steps.
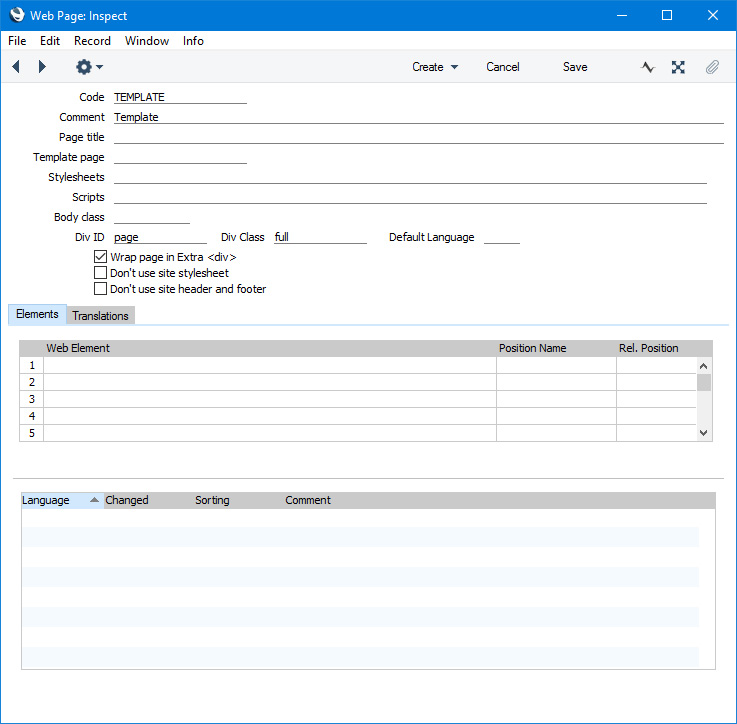
- Create a record in the Page register to represent the template:
- Create the Elements and connected Translations as appropriate. In this example, we will create an Element with a Translation that will display the company logo that will also act as a link to the home page. You can do this in two ways:
- You can add an Element whose Type is "Plain HTML" and include the link and the image in the Translation:
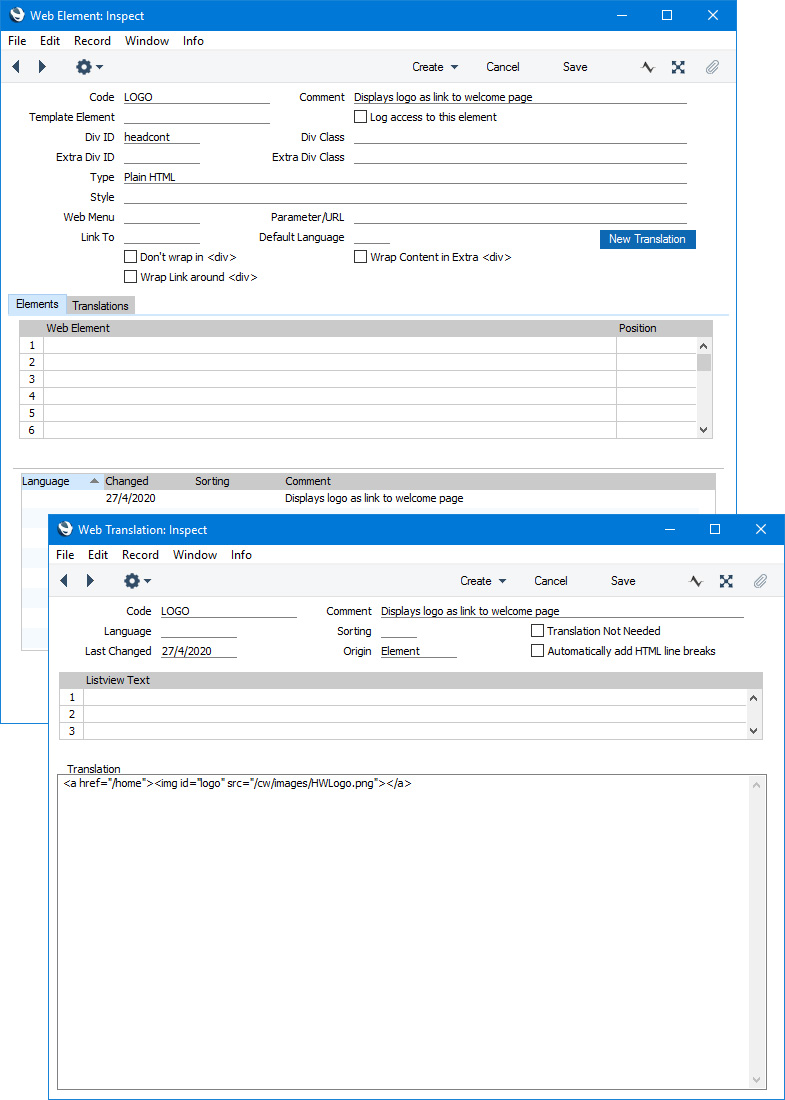
In this example, the anchor for the home page is a relative path:
- /home
Where "home" is the Web structure name in the Structure record for the home page. It would also be possible to use an absolute path http://server_ip_address:Web Port/Web_structure_name or http://domainname/Web_structure_name but you would probably need to change it between testing and going live.
We have also used a relative path to refer to the image file for the logo:
- /cw/images/HWLogo.png
To be able to use a relative path, the image file for the logo must be stored in the "webcust" folder in the folder containing the Standard ERP server application. In this case, the path to the logo file is server_folder/webcust/cw/images/HWLogo.png.
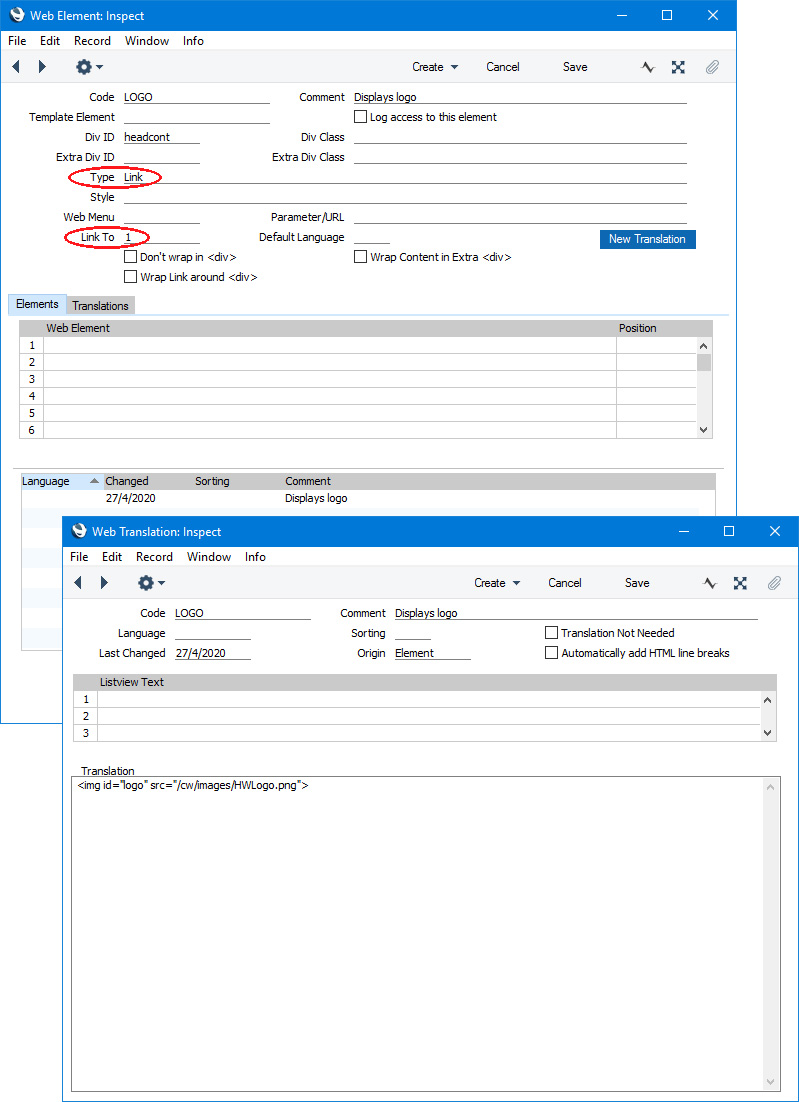
- You can add an Element whose Type is "Link". In this case, you only need include the image in the Translation (using a relative or absolute path), and you can use the following methods to specify where the link is to take browser users:
- Enter the Code of a Structure record in the Link To field (as shown in the illustration below).
Using this method you can specify whether the link will be inside the Element <div> (and Extra <div> if there is one) or whether the link will be wrapped around the <div>. By default, the link will be inside the Element <div>:
- <div id="div_id" class="div_class">
- <a href="/Web_structure_name">Link text</a>
- </div>
If you select the Wrap Link around <div> option, the link will be wrapped around the <div>:
- <a href="/Web_structure_name">
- <div id="div_id" class="div_class">Link text</div>
- </a>
- Enter the Web structure name of a Structure record in the Parameter/URL field. You can use a relative path (e.g. /home) or an absolute path (e.g. http://server_ip_address:Web Port/Web_structure_name or http://domainname/Web_structure_name).
- Enter an external web address in the Parameter/URL field. Include the http:// or https:// otherwise it will be assumed to be a relative path.
- If you need to link to an image or PDF file, enter the path to that image file or PDF in the Parameter/URL field. Please refer here for more details about this option.
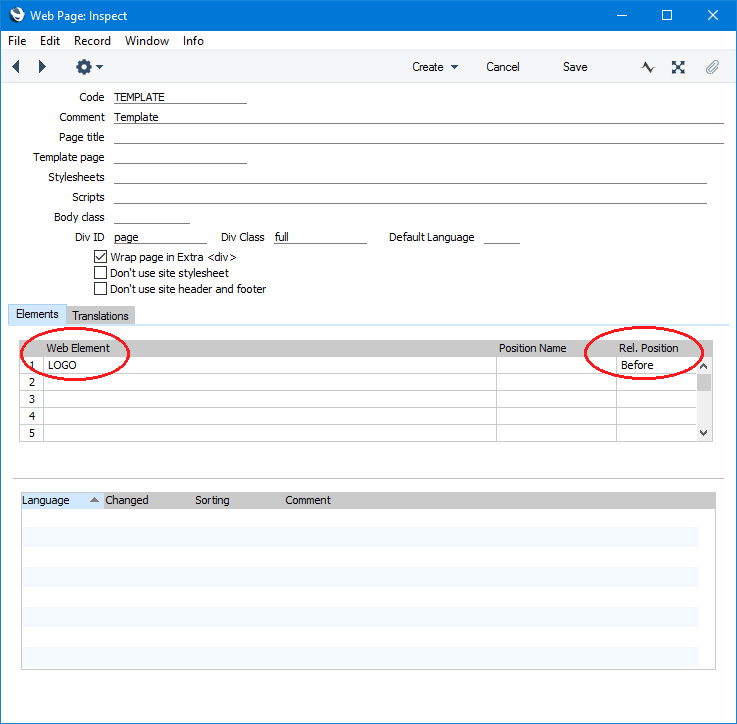
- In both cases, list the Element in the template Page record:
- In each Page record, specify the template in the Template page field:
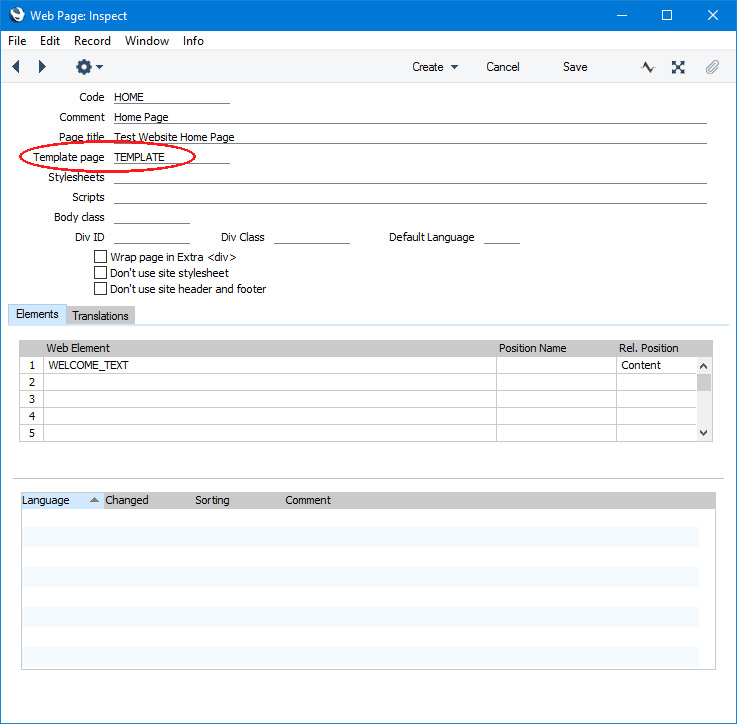
Note that in the "HOME" Page, the "WELCOME_TEXT" Element is in the "Content" Rel. Position, while in the "TEMPLATE" Page, the "LOGO" Element is in the "Before" Rel. Position. In effect, the template sets the default for the content of each Rel. Position, and the Page will override that default (with the exception of the "HTML Head" Rel. Position, see step 6 below). So, if we had set the "WELCOME_TEXT" Element as "Before", the logo would not be printed because the "WELCOME_TEXT" Element would override all the "Before" Elements in the template. Note too that a template can itself be based on a template: this would establish two levels of overrideable defaults for each Rel. Position. As the logo should always be displayed (i.e. in the same position on every page), you should therefore take care to ensure that you do not add "Before" Elements to any of the top-level Pages. An alternative would be to place the logo in the overall header Element where it can not be overridden.
Note too that you can specify stylesheets and scripts in a template Page. Again these are defaults that will be used by each Page. If you specify stylesheets and scripts in an individual Page record, the template stylesheets and scripts will not be used with that Page.
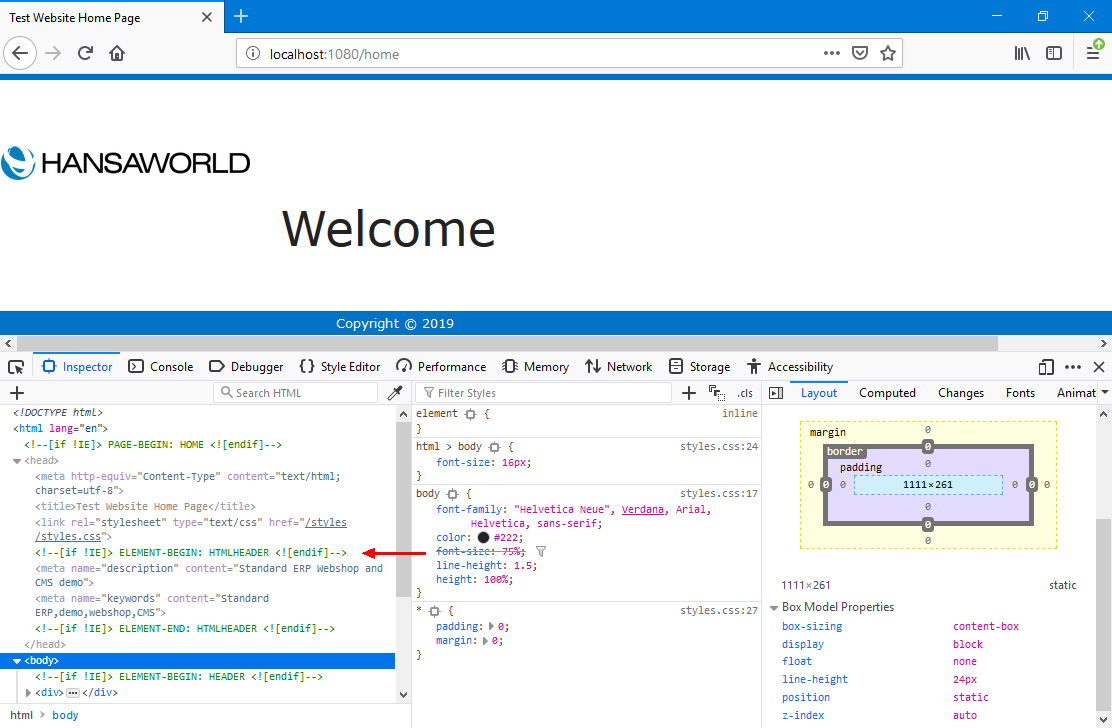
- This is the result in a browser:
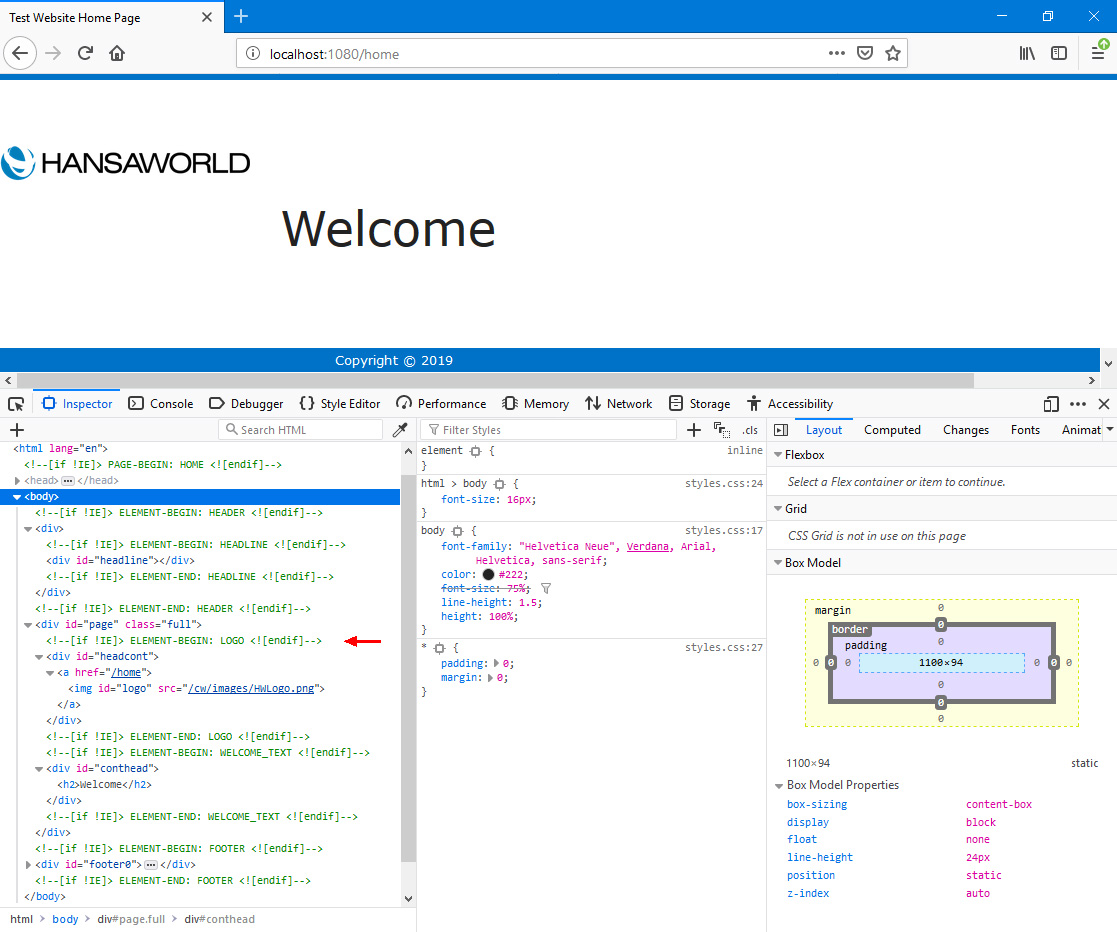
In this illustration, the following <div> attributes are user-assigned (i.e. you can assign different attributes or choose not to assign attributes at all):
- id="headline" (specified in the "HEADLINE" Element)
- id="page" class="full" (specified in the "TEMPLATE" Page) (note that this <div> wraps both the "LOGO" Element from the template and the "WELCOME_TEXT" Element from the main Page)
- id="headcont" (specified in the "LOGO" Element)
- id="conthead" (specified in the "WELCOME_TEXT" Element)
- id="footer0" (specified in the "FOOTER" Element)
- You can use a template to add meta tags to the <head> section of every page. To do this, first create an Element and connected Translation. The Translation should contain the meta tags:
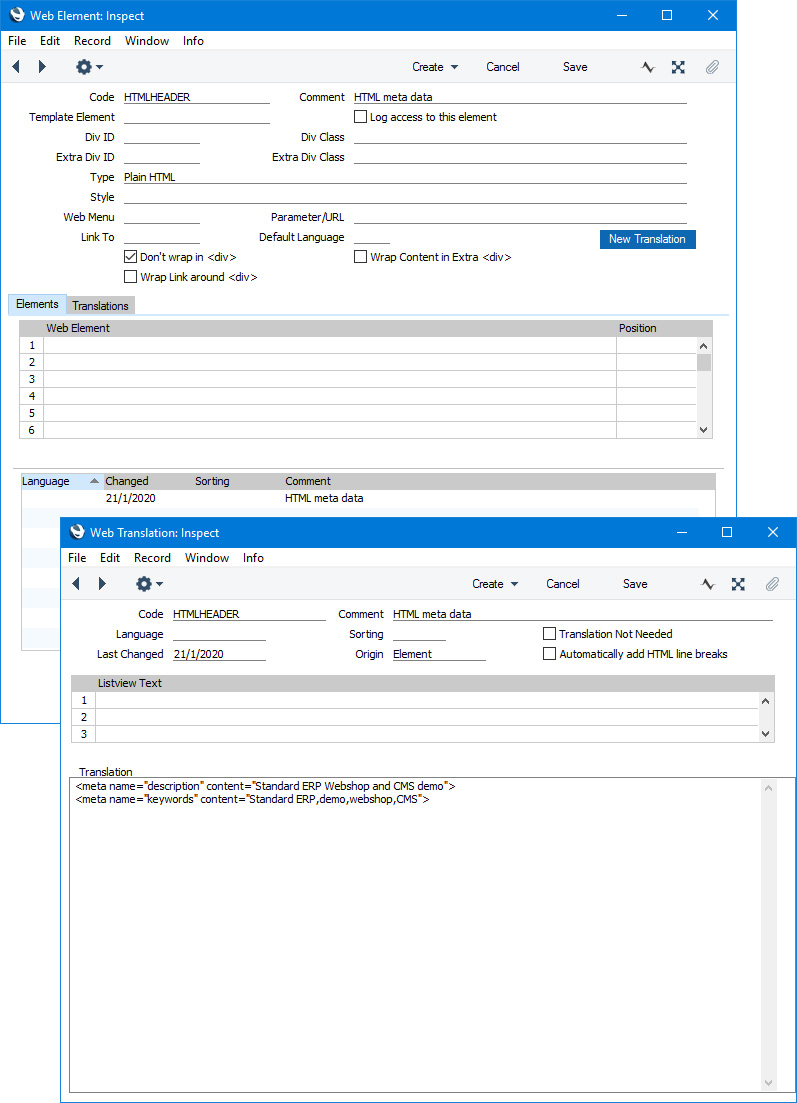
As shown in the illustration, you must select the Don't wrap in <div> option in Elements that are to contribute to the <head> section of every page, and you must deselect the Automatically add HTML line breaks option in the connected Translations.
Add the Element to the list of Elements in the template Page record. Specify "HTML Head" as the Rel. Position:
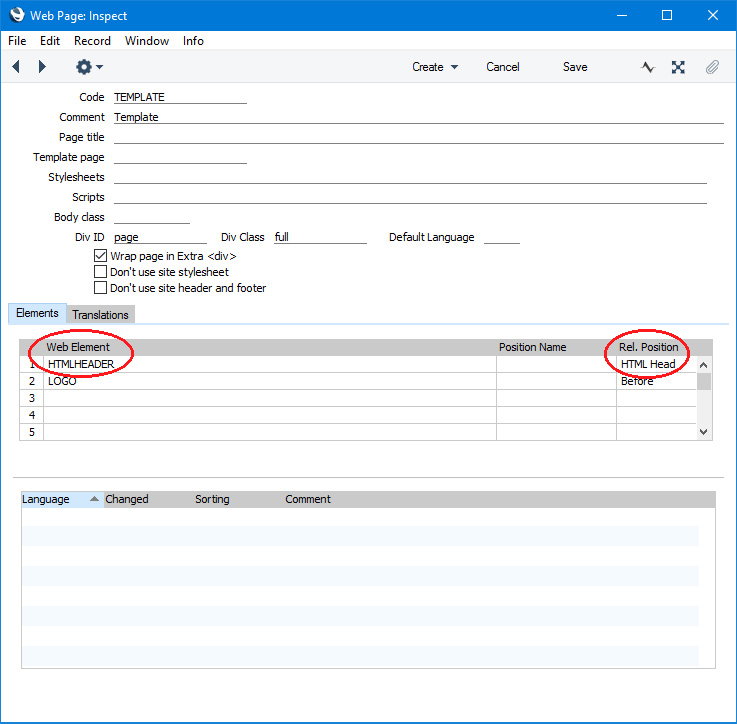
The meta tags will be placed in the <head> section of every page:
It was mentioned in step 4 that the template sets the default for the content of each Rel. Position, and that the Page will override that default. This is not the case for the "HTML Head" Rel. Position. If you place Elements in the "HTML Head" Rel. Position both in a particular Page and in the template, both Elements will contribute to the <head> section of the page.
If you need a list of Pages that use a particular template or of Pages that do not use a particular template, produce a Used Web Pages report for the template.
---
Building a web page in Standard ERP:
Go back to: