Building a Web Page - Adding a Page to the Structure or Node
This page describes adding a Page to a Structure or Node, one of the steps to be followed when building a web page. Please refer to the following pages for details about each step in this process:
Notes:
- The terms "Page" and "Web Page" in the application and in this documentation both refer to records in the Page register and are interchangeable. The terms "page" and "web page" (lowercase) refer more generally to a page in a browser i.e. it is what you will construct using a Structure, a Page, one or more Elements and text, images and other content.
- All the settings and registers mentioned are located in the Webshop and CMS module unless otherwise specified.
---
A Page is a list of the Elements that you need to appear on a web page. You can add a Page to a Structure or Node using the following methods:
- Open the Page register and add a new record. After saving, return to the Structure record and use 'Paste Special' from the Web Page field to select the new Page record. Save the Structure record to confirm the link.
- Working from the Structure record, open 'Paste Special' from the Web Page field and press [New]. After creating the new Page and saving, the Page window will be closed and you will be returned to the Structure record. The Code of the new Page will have been entered in the Web Page field automatically. Save the Structure record to confirm the link.
- When creating a new Structure record, you can specify a Web Page that doesn't yet exist. You can then go on to create the Web Page ensuring that you use the same spelling for the Code.
You can re-open the Page record from the Structure record at any time, by placing the insertion point in the Web Page field and using the F2 (Windows) or ⌘-Shift-V (macOS) keyboard shortcuts.
When creating a new Page, fill in the following fields:
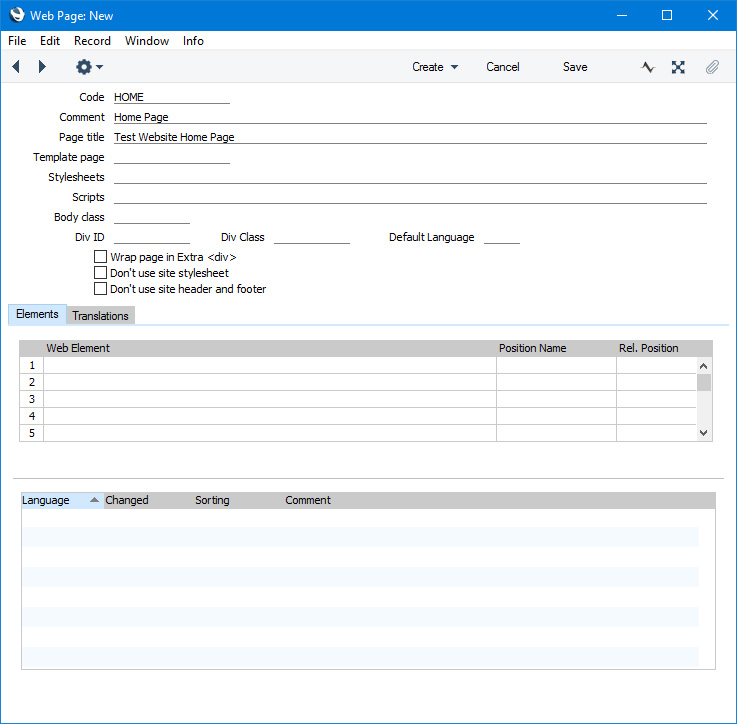
- Code
- As well as being a unique identifier for the Page, the Code can be a brief description of the Page. This will help with the management of complex websites.
- Comment
- Enter a name for the Page record, to be shown in the 'Web Pages: Browse' window and the 'Paste Special' list.
- Page Title
- Enter the title of the Page, to appear in the browser tab or title bar of the browser window.
- Depending on the Title Mode option that you have chosen on flip B of the Sites setting, the Page Title can be used instead of or together with the Site Title on flip A of the same setting.
- Stylesheet
- If you want the Page to use a dedicated stylesheet, specify here where that stylesheet file is located. You can specify more than one stylesheet, separated by commas.
- If you need this stylesheet to be used instead of the default stylesheet specified in the Sites setting, tick the Don't use site stylesheet option below. If you do not tick this option, the two stylesheets will be used in combination with this stylesheet being given priority in the event of any conflicts.
- It is recommended that you store the stylesheet file in the "webcust" folder that should be located in the folder containing your Standard ERP application. If so, you can use a relative path to refer to the stylesheet file: /styles/styles.css. In this case, the stylesheet file is named "styles.css" and it is located in a folder named "styles" that is inside the "webcust" folder.
- If you do not want to store the stylesheet file in the "webcust" folder, you will need to attach it to a Structure or Node whose Type is "Folder". Please refer here for details.
- Script
- If you want the Page to be constructed using a JavaScript file, specify here where the file is located. You can specify more than one script, separated by commas.
- Use this field in the same way as the Stylesheet field described above, with the exception that the Don't use site stylesheet option doesn't apply as it is not possible to specify a default script in the Sites setting.
- Body Class
- As an option you can use this field to assign a Class to the entire <body> of the page. The result will be as follows:
- <body class="class_name_from_this_field">
- ...
- </body>
- Wrap page in Extra <div>, Div ID, Div Class
- If you need to wrap the contents of the page in a <div>, select the Wrap page in Extra <div> option. The result will be as follows:
- <body>
- <div>
- ...
- </div>
</body>
Use the Div ID and/or Div Class fields if you then need to assign an ID and/or Class to the new <div>:
- <body>
- <div id="div_id" class="div_class ">
- ...
- </div>
- </body>
- Specifying a Div ID or Div Class will have no effect if you have not selected the Wrap page in Extra <div> option.
After creating a Page, the next step in building a web page is to add Elements to the Page. Please refer
here for details.
---
Building a web page in Standard ERP:
Go back to: