POS Button Types in Bar Tabs - Personnel Functions
This page describes the following POS Button Types in Bar Tabs:
- Change User
- Sales Assistant
- Select Waiter
Please refer
here for an index of all POS Button Types.
---
Change User
- Function
- Allows a new waiter or member of bar staff to log in.
- Workflow
- Click or touch the "Change User" button.
- The Bar Tab that is currently on screen will be saved and closed, you will be logged out and the 'Login' window will be opened, ready for the next waiter or member of bar staff.
- Note
- By default, every waiter and member of bar staff will be able to use the "Change User" button to log out and to leave the 'Login' window on screen waiting for the next waiter or member of bar staff. If you want to prevent particular waiters or members of bar staff from using the "Change User" button, assign them to an Access Group in which you have denied access to the 'Logout on Touch Screen Invoice' Action.
Sales Assistant
- Function
- Adds a line to a Bar Tab acknowledging the help of a Sales Assistant. Used when a Sales Assistant helps a Customer to choose an Item.
- Workflow
- Before adding the Item for which the Sales Assistant is to be credited, click or touch the "Sales Assistant" button.
- The 'Sales Assistant' window will appear:
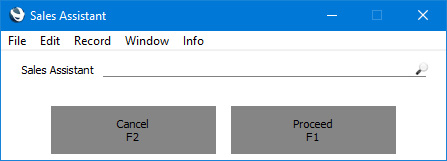
- Choose a Sales Assistant using 'Paste Special, enter their Signature using the keypad or scan their ID card.
'Paste Special' will list Persons and Global Users.
You can choose a Sales Assistant that does not have a record in the Person or Global User registers.
- Click or touch [Proceed] to add the Sales Assistant's name to the Bar Tab, or click [Cancel] to leave the Bar Tab unchanged.
- Add the Item for which the Sales Assistant is to be credited.
- Notes
- A line will be added to the Bar Tab below the last Item, containing the text "Assisted by: " and the Signature or name of the Sales Assistant (as chosen by the waiter or member of bar staff).
Select Waiter
- Function
- Changes the waiter in a Bar Tab.
- Workflow
- Click or touch the "Select Waiter" button.
- The 'Select Waiter' window will appear:
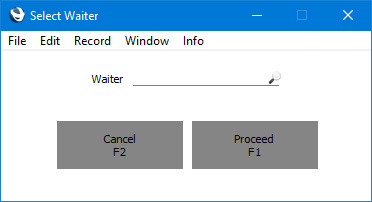
- Enter the Signature of the waiter, using 'Paste Special' if necessary, or scan their ID card. The waiter must have their own record in the Person register.
- Click or touch [Proceed] to add the waiter to the Bar Tab, or click [Cancel] to leave the Bar Tab unchanged.
- Note
- If you are using the Force Sequence option in the Restaurant Settings setting, the 'Select Waiter' window will open automatically whenever you create or open a Bar Tab. The Force Sequence option will also mean that you will be asked to specify a Table and then a number of covers after using the "Select Waiter" button to change the waiter in a Bar Tab.
---
Configuring the Bar Tab Window:
Go back to: