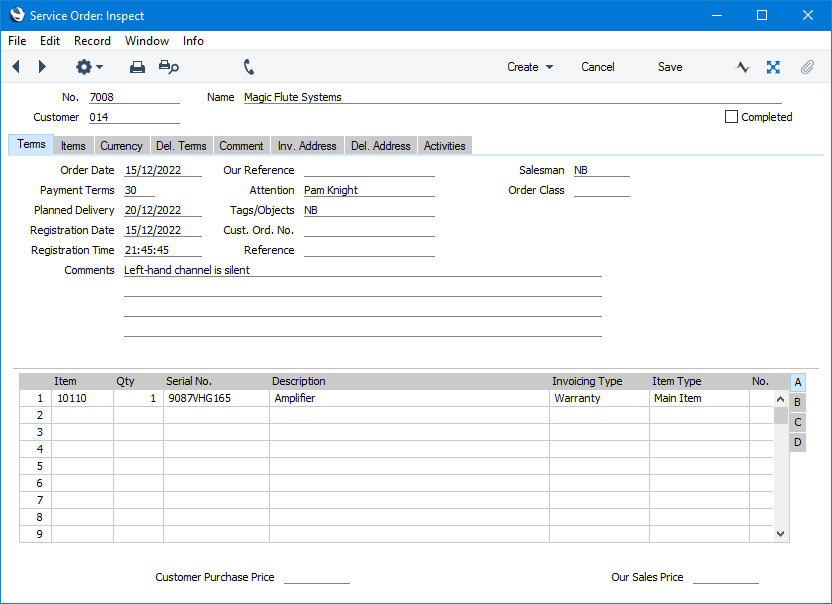
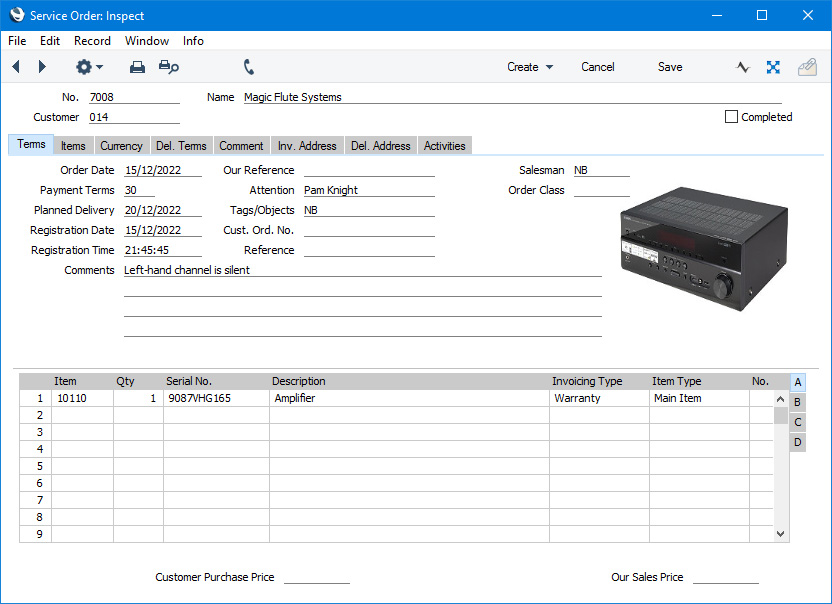
Entering a Service Order - Terms Card
This page describes the fields on the 'Terms' card in the Service Order record window. Please follow the links below for descriptions of the other cards:
---
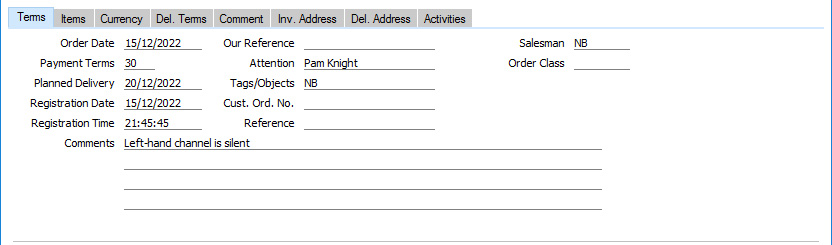
- Order Date
- Paste Special
Choose date
- The date of the Service Order: the current date will be entered as a default.
- Payment Terms
- Paste Special
Payment Terms setting, Sales/Purchase Ledger
- Default taken from Contact record for the Customer (Sales Pay. Terms)
- The Payment Term that you enter here will be transferred to any Invoices raised from the Service Order. This will ensure that the correct Payment Terms will be printed on Invoice documentation (in the Language of the Customer if necessary) . The Payment Term will also be used to calculate the Due Date in the Invoice(s). You can also use Payment Terms to configure a system of early settlement discounts.
- Planned Delivery
- Paste Special
Choose date
- The date on which the Items on the Service Order are scheduled to be returned to the Customer. Enter this date using the format specified in the Planned Delivery setting, which is located in the Service Orders and Sales Orders modules. Available options are free text, date, week number or year-week (4 characters). The Planned Delivery date will be passed to the Deadline field in any Work Orders that you create from the Service Order, to make technicians aware of the date by which the Customer is expecting the return of the equipment.
- Registration Date, Registration Time
- These fields will be filled in automatically when you save a Service Order for the first time, so they record the date and time when a Service Order was added to your Standard ERP database. They are read-only fields.
- Comments
- Default taken from
Contact record for the Customer (Order Comment)
- Use these fields to record any notes about the Service Order such as detailed information about the fault.
- These Comments will be copied to all Work Orders, Work Sheets and Service Stock Transactions that you create from the Service Order. If you need them to be included in documentation that you print from those records, add the "Comment 2" field (in the case of the Service Order) or the "Comment" field (in the other cases) to your Form Template designs.
- The first line of the Comment will also be copied to the Text field in Activities that you create from the Service Order.
- These Comments will be included in the Service Order Status report and the Detailed version of the Outstanding Service Orders report.
- You can record further comments and notes about individual Serial Numbered Items using the Serial Number Text setting. These comments will also appear in the Service Order Status report.
- Our Reference
- Use this field if you need to identify the Service Order by means other than the Order Number. This Reference will be transferred to any Work Orders generated from the Service Order. A default will be taken from the Our Ref field on the 'Sales' card of the Person record of the current user.
- Attention
- Paste Special
Contact Persons in the Contact register
- Default taken from Contact record for the Customer (Primary Contact)
- Record here the name of your contact in the Customer company, for whose attention any paperwork is to be marked. This name will be transferred to all records that you create from the Service Order (e.g. Work Orders, Work Sheets, Service Stock Transactions, Invoices, etc). The 'Paste Special' function will only list Contact Persons belonging to the specified Customer.
- Tags/Objects
- Paste Special
Tag/Object register, Nominal Ledger/System module
- Default taken from Contact record for the Customer (Sales Tags/Objects) and Salesman
- You can assign up to 20 Tags/Objects, separated by commas, to a Service Order and all transactions generated from it. You might define separate Tags/Objects to represent different departments, cost centres or product types. This provides a flexible method of analysis that can be used in Nominal Ledger reports.
- The Tags/Objects specified here will be copied to the Tags/Objects field on the 'Date' card in each Work Sheet created from the Service Order. In the Nominal Ledger Transactions generated from those Work Sheets, these Tags/Objects will be assigned to the debit posting to the Stock Cost Account.
- If you have not selected the Work Sheet Tag/Object on Invoice option in the Account Usage Service Order setting, the Tags/Objects specified here will also be copied to the Tags/Objects field on the 'Terms' card in each Invoice raised from the Service Order. In the Nominal Ledger Transactions generated from those Invoices, these Tags/Objects will be assigned to the credit posting to the Sales Account, to the debit posting to the Cost Account (if you posting Cost of Sales from Invoices) and to the debit posting to the Debtor Account (if you are using the Tags/Objects on Debtors A/C option in the Account Usage S/L setting).
- If you have selected the Work Sheet Tag/Object on Invoice option, the Tags/Objects specified here will not be copied directly to Invoices. Instead, the Tags/Objects in Work Sheets (which by default will have been copied from the Service Order) will be copied to the relevant Invoice rows. From there, they will be will be assigned to the credit postings to the Sales Accounts in the resulting Nominal Ledger Transactions.
- Cust. Ord. No.
- Record the Customer's Purchase Order Number here. It will be included on documentation printed from the Service Order providing you have included the "Customer Order Number" field in your Form Template design, and will be transferred to Work Orders and Invoices that you create from the Service Order.
- Reference
- Record here any additional code by which the Service Order can be identified. This is for information only.
- Salesman
- Paste Special
Person register, System module and Global User register, Technics module
- Default taken from Contact record for the Customer or current user
- Enter the Signature of the Salesman responsible for the Service Order here.
- Generating an Activity from the Service Order using the 'Workflow Activity' function on the Create menu (Windows/macOS) or + menu (iOS/Android) will place a reminder in the Salesman's Task Manager to call the Customer on the Planned Delivery Date.
- As you create Activities from a Service Order, they will be added to the list on the 'Activities' card. You can open Activities from this card by double-clicking (Windows/macOS) or tapping (iOS/Android). You can also use the Workflow Manager in the Service Order to see and open the connected Activities.
- This field is also used by the Limited Access feature: please refer to the description of the Sales Group field on the 'Del. Terms' card for details.
- Order Class
- Paste Special
Order Classes setting, Service Orders/Sales Orders module
- Enter the Order Class for the Service Order (if any). Order Classes allow you to categorise Service Orders for reporting or prioritising.
- If you are using the Workflow Overview to monitor the progress of Service Orders, you will be able to display the Service Orders belonging to each Class in separate columns.
- Picture, Add Picture
- You can attach pictures to Service Orders. Follow these steps:
- Open the record in question. The record must already have been saved at least once (i.e. the window title must be 'Inspect' or 'Update').
- Click the [Document Manager] button (in the top right-hand corner with the paper clip icon) or select 'Attachments' from the Record menu. A list of objects currently attached to the record is opened.
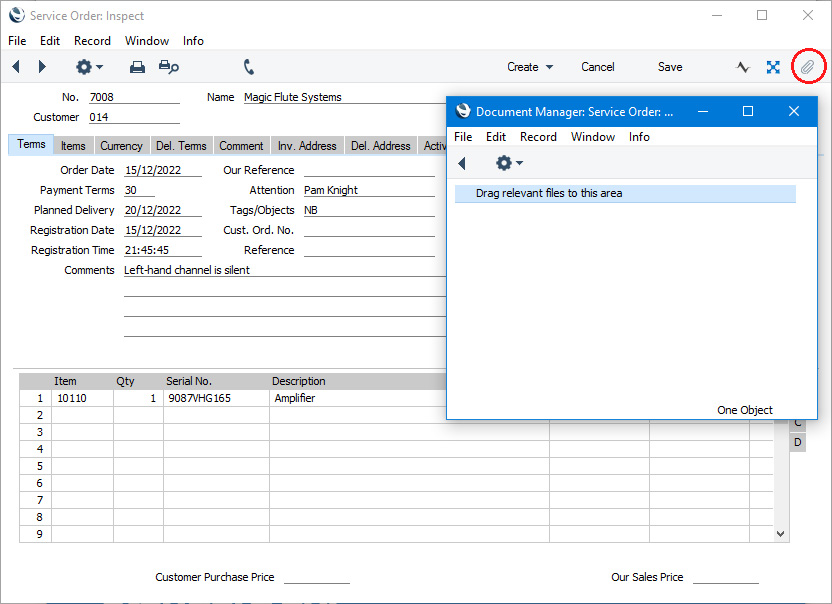
- The image must be a .jpg file (or a .png file if you are using macOS). Pictures larger than 280 x 280 pixels will be scaled. Drag the image file from the desktop to the list, or choose 'Attach File' from the Operations menu of this list.
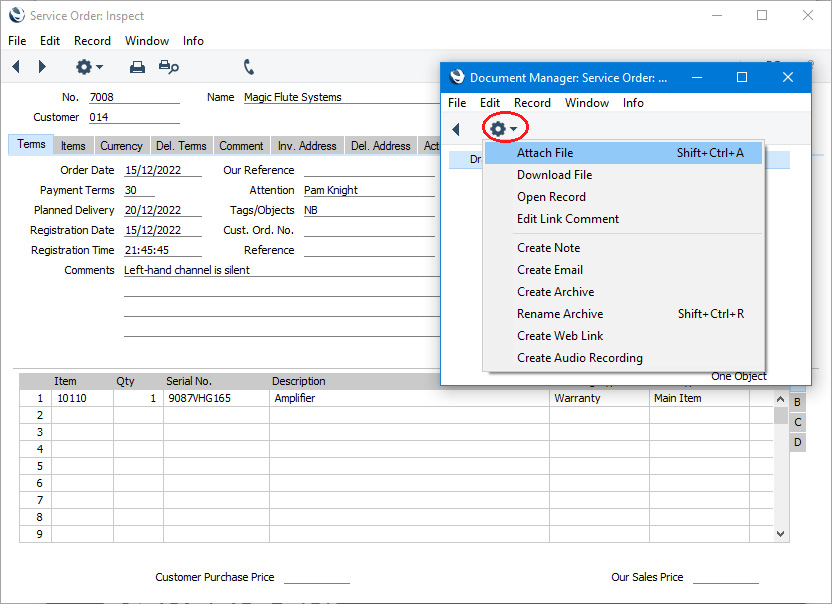
Locate the picture file on your hard disk and click [Open]. The picture will be attached to the record. It must be a .jpg file (or a .png file if you are using macOS). Pictures larger than 280 x 280 pixels will be scaled.
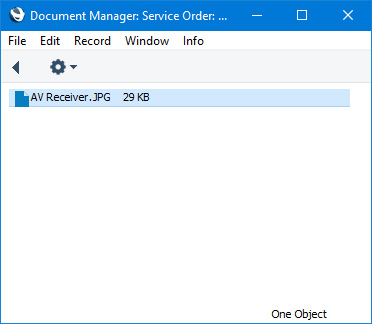
- After you have dragged or uploaded the image file to the list of attachments, you may need to close and reopen the record to see the picture:
- In the macOS version of Standard ERP, you can attach pictures to Person records as described above, but you can also use the [Add picture] button underneath the picture field:
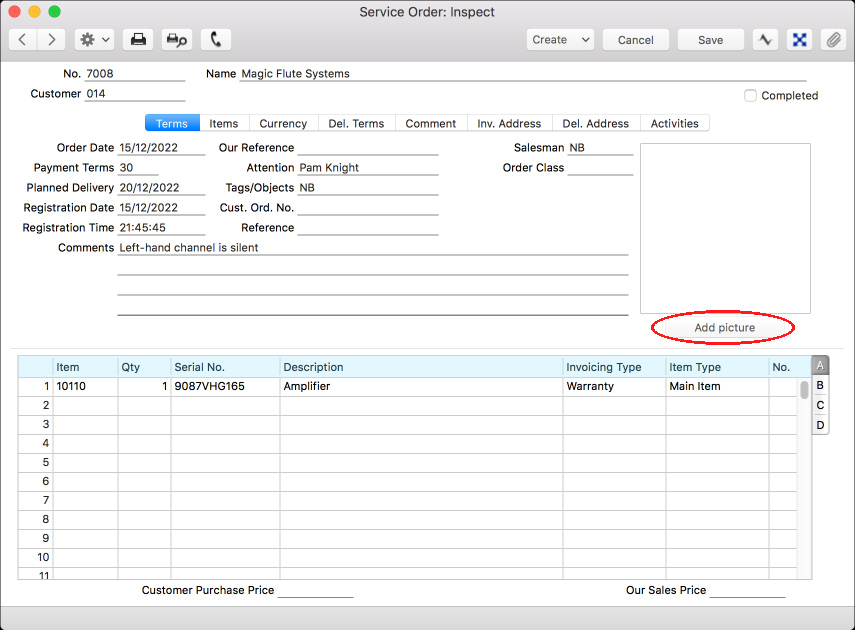
When you click this button, the 'Edit Picture' window opens:
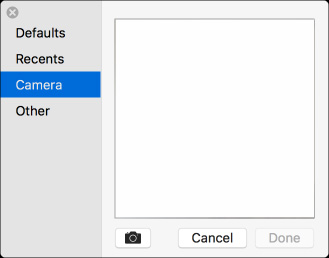
If the picture is already on your hard disk, click the [Other] button to locate it. Alternatively, click the button with the camera icon to take a photograph of the Item(s) on the Service Order using your device's camera.
- In both cases you can then scale the picture using the slider and, if the picture is too big, move the picture by dragging so that the part you need is in the centre of the frame (the part outside the frame will be cropped).
- Finally, click the [Done] button to add the picture to the Item. The picture will be converted to .PNG format and will appear in the Document Manager with the name "image.png":

---
The Service Order register in Standard ERP:
Go back to:
|