Entering a Work Sheet
You will use Work Sheets to register the time spent and the spare parts used in a repair.
You can enter Work Sheets using the following methods:
- Open the 'Work Sheets: Browse' window and select 'New' from the Create menu (Windows/macOS) or + menu (iOS/Android) to open a new Work Sheet. If you use this method, be sure to specify a Service Order Number and/or a Work Order Number in the new Work Sheet before saving.
- Open the Work Order that represents the work you are carrying out and select 'Work Sheet' from the Create menu (Windows/macOS) or + menu (iOS/Android). A new Work Sheet will be created. The advantage of using this method is that it ensures each Work Sheet will be linked to the correct Work Order and from there to the originating Service Order automatically, ensuring the work will be included in the invoicing process.
- If you are not using Work Orders, you can create Work Sheets from Service Orders. Open the relevant Service Order and select 'Work Sheet' from the Create or + menu. A new Work Sheet will be created. The new Work Sheet will be linked to the correct Service Order automatically.
- If you have quoted for the work you are about to carry out, you can create a Work Sheet from the relevant Quotation. Open the relevant Quotation and select 'Work Sheet' from the Create or + menu. Again, the new Work Sheet will be linked to the correct Service Order automatically.
Note that a Work Sheet created from a Work Order, Service Order or Quotation will be presented in a 'Work Sheet: Inspect' window. This means that the record will already have been created and saved into the register. To delete it you must choose 'Delete' from the Record menu (which has a 'cog' icon if you are using iOS or Android).
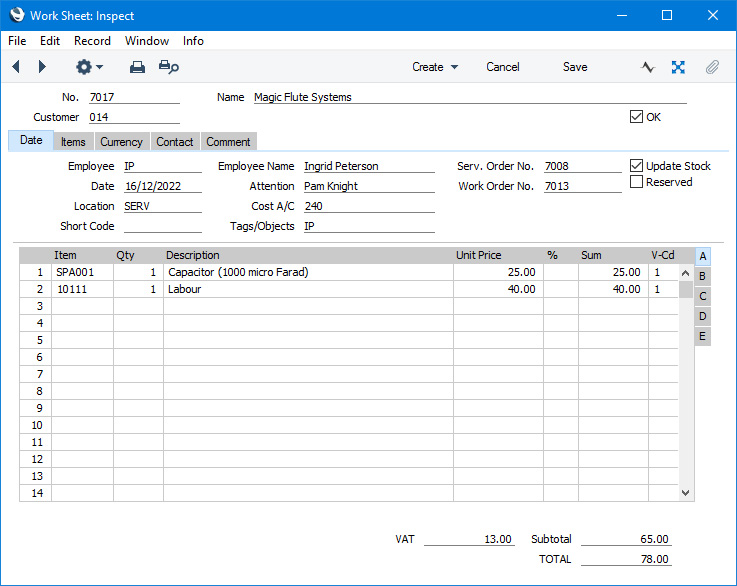
Since the amount of information stored about each Work Sheet will not fit on a single screen, the Work Sheet window has been divided into five cards. At the top of each is the header. This contains the Work Sheet Number, the Customer Number and Name, and the OK check box. There are five named buttons ('tabs') in the header.

By clicking the tabs you can navigate between cards. The header is always visible, as a reminder of the Work Sheet you are working with.
If you are using iOS or Android, there will only be two tabs, marked 'Items' and 'Details'. If you tap 'Details', you will see every card except 'Items' arranged vertically on screen. You can scroll down to see each one, or you can jump to any card by tapping on any tab and selecting the tab you want to go to.
After entering a Work Sheet, you can proceed as follows:
- List the Items for labour and any spare parts that you will use or have used on the 'Items' card. In a Work Sheet created from a Quotation, the labour and spare parts will be copied to the Work Sheet from the Quotation.
- If necessary, create Purchase Orders for any spare parts or other Items that you do not have in stock. You can do this from an individual Work Sheet or from the originating Work Order. When the spare parts arrive, create Goods Receipts and Purchase Invoices from the Purchase Orders in the usual way.
- When you have finished the repair, mark the Work Sheet as OK and save. This will cause the spare parts to be removed from stock and Work Sheet Transactions to be created. The Work Sheet Transactions will be used to construct the Invoice.
- From the Service Order, create the Invoice for the repair.
- Return the repaired Item to the Customer using a Service Stock Transaction and/or an Items Out record.
- Mark the Service Order as Completed.
Please refer to the following pages for details about the fields on each card in the Work Sheet window:
---
The Work Sheet register in Standard ERP:
Go back to: