Entering an Item
To work with Items, use the [Module] button in the Master Control panel to enter the Receivables module and click the [Items] button, also in the Master Control panel. The 'Items: Browse' window will be opened, listing of the Items you have already entered. To create a new Item, click the [New] button above the list or use the ⌘-N (Mac OS X) or Ctrl-N (Windows) keyboard shortcut. Alternatively, highlight an Item similar to the one you want to enter and click [Duplicate] (or use ⌘-Y or Ctrl-K).

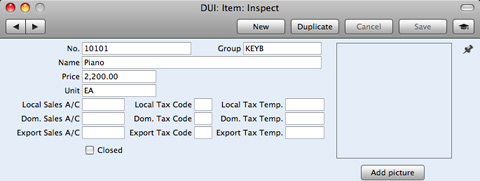
The 'Item: New' window will open, empty if you clicked [New] or containing a duplicate of the highlighted record. Complete the Item record as appropriate and as described below, then save it using the [Save] button and close the window by clicking the close box. Then, close the browse window using the close box again.
The Item window contains the following fields:
- No.
- Enter the unique identification code you are assigning to this Item. This is the means by which you will identify the Item when including it in Invoices. The field holds up to 20 characters. Once you have saved the Item record, you will not be able to change the Item Number.
- Group
- Paste Special
Item Groups setting, Receivables module
- Enter the Item Group to which this Item belongs. Item Groups enable you to classify similar Items together.
- Name
- Enter the name or a short description of the Item.
- Price
- Used as default in
Sales Invoices
- Enter the normal sales price for the Item here.
- Unit
- Specify here the quantity to which the Price refers. In the majority of cases, this will be a single item, but otherwise it might be a pair or a dozen.
- Sales A/C
- Paste Special
Account register, General Ledger/System module
- A Sales Account will be credited whenever you sell the Item, allowing you to record the levels of sales of different types of Items in the General Ledger. The default Sales Account will be chosen in this order:
- If the Customer has a Price List and there is a record in the Price register for the Item/Price List combination, the Sales Account will be taken from that Price record.
- It will be taken from these fields in the Item record.
- The Sales Account in the Account Usage A/R setting will be used.
In the cases of points 2 and 3, the choice of Sales Account will depend on the Tax Zone of the Customer (specified on the 'Account' card of the Contact record for the Customer).
- Sales Tax Code
- Paste Special
Tax Codes setting, General Ledger
- The Tax Code will determine the Output Tax Account to be credited whenever you sell the Item and the rate at which Tax will be charged. The default Tax Code will be chosen in this order:
- The Sales Tax Code for the Customer will be used.
- It will be taken from these fields in the Item record.
- The Tax Code in the Account Usage A/R setting will be used.
In the cases of points 2 and 3, the correct Tax Code for the Tax Zone of the Customer will be used.
- You will be able to override the choice of Tax Code in an individual Invoice row if necessary.
- Closed
- Check this box if the Item is no longer to be used (you cannot delete an Item altogether if you have used it in an Invoice). Closed Items will appear in the 'Items: Browse' window but not in the Items 'Paste Special' list. You will not be able to use a closed Item in Invoices. You can re-open a closed Item at any time.
- Picture, [Add picture]
- You can attach pictures to records in the Item register. Follow these steps:
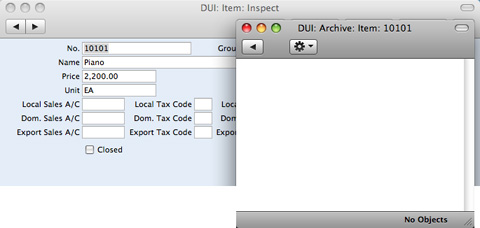
- Open the record in question. The record must already have been saved at least once (i.e. the window title must be 'Inspect' or 'Update').
- Click the [Attachments] button (with the drawing pin icon). A list of objects currently attached to the record is opened.
- Choose 'Attach File' from the Operations menu of this list.
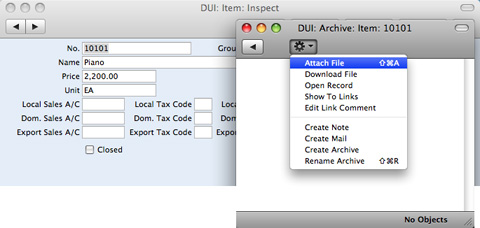
- Locate the picture file on your hard disk and click [Open]. The picture will be attached to the record. It must be a .jpg file. The maximum picture size is 280 x 280 pixels: larger pictures will be cropped.
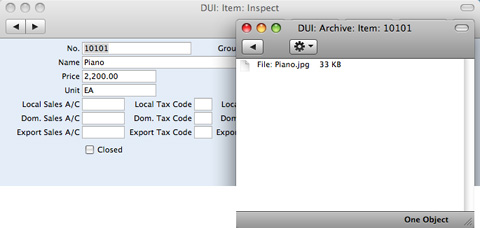
- After the picture file has uploaded, you may need to close and reopen the record to see the picture:
In the Mac OS X version of Books by HansaWorld, you can attach pictures to Item records as described above, but you can also use the [Add picture] button underneath the picture field. When you click this button, the 'Buddy Picture' window opens:
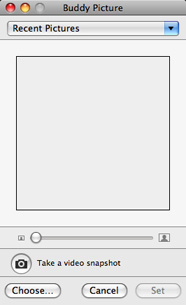
If the picture is already on your hard disk, click the [Choose] button to locate it. The maximum picture size is 280 x 280 pixels: larger pictures will be cropped.
- Alternatively, click the button with the camera icon marked 'Take a video snapshot' to take a photograph of the Item using your computer's camera.
- In both cases you can then scale the picture using the slider and, if the picture is too big, move the picture by dragging so that the part you need is in the center of the frame (the part outside the frame will be cropped).
- Finally, click the [Set] button to add the picture to the Item.
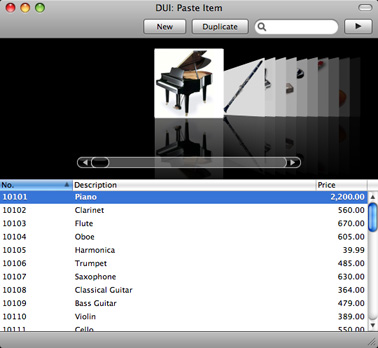
- When you use 'Paste Special' to add Items to Invoices and if you are using Mac OS X, the Item pictures will appear above the 'Paste Special' list to help you choose the correct one:
---
In this chapter:
Go back to: