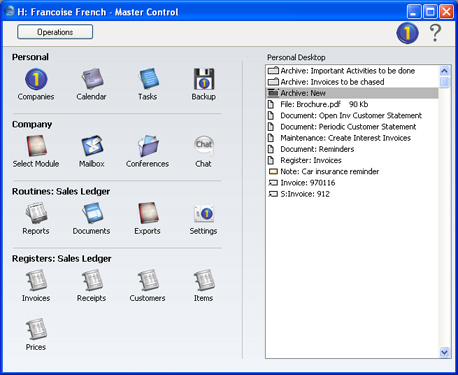
Personal Desktop - Organising Items in your Personal Desktop: Archives
When you have many items in your Personal Desktop, you can organise them into Archives. An Archive is a folder that can contain Attachments of all kinds, including other Archives.
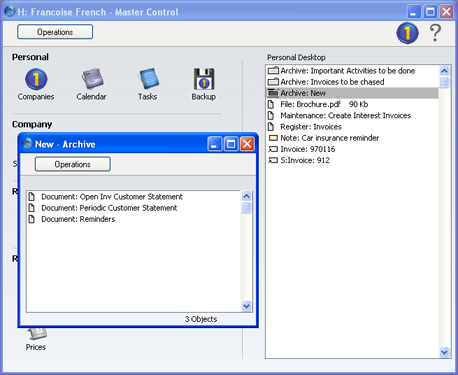
- Bring the Master Control Panel to the front by clicking on it, by using the Ctrl-M/⌘-M keyboard shortcut or by selecting 'Master Control' from the File menu.
- Select 'Create Archive' from the Operations menu. A new Archive will appear towards the top of the Personal Desktop, named "Archive: New".
- Move the relevant items into the Archive by dragging and dropping onto "Archive: New".
- If you want to work with an item that is in an Archive, double-click the Archive. A new window is opened, listing the items that are in the Archive. This window has the same properties, features and functions as a list of Attachments, so you can work with it in the manner described on the Organising Attachments page.
- If you want to rename the Archive, first open it as described in step 4 above and then select 'Rename Archive' from the Operations menu.
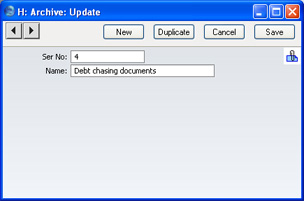
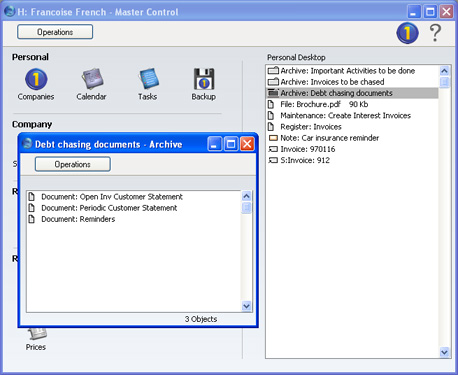
Enter the new Name of the Archive and click [Save]. The new name will replace the text "New," both in the title bar of the Archive and in the Personal Desktop:
- You can remove an item from an Archive in one of two ways. First, you can drag it to the Personal Desktop or to another Archive. Otherwise, to remove the item altogether, click on it and select 'Clear' from the Edit menu.
- To remove an Archive, click on it in the Personal Desktop and select 'Clear' from the Edit menu. You can only remove empty Archives. To empty an Archive, you must remove its contents item by item as described in step 6 above.