Object Type Control - Assisted Object Entry
If you are using Object Type Control, the Assisted Object Entry feature will help you choose the correct Objects when entering Transactions and Simulations, as follows:
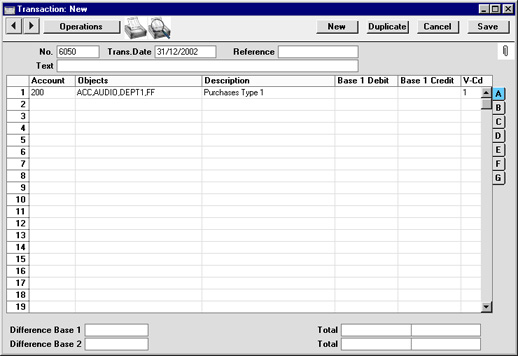
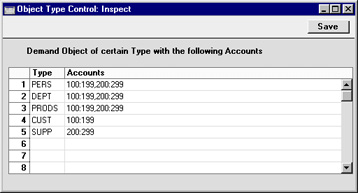
- In a Transaction or Simulation, use an Account that has been quoted at least once in the Object Type Control setting. In the example Object Type Control setting illustrated above, this means any Account between 100 and 299.
- From the Object field, activate the 'Paste Special' feature using Ctrl-Enter or ⌘-Enter as usual. Instead of the usual 'Paste Special' list, the 'Assisted Object Entry' window opens.
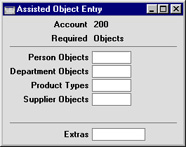
In this example, Account 200 has been used in a Transaction. The illustration of the Object Type Control setting earlier on this page shows that Account 200 requires Objects belonging to four different Object Types. As a result, the 'Assisted Object Entry' window has four fields, one for each required Object Type.
- Using 'Paste Special' in the usual way, enter an Object belonging to each Type in the appropriate field. Use the Extras field if you want to add another Object belonging to a fifth Type.

- Close the 'Assisted Object Entry' window by pressing the Shift-Enter key combination. The Objects will all be pasted into the Transaction: