Viewing a Contact's Call History
You can view a Contact's Call History in two ways:
- Open a Contact record by double-clicking in the Contact list in the 'Hansa BusinessPhone' window, and then select 'Call History' from the Operations menu. This will show the Call History for the selected Contact.
- Produce a Call History report, as described below. This allows you to show the Call Histories for several Contacts in the same report.
To produce a Call History report, follow these steps:
- Click the [Routines] button towards the top right of the 'Hansa BusinessPhone' window. A list of Routines appears:

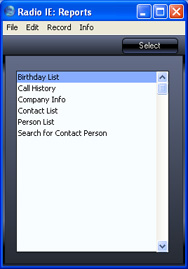
- Click the [Reports] button. A list of reports appears:

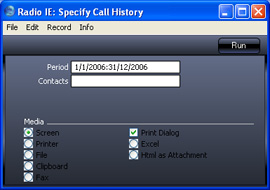
You can also open this window from anywhere in Hansa BusinessPhone using the Ctrl-R keyboard shortcut. - Double-click 'Call History' in the list, or highlight it and click the [Select] button. The 'Specify Call History' window is opened:

- Complete this window as follows:
- Period
- Paste Special
Reporting Periods - Enter the period for which you wish the Call Histories to be printed. Separate the Start and End Dates with a colon (:).If you enter the report period in the format 01-01-06:31-12-06 and if you are using four-digit years as in the illustration, the leading digits will be inserted automatically. If your report period is a single day, just enter the date once and this will be converted to a period format automatically. The default will be the first record in the Reporting Periods setting.
- Contacts
- Paste Special
Customers, Suppliers and Contact Persons - Range Reporting Alpha
- Enter a Contact Number (or range of Contact Numbers separated by a colon) to print the Contact History for a particular Contact or range of Contacts. Use the 'Paste Special' function to choose a Contact or range of Contacts, as described on the Call Histories' page.
- Media
- Use these options to choose the destination of the printout. The available options are Screen, Printer, File, Clipboard and Excel. The last option will open Microsoft Excel and create a new Workbook containing the report. If you print to screen (the default setting), the report will be shown in a new window. You can subsequently send the report to a printer by clicking the Printer icon in the Button Bar of this window or by selecting 'Print' from the File menu.
- If you are sending the report to a printer and you want a print dialogue to appear, check the Printer Dialog box (last of the Media options). You might do this if you want to print several copies of a report.
- When you have completed the 'Specify Call History' window, click the [Run] button. The report will be printed to the specified destination.
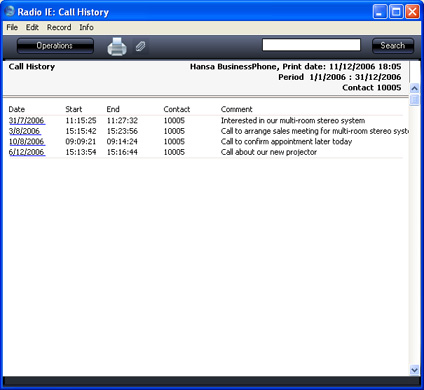
Shown below is a typical Call History report, printed to screen:

In the report, the date of each Activity is underlined. This means you can click on a date to open the Activity record.
