Printing Registers using Conditions chosen using Check Boxes
If you are designing a report that will simply list the records in various registers, you can allow the person producing the report to choose the registers that will be printed using check boxes in the specification window. For example, you might be designing a Customer List report that lists the records for each Customer in various registers such as Invoices, Sales Orders, Quotations, Activities and so on. Follow these steps:
- Create a new report. On the 'Data' card, specify that the Contact register is to be the primary register. Add any searches that are needed. On the 'Layout' card, design the output of the report as required.
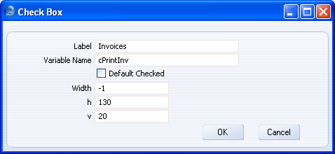
- Go to the 'Input' card and use the [Check Box] button above the report display area to add check boxes for each register, as described in step 2 on this page. The check box for one of these registers is illustrated below :
- After adding the check boxes, they will be shown in the display area on the 'Input' card:
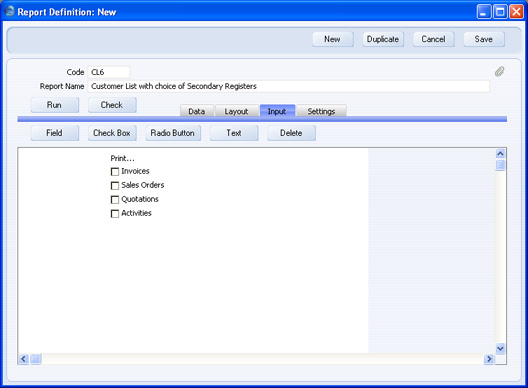
- In this example, the check boxes will allow the person producing the report to list Invoices, Orders, Quotations and/or Activities for each Customer. The structure of the report will be as follows:
- Customer 1
- Customer 1's Invoices (if chosen)
- Customer 1's Orders (if chosen)
- Customer 1's Quotations (if chosen)
- Customer 1's Activities (if chosen)
- Customer 2
- Customer 2's Invoices (if chosen)
- Customer 2's Orders (if chosen)
- Customer 2's Quotations (if chosen)
- Customer 2's Activities (if chosen)
The Invoice, Order, Quotation and Activity registers will therefore all be secondary registers. Return to the 'Data' card and add these to the report as described on the Adding a Secondary Register page with the exception that in each case you should also specify a Condition:
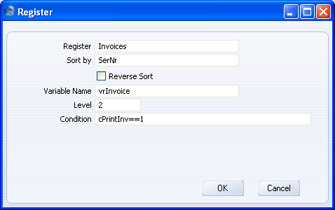
The Condition specifies that Invoices will only be printed for each Customer if cPrintInv is equal to 1 (i.e. if the person producing the report ticks the Invoices check box). More than that, the Invoice register will only be processed (the report will only loop through the Invoice register) if the check box has been ticked. So, if the check box has not been checked, no time will be wasted processing a register that will contribute nothing to the final report.
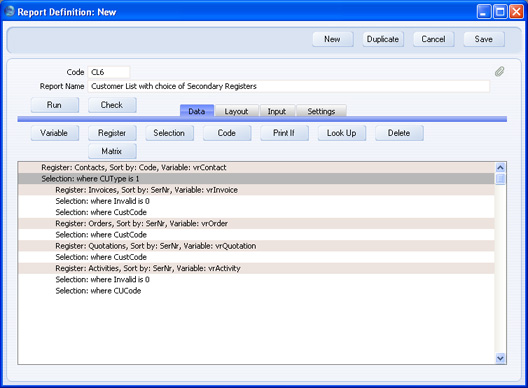
- Connect each of the secondary registers to the primary register, as described on the Linking the Primary and Secondary Registers page:
- Return to the 'Layout' card and design the output of each of the secondary registers as required.
The example report described above will list every Customer. If the person producing the report chooses any of the check box options, the records in the corresponding registers for each Customer will also be listed. For example, if the Invoices and Orders check boxes are selected, each Customer's Invoices and Orders will be listed. As the options are check boxes, the user can choose as many options as necessary, including none of them. The options could also be radio buttons, in which case only one of the options could be selected when the report is printed.
Please click the links below for more details about: