Available Tools and Functions (POS Button Types) - Item Functions
This page describes the POS Buttons that you can use to add Items to POS Invoices. Please refer
here for details about making these buttons appear in POS Invoices.
Item
- Function
- Adds a specific Item to a POS Invoice.
- Requirements
- In the row in the POS Button record that defines the "Item" button, you must enter an Item Number in the Code field, using 'Paste Special' if necessary. This is the Item that will be added to the POS Invoice when you click or touch the button.
- Workflow
- Click or touch the "Item" button.
- The relevant Item will be added to the POS Invoice.
- Note
- The "Item" button can be useful for commonly used Items, especially those without barcodes (for example, a parking fee).
Item Search
- Function
- Adds an Item to a POS Invoice after searching for it by name.
- Workflow
- Click or touch the "Item Search" button.
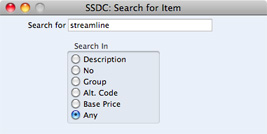
- The 'Search for Item' window appears:

- Enter part of the Item's name or other piece of information (information that fits one of the radio button options e.g. Item Group or Base Price) in the Search for field.
Entering more than one word as the search string will be treated as a "Find All Words" search, not "Find Exact Phrase".
- Press the Enter key.
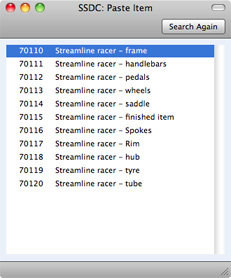
- The 'Paste Item' window will appear, listing the results of the search:

- Double-click the one that you need, or highlight it and press the Enter key. The Item will be added to the POS Invoice. If the Item that you need isn't listed, click or touch the [Search Again] button or close the window using the close box or the Esc key.
Price Lookup
- Function
- Displays the price of an Item without adding it to a POS Invoice.
- Workflow
- Click or touch the "Price Lookup" button.
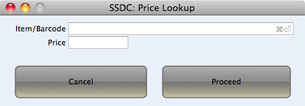
- The 'Price Lookup' window appears:

- Scan the Item's barcode, enter its Item Number or Barcode, or choose an Item using 'Paste Special'. Then, press the [Proceed] button or the Enter key (not the Tab key).
- The Item's price will be displayed in the Price field.
- Click the [Cancel] button to return to the POS Invoice.
---
In this chapter:
Go back to:
