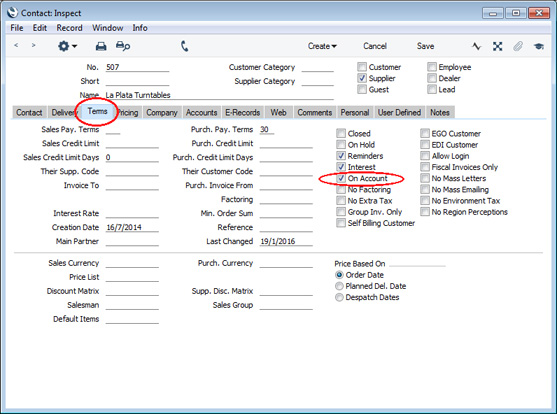
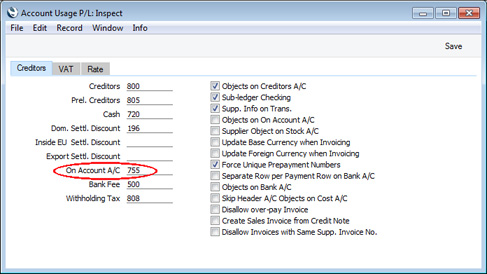
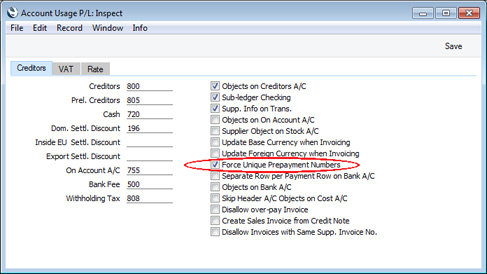
Language:


Printing Payment Forms and Cheques

You will often need to print certain documents associated with Payments. These may be remittance advices, cheques or documents used to gain internal authorisation for the Payment.

There are two documents in the Purchase Ledger that you can use to print Payments: Cheque Documents and Payment Forms. The provision of two documents allows you to print Payments using different Forms, depending on the occasion. For example, you might use the Payment Forms document to print remittance advices and the Cheques document to print cheques. However, you can print two Forms from the same document (as described below), and you can also design a Form that combines a remittance advice with a cheque.

The two documents behave as follows:

Cheque Documents
If a Payment record contains payments issued to more than one Supplier, separate documents will be printed for each Supplier.

Payment Forms
If a Payment record contains payments issued to more than one Supplier, separate documents will be printed for each Supplier, providing you print the document using the Payment per Supplier option.

The Payment Form will also be printed if you click the Printer icon in a Payment. In this case, the Payment per Supplier option will be used.
If you design a Form to be used with the Cheque document, you can also use it with the Payment Forms document when you print it using the Payment per Supplier option. Both documents use the same fields in the same way: you will find a full list of the available fields here. However, if you are likely to use the Payment Forms document without using the Payment per Supplier option, you may need a different Form design because some fields will then behave differently. A full list of the fields you can use in this situation is here.

A typical workflow will be as follows:

  1. Enter a Payment record.

  2. Mark the Payment as Ordered and save it.

  3. If you only need to print a remittance advice, click the Printer icon while the Payment is open in a record window.

  4. If you need to assign Cheque Numbers to each row in the Payment and/or you want to print remittance advices from several Payments at once, click the [Documents] button in the Master Control panel and select 'Cheque Documents' or 'Payment Forms' from the subsequent list.

  5. Specify the Payment Number or range of Payment Numbers that you want to print, and the Cheque Number of the first cheque. Note: do not specify a Cheque Number if you are printing Payments where the Type of the Payment Mode is "Own Cheques" or "Received Cheques" as in these cases you should use other methods to assign cheque numbers. Illustrated below is the specification window for the Payment Forms document, but you can use the Cheque document in the same way.

  6. Click the [Run] document to print the Payments. If you specified a Cheque Number in the specification window, Cheque Numbers will be written to each Payment row (flip C) as a Payment is printed, incremented for each Supplier in a Payment and in subsequent Payments.
If you do not mark a Payment as Ordered as mentioned in step ii above, the phrase "Test Printout" will be printed diagonally across the page as a watermark (providing you are not using the No Test Printout option in the Optional Features setting in the System module).

To determine the Form that will be used when you print the Payment, follow the steps described below. In this example, we describe the configuration that is needed for a remittance advice and a separate cheque to be printed from the same document:

  1. Design the remittance advice and the cheque Forms using the Form register in the System module. Use the 'Properties' function on the Operations menu to name the Forms (in this description, we have used the names "REM_ADVICE" and "CHEQUE" respectively) and to assign them Document Types of "Payment" (in the former case) and "Payment Cheques".

    A file containing samples of each Form including "REM_ADVICE" and "REM_CHEQUE" is supplied with Enterprise by HansaWorld: if you want to use these samples as templates for your own designs, import the "UKForms.txt" file as described on the Importing Sample Data page. "REM_ADVICE" is a standard remittance advice, and "REM_CHEQUE" is a remittance advice incorporating a cheque.

  2. Select the Purchase Ledger using the [Module] button in the Master Control panel or the Ctrl-0 (Windows and Linux) or ⌘-0 (Mac OS X) keyboard shortcut.

  3. Click the [Documents] button in the Master Control panel or use the Ctrl-D/⌘-D keyboard shortcut. The 'Documents' list window will be opened showing a list of available documents. Highlight 'Payment Forms'.

  4. Select 'Define Document' from the Operations menu.

  5. Use the Sequence column in the subsequent window to determine the order in which the Forms will be printed. If, for example, you need a remittance advice to be printed first, on the first line enter "1" as the Sequence Number and "REM_ADVICE" as the Form (you can use 'Paste Special' from the Form field to ensure the spelling is correct). On the second line, enter "2" as the Sequence Number and "CHEQUE" as the Form. You can use the Printer column to print the Forms on different printers if necessary: you may have a dedicated printer for your cheque stationery. You can, of course, specify on a third line that an internal authorisation document is also to be printed.

    If you only want to be able to print Payments that have been marked as OK, enter 'OKed' in the Status column in every row in the 'Form Definition' window. This will prevent the printing of Payments that have not yet been marked as OK. Note however that this will also prevent the printing of Payments that have been marked as Ordered but not OK.

  6. Click [Save] to save the Payment Form definition. From now on, whenever the Payment Form is printed, the remittance advice and the cheque will be printed, on different printers.
Note that following steps 3-6 will ensure that the same Form is used for Payments of all Payment Modes. However, if you have assigned a Form to a particular Payment Mode (in the Document field on flip B of the Payment Mode window), that Form will take precedence. You can therefore assign different Forms to different Payment Modes, but with the disadvantage that it is not possible to attach sequences of Forms to each Payment Mode, as described in step 5 above.

If you need Payments to pass through an approval process before you can print them, you can configure such a process using the Approval Rules register in the Business Alerts module. Please refer to the description of the Approval Status options on the 'Bank' card of the Payment window for brief details about the approval process and here for full details.

---

In this chapter:

Go back to: