Create Menu - Receipts
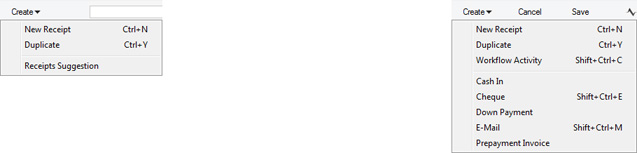
The Create menus for Receipts are shown above. On the left is the Create menu for the 'Receipts: Browse' window. On the right is the Create menu for the 'Receipt: New' and 'Receipt: Inspect' windows. If you are using iOS or Android, you can access the Create menu functions through the + menu.
'New' and 'Duplicate' are standard functions that are provided on every Create and + menu. Use these functions to create new records, in this case in the Receipt register. Please follow the links below for details about the other functions:
---
The Receipt register in Standard ERP:
Go back to: