Item Classifications
This page describes the Item Classifications setting in the Sales Ledger.
---
There are two methods in Standard ERP that that you can use to categorise your Items:
You can divide Item Classifications into Classification Types, allowing great flexibility. To define Classification Types use the
setting of the same name in the CRM module.
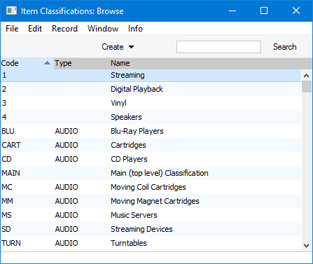
To work with Item Classifications, first use the [Switch Module] button in the Navigation Centre to enter the Sales Ledger. Then, if you are using Windows or Mac OS X, click the [Settings] button, also in the Navigation Centre and double-click 'Item Classifications' in the resulting list. If you are using iOS or Android, select 'Settings' from the Tools menu (with 'wrench' icon) and then tap 'Item Classifications' in the 'Settings' list. The 'Item Classifications: Browse' window opens, listing the Item Classifications that you have already entered:
To enter a new record, select 'New' from the Create menu (Windows/Mac OS X) or from the + menu (iOS/Android). The 'Item Classification: New' window appears: enter the details as appropriate and click [Save] (Windows/Mac OS X) or tap √ (iOS/Android) to save the new record.
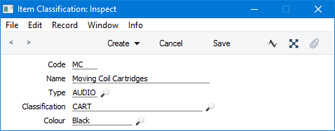
- Code
- Enter a unique code to identify the Item Classification. It can consist of up to five alphanumeric characters.
- Name
- Assign a descriptive name to the Item Classification. This will be shown in the 'Item Classifications: Browse' window and the 'Paste Special' list, so it should be descriptive enough to make the selection of the correct Item Classification easy for all users.
- Type
- Paste Special
Classification Types setting, CRM module
- If necessary, you can group Item Classifications of a broadly similar nature together by assigning them to the same Classification Type.
- Classification
- Paste Special
Item Classifications setting, Sales Ledger
- An Item Classification can belong to another Item Classification, allowing you to define a hierarchical Classification structure. Please refer here for details.
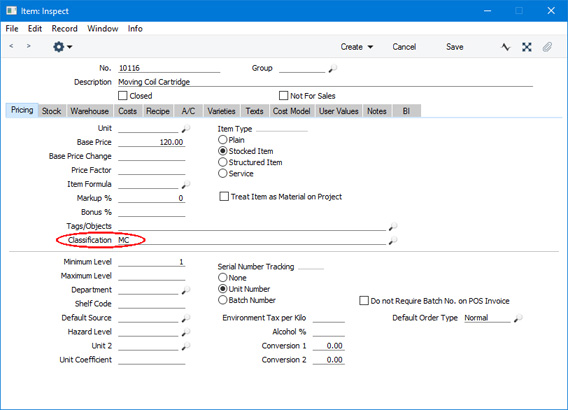
After entering your Item Classifications, you can assign them to the appropriate Items. To do this, use the Classification field on the
'Pricing' card of each Item record. You can assign several Classifications to the same Item, separated by commas:
---
Item Classifications in Standard ERP:
Go back to: