POS Button Types in POS Invoices - Processing POS Invoices
This page describes the following POS Button Types in POS Invoices:
- Finish
- Invalidate Invoice
- Open Cash Drawer
- Paste Quotation
- Paste Sales Order
- Print Invoice
- Reprint Last CC Slip
- Reprint Receipt
Please refer here for an index of all POS Button Types.
---
Finish - Function
- Prints, marks as OK and closes the POS Invoice, and opens a new POS Invoice.
- Requirements
- The POS Invoice must be fully paid.
- If you need POS Invoices to be printed on a conventional printer (i.e. not a receipt printer or a fiscal printer) when you click or touch the "Finish" button, specify in the Auto Actions setting in the System module that POS Invoices are to be printed At OK. A printer must be connected to the till, and you must have assigned a Form Template to the POS Invoice form.
- If a fiscal printer or fiscal control unit is attached to a till, touching or clicking the "Finish" button will cause the POS Invoice to be printed on that printer and can also open the printer's cash drawer.
- Workflow
- When a POS Invoice is complete (including payment), click or touch the "Finish" button.
- The POS Invoice will be printed, saved and closed, and a new one opened, ready for the next Customer.
- If you needed to give change to the previous Customer, the amount will be shown in the new POS Invoice as a reminder until you start adding Items.
Invalidate Invoice- Function
- Invalidates or voids a POS Invoice.
- Requirements
- Requires a supervisor to log in: can only be used by a cashier or supervisor whose Access Group gives access to the 'Invalidate Touch Screen Invoice' Action.
- Workflow
- Click or touch the "Invalidate" button.
- If the cashier does not have the necessary access right, the 'Login' window will appear, allowing a supervisor to log in.
- The POS Invoice will be saved in an invalidated state and closed, and a new empty POS Invoice opened, allowing the cashier to enter the next Invoice.
- Control of the till will be passed back to the cashier.
- Notes
- A cashier can use the "Invalidate Invoice" button when they have scanned a Customer's Items and the Customer then realises they cannot pay. If you are using the Incremental Receipt Printing option on the till, a receipt will already have been printed for the Items, and the "Invalidate Invoice" button will print a line on the receipt showing that the transaction has been invalidated. If you are not using the Incremental Receipt Printing option, you may not need to invalidate the POS Invoice as you can simply cancel the Invoice.
- You can use the "All Invoices" button to open a previous POS Invoice that has already been finished and then invalidate that Invoice. If the till is not connected to a receipt printer or a fiscal printer, a copy of the Invoice will be printed automatically as part of the process, with an "Invalidated" watermark. However you cannot invalidate a previous finished POS Invoice if it has been included in a POS Balance record (i.e. if it has been posted to the Nominal Ledger) or if it has updated stock (i.e. if you have run the 'Update Stock' Maintenance function after the Invoice was created).
- An invalidated Invoice is easily distinguished because all fields have red lines drawn through them. These red lines are also shown in the 'POS Invoices: Browse' window.
Open Cash Drawer- Function
- Opens the till's cash drawer.
- Requirements
- Can only be used by a cashier or supervisor whose Access Group includes a row explicitly giving full access to the 'Open Cash Drawer' Action.
- The POS Invoice must contain at least one payment. The Payment Mode of this payment must have been registered together with the Local Machine Code of the till in a row in the Local Machine Payment Modes setting. In this row, the Drawer field should not be empty.
- You must have specified in the Local Machine Serial Port Devices setting in the Technics module that the till or cash machine has a cash drawer.
- Workflow
- Click or touch the "Open Cash Drawer" button.
- The till's cash drawer will open.
- Notes
- If a receipt printer (Epson TM-U210 or TM-T88II) with cash drawer is attached to a till, touching or clicking the "Finish" button will also open the cash drawer.
- The "Open Cash Drawer" button does not have the supervisor log-in feature. So, if a cashier who does not have access to the 'Open Cash Drawer' Action clicks or touches the button, a message will appear to this effect. The 'Login' window will not appear, so there will be no opportunity for a supervisor to log in.
Paste Quotation- Function
- Copies the details from a Quotation into a POS Invoice.
- Workflow
- Click or touch the "Paste Quotation" button.
- A 'Paste Quotation' window and a numeric keypad open:

- Enter a Quotation Number in the 'Paste Quotation' window.
- If you are using a touch screen, use the numeric keypad to enter the Quotation Number, and touch the [Enter] button to add it to the 'Paste Quotation' window.
- Click or touch [Proceed] to copy the details of the Quotation into the POS Invoice, or [Cancel] if you do not want to proceed.
- The Customer in the POS Invoice will be changed to the one in the Quotation, and the Items in the Quotation will be added to the POS Invoice, after any Items that were already there. The first line in the Comment on the 'Price List' card of the Quotation will be copied to a separate line in the POS Invoice.
The Quotation will not be updated (e.g. it will not be marked as Accepted), and it will not be connected to the POS Invoice.
- Note
- The Quotation register is not synchronised. Therefore you can only use this button on a till that has a live connection with the server. You cannot use it on a till that has a live-sync connection with the server.
Paste Sales Order- Function
- Copies the details from a Sales Order into a POS Invoice.
- Workflow
- Click or touch the "Paste Sales Order" button.
- A 'Paste Sales Order' window and a numeric keypad open:
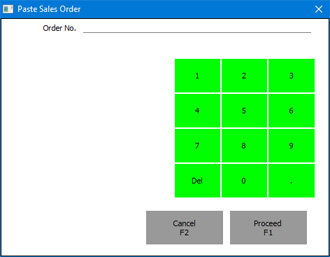
- Enter an Order Number in the 'Paste Sales Order' window.
- If you are using a touch screen, use the numeric keypad to enter the Order Number, and touch the [Enter] button to add it to the 'Paste Sales Order' window.
- Click or touch [Proceed] to copy the details of the Sales Order into the POS Invoice, or [Cancel] if you do not want to proceed.
- The Customer in the POS Invoice will be changed to the one in the Sales Order, and the Items in the Sales Order will be added to the POS Invoice, after any Items that were already there. Items in the Order that are fully delivered (i.e. Items where the Order Quantity and the Del. OK quantity are the same) will not be copied. Items that are partially delivered will be copied with their undelivered quantities. The first line of the Comment on the 'Price List' card of the Sales Order will be copied to a separate line in the POS Invoice.
The Sales Order will not be updated, and it will not be connected to the POS Invoice.
- Note
- The Sales Order register is not synchronised. Therefore you can only use this button on a till that has a live connection with the server. You cannot use it on a till that has a live-sync connection with the server.
Print Invoice- Function
- Reprints a POS Invoice
- Requirements
- Can only be used to print a finished Invoice. Therefore, if you add a "Print Invoice" button to the POS Invoice window, you must also add an "All Invoices" button to allow a cashier to find the finished Invoice that is to be printed.
- Workflow
- Click or touch the "All Invoices" button and then locate and open the POS Invoice that is to be printed.
- Click or touch the "Print Invoice" button. The POS Invoice will be printed.
- Note
- The "Print Invoice" button will print POS Invoices on a conventional printer (i.e. not a receipt printer or a fiscal printer) using the Form Template that you have assigned to the POS Invoice form (in other words, it is similar to using the Printer icon in a Sales Ledger Invoice or other printable record). If you need to be able to reprint POS Invoices on a receipt printer or on the TSL FP05 (Kenya) or FPrint 02K fiscal printers, use the "Reprint Receipt" button described below.
Reprint Last CC Slip- Function
- In Sweden, if you are processing credit card payments through Bambora, will reprint the last credit card slip (with a "Copy" watermark).
- Requirements
- In the Local Credit Card Terminal setting on the till, you must have specified that the Terminal Type is "Bambora".
- Workflow
- Click or touch the "Reprint Last CC Slip" button to reprint the last credit card slip.
Reprint Receipt- Function
- Reprints a POS Invoice.
- Requirements
- Requires a supervisor to log in: can only be used by a cashier or supervisor whose Access Group gives access to the 'Reprint Touch Screen Invoice' Action.
- Can only be used to print a finished Invoice. Therefore, if you add a "Reprint Receipt" button to the POS Invoice window, you must also add an "All Invoices" button to allow a cashier to find the finished Invoice that is to be printed.
- Workflow
- Click or touch the "All Invoices" button and then locate and open the POS Invoice that is to be printed.
- Click or touch the "Reprint Receipt" button.
- If the cashier does not have the necessary access right, the 'Login' window will appear, allowing a supervisor to log in.
- The POS Invoice will be printed.
- Control of the till will be passed back to the cashier.
- Note
- The "Reprint Receipt" button will reprint POS Invoices on a receipt printer or on the TSL FP05 (Kenya) or FPrint 02K fiscal printers. If you do not have such a printer attached to a till (i.e. you have not entered a record in the Local Machine Serial Port Devices setting in the Technics module that connects such a printer to the till), the button will print POS Invoices on a conventional printer using the Form Template that you have assigned to the POS Invoice form (i.e. it will behave in the same way as the "Print Invoice" button described above).
- Equivalent POS Command
- Reprint Receipt
---
Configuring the POS Invoice Window:
Go back to:
|