Language:

HansaManuals

Creating a Report Using the Report Generator
Creating a Report Generator Report - Specifying the Primary Register
Creating a Report Generator Report - The Appearance of the Report
Creating a Report Generator Report - Choosing a Print Destination
Creating a Report Generator Report - The Width of the Report Window
Creating a Report Generator Report - Printing the Report
Creating a Report Generator Report - Adding White Space
Creating a Report Generator Report - Adding Searches
Creating a Report Generator Report - Adding a Secondary Register
   - Linking the Primary and Secondary Registers
   - Printing Information from the Secondary Register
   - Printing Elements with Red Line Overstrikes
   - If there are no Records in the Secondary Register
Creating a Report Generator Report - Using Variables and Formulae
Creating a Report Generator Report - Printing Information from Matrices
Creating a Report Generator Report - Bringing Information in from Other Registers
Creating a Report Generator Report - Page Breaks
Creating a Report Generator Report - Filtering Records (Print If)
Creating a Report Generator Report - Adding Check Boxes to the Specification Window
Creating a Report Generator Report - Adding Radio Buttons to the Specification Window
Creating a Report Generator Report - Searching for Records within a Period
Creating a Report Generator Report - Break Points, Subtotals and Totals
Creating a Report Generator Report - Blocks
Creating a Report Generator Report - Syntax
Creating a Report Generator Report - Useful Functions
Example Reports - Listing Sales Figures
Creating a Report Generator Report - Common Error Messages

Tutorials for Standard Accounts

Creating a Report Generator Report - Choosing a Print Destination

This page describes specifying a print destination for a Report Generator report.

---

To specify the default print destination for a Report Generator report, open the Report Definition in a record window, change to the 'Settings' card and choose a Default Media option:

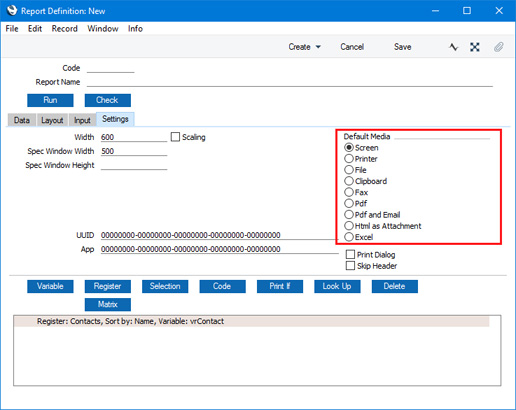
If it is likely that the report will be printed on a printer and you want a print dialogue to appear, select the Print Dialog option. The print dialog will allow the person producing the report to specify, for example, that they want several copies of the report to be printed.

Usually when you print a report, there will be an section at the top showing the report name, the search criteria used in producing the report, and the print date and time. If you do not want this section to be printed, select the Skip Header option.

Having chosen a print destination, please refer here for details about setting the width of the report.

---

Creating a Report Generator Report:

Go back to: