Entering a Transaction - Example
There are several shortcuts that you can use to simplify your work when entering Transactions. You can bring a date into a date field using the Paste Special' feature. If you will be entering Transactions of the same type repeatedly (e.g. salaries), you can automate their entry using Autotransactions. Their use is fully described
here.
- To enter a Transaction, ensure you are in the Nominal Ledger and then open the Transactions register. If you are using Windows or macOS, click the [Registers] button in the Navigation Centre and double-click 'Transactions' in the resulting list. You can also use the Ctrl-1 (Windows) or ⌘-1 (macOS) keyboard shortcut. If you are using iOS or Android, tap the [Registers] button in the Navigation Centre and then tap 'Transactions' in the subsequent list.
- If you are using Windows or macOS, select 'New' from the Create menu or press Ctrl-N/⌘-N to create a new Transaction. If you are using iOS or Android, select 'New' from the + menu.
The 'Transaction: New' window opens. In a single-user system, a Transaction Number will have already been entered in the No. field. In a multi-user system, the No. field will be empty, and a Transaction Number will be assigned when you save the Transaction for the first time. The Transaction Date will be the date from the previously entered Transaction.
On all platforms, if you don't need to open the 'Transactions: Browse' window, you can go straight to the 'Transaction: New' window from the Navigation Centre. Open the + drop-down menu in the top right-hand corner of the Navigation Centre (towards the top left if you are using macOS), and select 'New Transaction'.
- Enter and edit the data in the normal way. We will show how to enter the various items with the help of a few examples.
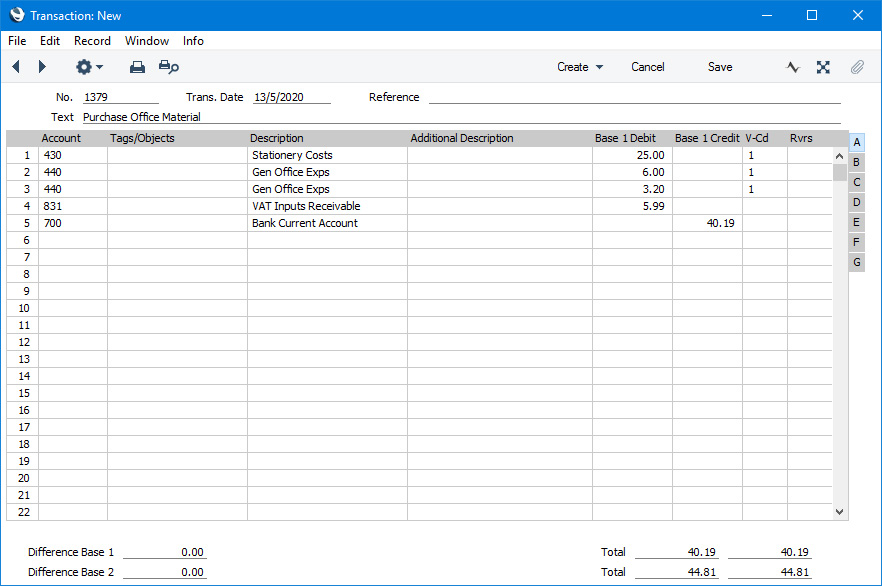
We assume that you have bought some office material from the local stationery store.
You have purchased two boxes of copy paper at 12.50 each, a box of pencils for 6.00, and a box of adhesive tape for 3.20. The VAT was 5.99, and the total 39.42. You paid by cheque from the company's current account.
The Transaction will look like this:

- Click [Save] (Windows/macOS) or tap √ (iOS/Android) to enter the Transaction in the Nominal Ledger.
- The next Transaction records the purchasing of a new desk. Start by selecting 'New' from the Create menu (Windows/macOS) or √ (iOS/Android). The stationery Transaction is closed and replaced with an empty record ready for data entry.
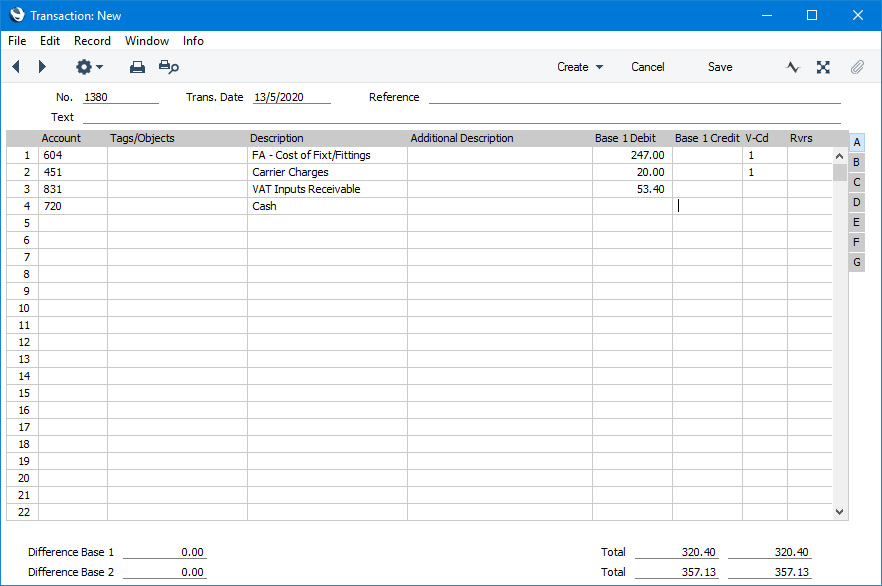
The desk cost 247.00 excluding VAT. You are charged 20.00 for transport, and then of course VAT.
Since there will be a single credit posting in this Transaction, you can try the automatic balancing function that is available when you are using Windows or macOS. Enter the three debit postings and continue with row 4 until you are going to enter the amount. The Transaction will look like this:

- With the insertion point in the Base 1 Credit column, press the Return or Enter key. The correct credit amount to balance the entry will be brought in for you. If you press Return or Enter again, the Transaction will be saved, closed and committed to the Nominal Ledger, and a new, empty, Transaction will be opened. You can use this feature when you need to enter several Transactions quickly in one sitting.
---
The Transaction register in Standard ERP:
Go back to:
