Editing Customer Details (My Account) - Change Password
The "Change Password" page is a separate sub-node built in to the
"My Account App" Node that browser users (usually Customers) can use to change their passwords. As it is a sub-node built in to the "My Account App" Node, it will be displayed in the
My Account Area (i.e. in the
<div id="my_account">). The name of the sub-node is hard-coded to be "/changepassword".
The "/changepassword" sub-node in the "My Account App" Node allows users to change their passwords. You can also add a "Forgot Password Form" Element to your website (perhaps to the log-in page). This will allow users to request that passwords be generated and sent by email or text message (SMS). The "Forgot Password Form" Element is described here.
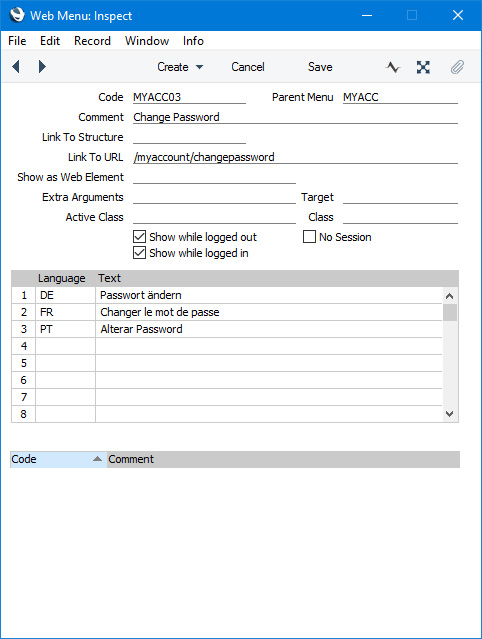
If you want users to be able to change passwords from within the "My Account App" Node, you must provide a button or menu item that will take users to the "Change Password" page. Specify /My_Account_App_Web_structure_name/changepassword (e.g. /myaccount/changepassword) as the anchor (using the Link to URL field if you are providing a menu item):
Please refer to step 7 on the
Editing Customer Details (My Account) page for more details about adding a menu to the "My Account App" Node.
When a browser user chooses to change their password, the /changepassword sub-node will be displayed in the My Account Area (i.e. in the <div id="my_account">):
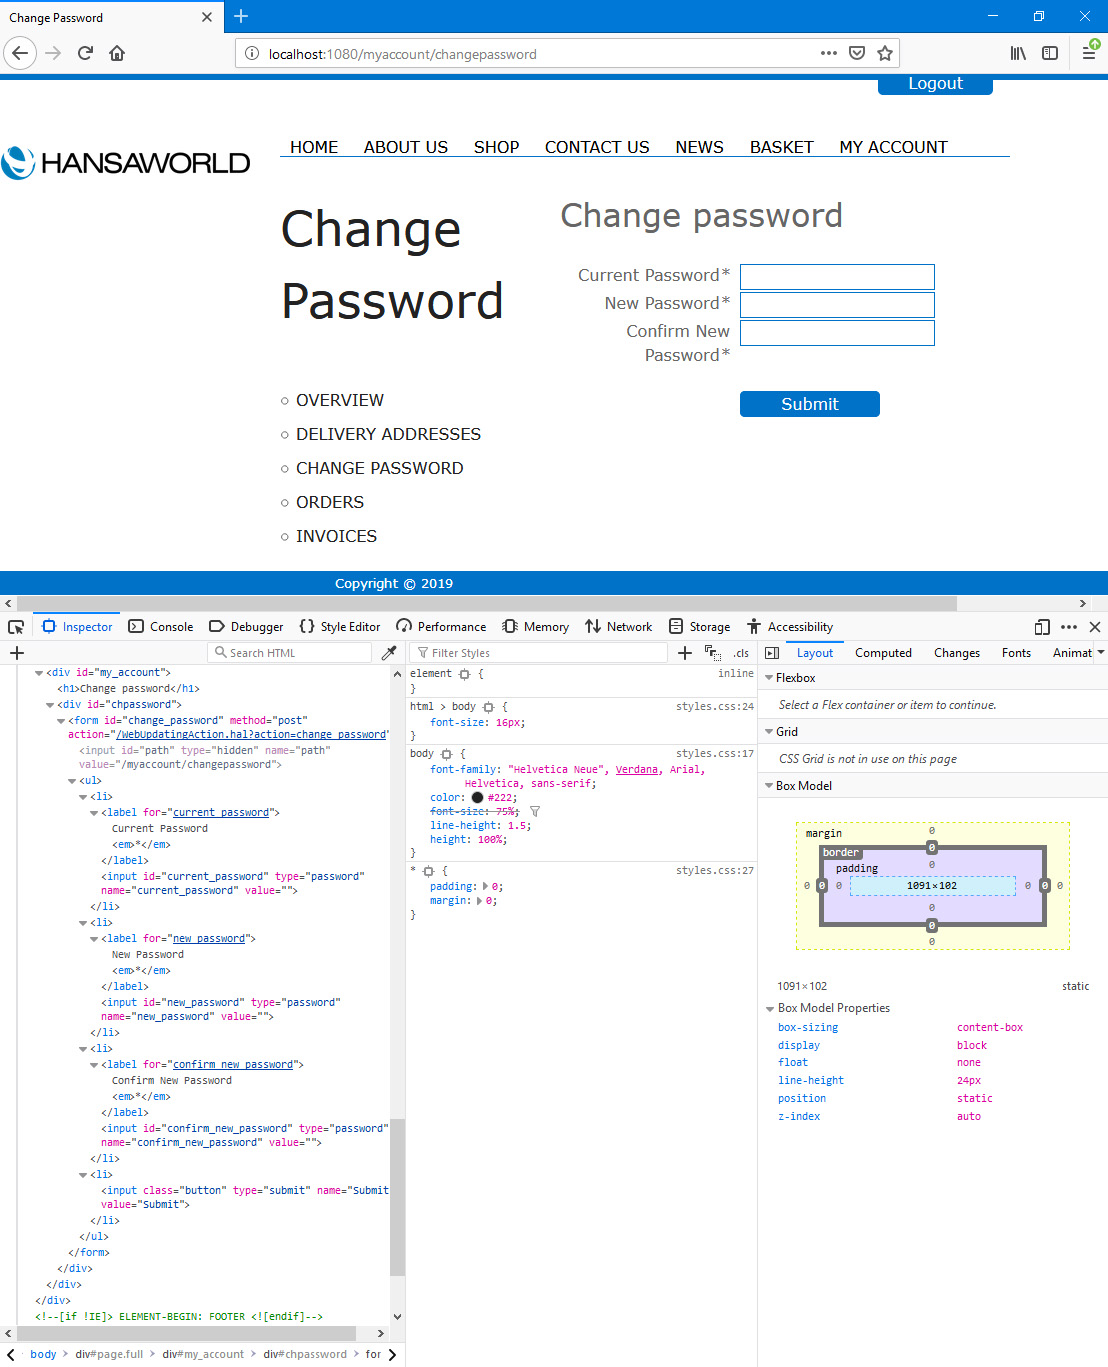
In this illustration, the following attributes are assigned automatically by Standard ERP (i.e. you will not be able to change these attributes, but you will be able to apply styling to them in your .css file):
- <h1> (used for the "Change Password" (Web Text 25815) heading)
- <div id="chpassword"> (contains the fields and the button)
- <form id="change_password"> (inside the previous <div>, contains the fields and the button)
- <input class="button"> (used for the button)
You can use the following options to change the appearance of the "Change Password" page:
- By default, the browser page displaying the /changepassword sub-node will be based on the Page specified in the Structure record for the "My Account App" Node. Specify a Template Page on the 'Change Password' card in the My Account Settings setting if you would like it to be based on a different Page.
- Using the Template Element field on the 'Change Password' card in the My Account Settings setting, you can specify that a header and/or footer will be added to the beginning and end of the <div id="my_account">. Please refer to step 7 ix on the 25815) to appear, select the Template elements override built-in headings option in the My Account Settings setting. This option applies to the /orders and /invoices sub-nodes as well as /changepassword.
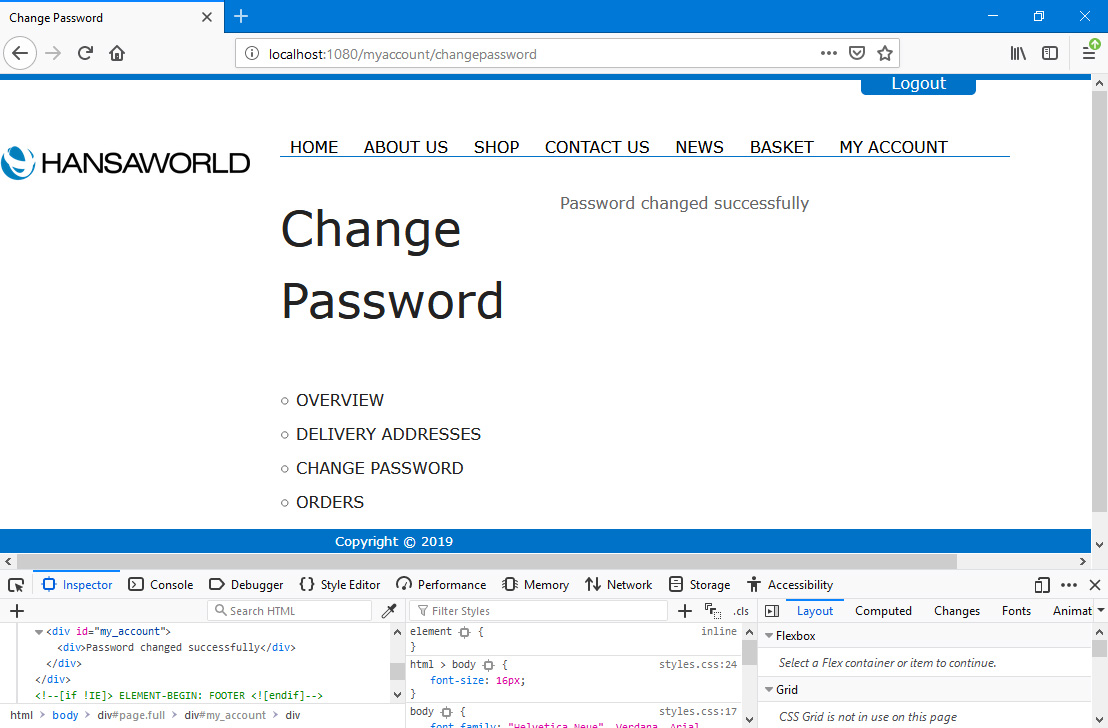
When a user fills in the form and presses the [Submit] button, the new password will be saved immediately, and the user will be shown Web Text 25427 (by default, "Password changed successfully") confirming that password has been changed.
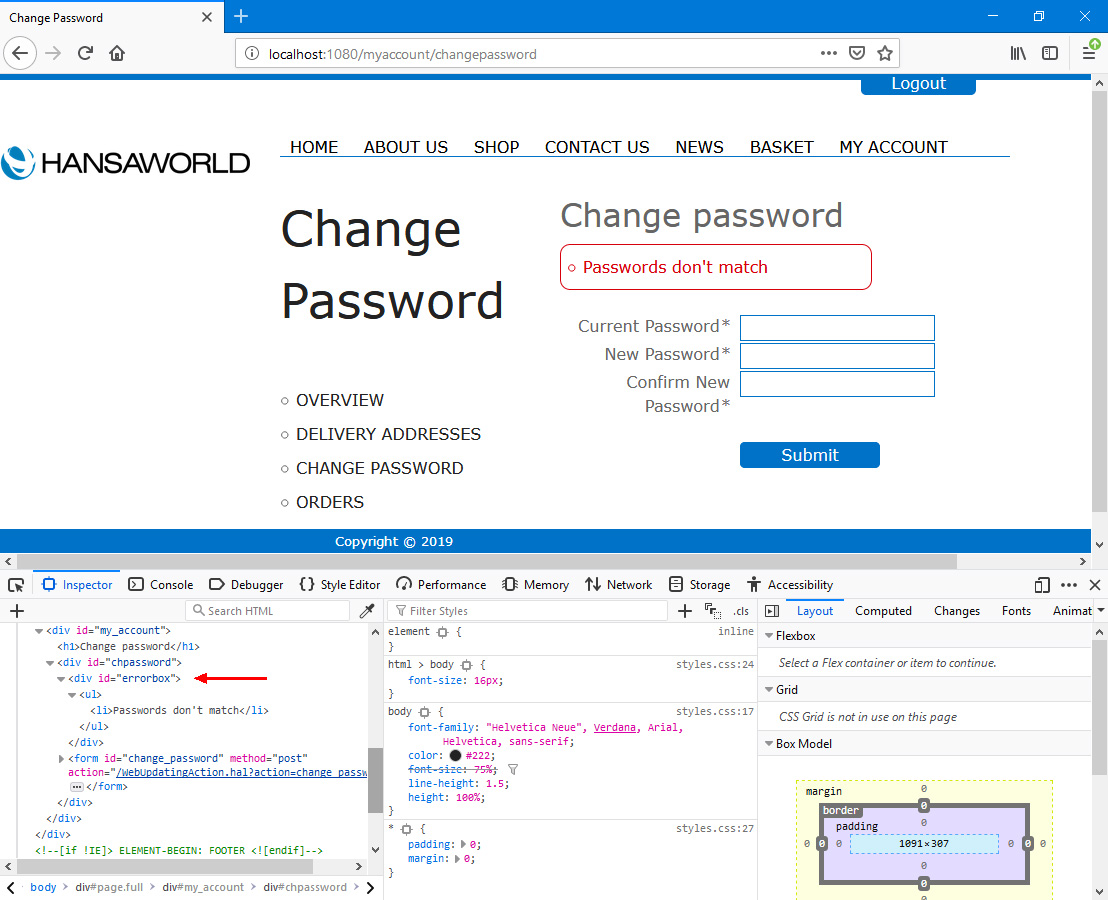
If the user has not filled in the form correctly when they press the [Submit] button, they will be taken back to the form where they will be shown an appropriate error message in
<div id="errorbox">:
If you need an email to be sent to the user to confirm that their password has been changed, follow these steps:
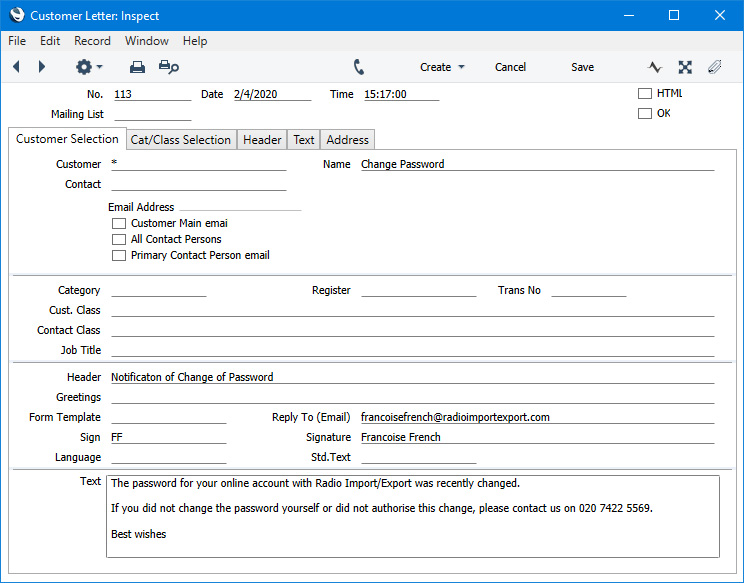
- Enter a Customer Letter (in the CRM module) with * in the Customer field (and in the Cust. Class field if you have specified in the CRM Settings setting (also in the CRM module) that a Customer Classification is required in Customer Letters), and with a Name, a Header and the letter text in the Text field. You should also enter an email address in the Reply To (Email) field: this is the address from which the confirmatory emails will be sent:
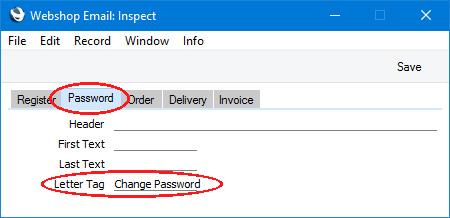
- In the Webshop Email setting, go to the 'Password' card and enter the Name from the Customer Letter in the Letter Tag field:
These emails will not appear in anyone's Mailbox in Standard ERP, but they will be visible in the
Email Queue in the Email and Conferences and Technics modules. For mails to be sent, you must subscribe to the Email and Conferences and External Email modules and you must have configured the Email SMTP Server setting. Please refer
here for full details about the mailing facilities in Standard ERP.
You can use the Web Texts setting to change the following texts:
| Sub-Node | Default Text | Web Text Code |
| | |
| My Account App/changepassword | Submit [button] | 20067 |
| My Account App/changepassword | Change Password [<h1> heading] | 25815 |
| My Account App/changepassword | Current Password [field label] | 25816 |
| My Account App/changepassword | New Password [field label] | 25817 |
| My Account App/changepassword | Confirm New Password [field label] | 25818 |
| My Account App/changepassword | All fields are required | 25053 |
| My Account App/changepassword | Current password is incorrect | 25054 |
| My Account App/changepassword | Passwords don't match | 25046 |
| My Account App/changepassword | Password changed successfully | 25427 |
---
Allowing Contacts to Use Your Website:
Go back to:
