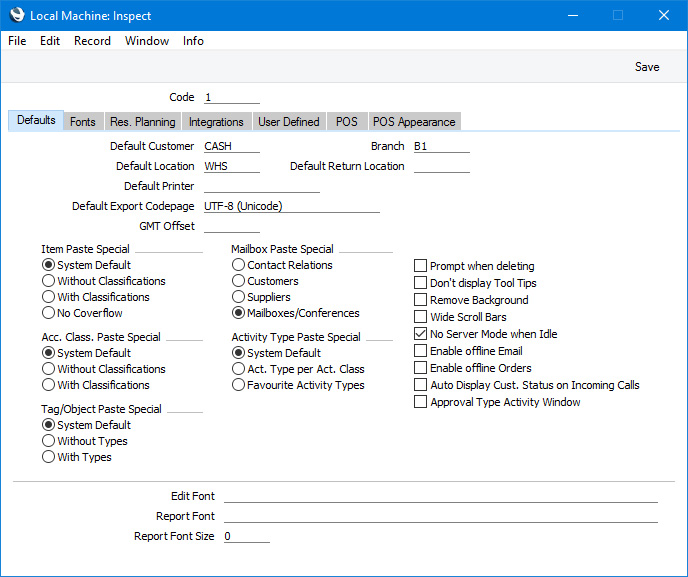
Local Machine - Header and Defaults Card
This page describes the fields and options in the Header and on the 'Defaults' card of the Local Machine setting with reference to the Restaurant module. Please follow the links below for descriptions of the other cards:
---
- Code
- Paste Special
Local Machines setting, Point of Sales/Restaurant/Technics module
- Use this field to assign a unique identification Code (the "Local Machine Code") to each till and device.
- The Local Machine Code will be copied to every transaction (e.g. every Bar Tab) recorded on the till or device and will be updated each time a transaction is saved. This allows the transactions recorded on each till and device to be kept separate in reports. You will also need to quote the Local Machine Code in every operation affecting the till or device (e.g. moving cash floats in and out of the till or device, opening and closing work sessions, cashing up).
- An option that is available is to pre-configure the Local Machine setting for each till and device. To do this, create separate records for each Local Machine Code in the Local Settings setting in the Technics module or, if you need the same options to be used on every till or device, you only need create a default record in which the Code is empty. Having done so, when you specify a Code in this field on a particular till or device, the other fields and options in the Local Machine setting will be changed to agree with the relevant record in the Local Settings setting.
- You will need to restart Standard ERP on a till after specifying its Local Machine Code, in order for the new Local Machine Code to be fully registered throughout the system.
- Default Customer
- Paste Special
Customers in Contact register
- The Default Customer is the Customer that will be used by default in every new Bar Tab and POS Invoice. This will often be a generic Customer such as 'Cash Sale'.
- You can specify an overall Default Customer in the POS Settings setting in the Restaurant and Point of Sales modules This Default Customer will be used on every till and device. If you want to use a different Default Customer on a particular till or device, specify that Customer in this field on the till or device in question.
- In both cases, the specified Customer must exist in the Contact register.
Every new Bar Tab and POS Invoice will be created in the name of the Default Customer. If you have added a "Customer Search" button to the Bar Tab and/or POS Invoice windows, you will be able to choose a different Customer if necessary. Specifying a Loyalty Card in a Bar Tab or POS Invoice will also change the Customer.
- Although the Default Customer field is on the 'Defaults' card of the Local Machine setting, it will only be used in Bar Tabs and POS Invoices. New Quotations, Sales Orders and Sales Ledger Invoices will not use the Default Customer.
- Branch
- Paste Special
All records in Contact register
- If your business has more than one Branch (e.g. more than one restaurant), you can use this field to record the Branch where a till or device is located.
- Each Branch must have its own record in the Contact register. These Contact records will allow details such as the Branch address to be printed on documentation, providing you have included the relevant fields in your Form Template designs.
- The Branch specified here will be copied to all Bar Tabs, Deliveries, POS Invoices, Purchase Orders, Reservations, Returned Goods records, Quotations, Sales Invoices, Sales Orders and Stock Movements that you enter on the client machine, till or device. It is a legal requirement in some countries that the Branch origin of these transactions is recorded.
- If you have specified any Sales Tags/Objects in the Contact record for a particular Branch, those Tags/Objects will be copied to Bar Tabs, POS Invoices, Reservations, Quotations, Sales Orders and Sales Invoices. This will allow detailed Branch reporting and analysis in the Nominal Ledger.
- You must specify a Branch in the Local Machine setting on each till and device if you want to use some of the features in the Restaurant module, even if you only have one Branch. These features include the Kitchen Order Screen and the Blocked Items setting.
- Default Location
- Paste Special Locations setting, Stock module
- When you enter a Bar Tab or a POS or Sales Ledger Invoice on a till or device, the Location will be chosen as follows:
- It will be taken from the Person record for the current user ('Sales' card). In a restaurant environment, it may not be necessary to specify Locations in the Person records for the waiters and bar staff.
- It will be taken from this field, which is specific to the till or device. In a restaurant environment, this Location may represent the branch in which the till or device is situated.
When you mark a Sales Ledger Invoice as OK and save, the Items sold will be withdrawn from the specified Location immediately. Items sold in Bar Tabs and POS Invoices will be withdrawn from the specified Location when you next run the 'Update Stock' Maintenance functions in the Restaurant and Point of Sales modules (note that the two 'Update Stock' functions are not the same).
- The Location will also be chosen as described above in new Goods Receipts, Purchase Orders, Quotations, Sales Orders, Stock Depreciation records, Stock Revaluations, Stocktaking records and Work Sheets unless determined by other records (e.g. a Goods Receipt created from a Purchase Order will take its Location from the Purchase Order). In all cases except Bar Tabs and POS Invoices, you will be able to change the default choice of Location if necessary.
- Default Return Location
- Paste Special Locations setting, Stock module
- If you need Items that Customers return to be received into a dedicated Location (for example, a testing area), specify that Location here. This Location will be used in all Returned Goods records and Credit Notes entered on the till or device, in preference to the Default Location specified in the current user's Person record above or in the field above.
- Note that the Default Return Location will not be used in Returns created in the restaurant environment (i.e. in Bar Tabs with negative values created using the "Return" button in the Bar Tab window). Returns will use the Default Location as described above.
- Wide Scroll Bars
- Wider scroll bars can make operation on a touch screen easier. This feature is not operational on every operating system.
The Local Machine setting and the Restaurant module:
---
Go back to:
|