Table Views
This page describes the Table Views setting in the Restaurant module.
---
A Table View is a floor plan of the restaurant. If a restaurant has more than one room, floor or other division, it can have more than one Table View. A Table View will show each Table in the appropriate position in the room, with each Table using colour-coding to indicate whether it is occupied. Waiters and members of bar staff can use a Table View to assign Bar Tabs to Tables.
If you will use Table Views, follow these configuration steps:
- Enter separate records in the Table Views setting in the Restaurant module for each room, floor or other division in the restaurant:
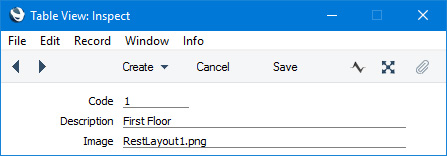
As well as a Code and a Description, you can specify the path to an image file. This could be the restaurant logo as a watermark, or it could be an outline of the room or floor. Supported formats for the image are BMP, GIF, JPG, PDF and PNG, and the image file should be stored in the same location on each till, cash machine and device.
- When entering records in the Tables setting, fill in the following fields to assign each Table to a Table View and to position the Tables in the Table View:
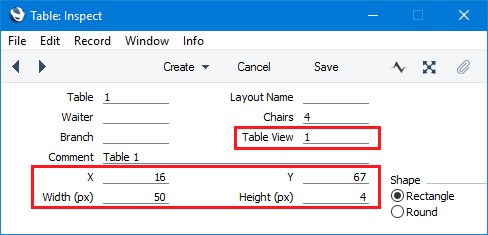
- Table View
- Paste Special
Table Views setting, Restaurant module
- Use this field to assign a Table to a Table View.
- X, Y
- Use these fields to locate the Table in the Table View.
- Width (px), Height (px)
- Use these fields to specify the size of the Table in the Table View.
- While placing Tables in the Table View as described in step 2, you can open the Table View to check that each Table is positioned and sized correctly. To do this, open the New Table Views setting in the Restaurant module:
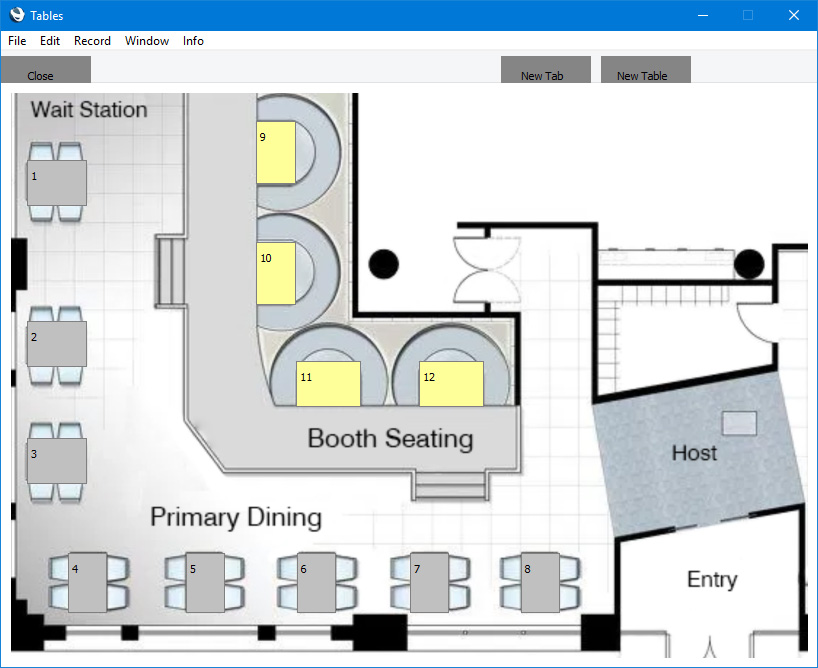
If you have specified a Table View on the 'POS' card in the Local Machine setting (step 5 below), the Tables in that Table View will be shown. Otherwise all Tables will be shown. For this design stage, you can change the Table View in the Local Machine setting as necessary if you are designing more than one Table View. You can also create new Tables from the Table View using the [New Table] button: the new Tables will be assigned to the Table View you are using (i.e. the one specified in the Local Machine setting) automatically.
- When adding a "Set Table" button to the Bar Tab window, you can specify a Table View in the Code field:
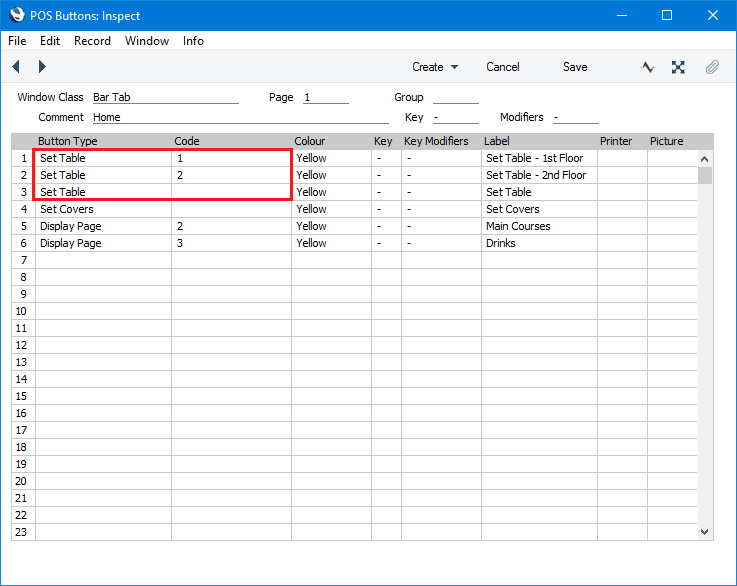
When a waiter or member of bar staff presses the "Set Table" button, the Table View that you have specified in the Code field will be opened. The waiter or member of bar staff will then be able to select a Table by double-clicking or touching.
If you do not specify a Table View in the Code field, the "Set Table" button will open the Table View that is specified in the Local Machine setting (step 5 below). If no Table View has been specified in the Local Machine setting, the button will open a different window in which a waiter or member of bar staff can enter a Table number using a keypad or 'Paste Special'.
- Working on each client (i.e. on each till, cash machine and device), specify a Table View on the 'POS' card in the Local Machine setting:
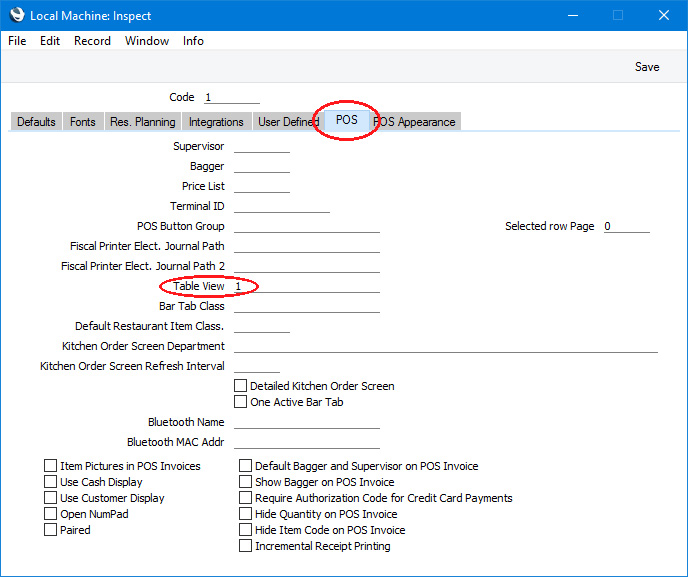
If you have devices that will use live-sync connections to the server, specify the Table View in the records for these devices in the Local Settings setting in the Technics module.
For example, if there are two floors in your restaurant, you can specify the Table View for the first floor in the Local Machine setting on each device that will be used on that floor, and the Table View for the second floor in the Local Machine setting on each device that will be used there. If devices will be used on both floors, you may prefer to provide "Set Table" buttons for each floor as described in step 4.
- If you need the Table View be opened automatically when a user logs in to your Standard ERP system, specify this using the Login Shortcuts register in the User Settings module. Again, you will need to do this separately on each client (i.e. on each till, cash machine and device). If you have devices that will use live-sync connections to the server, create separate records for each device in the Local Shortcuts setting in the Technics module.
Having configured Table Views, waiters and members of bar staff will be able to assign Bar Tabs to Tables. One way to do this is to work from the Table View. They will be able to look at the Table View, select an unoccupied Table and create a Bar Tab that is assigned to the selected Table. They will also be able to select an occupied Table and to open the existing Bar Tab from there.
The Table View will have been opened automatically when a waiter or member of bar staff logs in, if specified as described in step 6 above. Alternatively, the waiter can open the New Table Views setting in the Restaurant module. In both cases, a Table View will open as follows:
- If a Table View has been specified in the Local Machine setting on the device, that Table View will be shown.
- If a Table View has been not specified in the Local Machine setting on the device, all Tables will be shown.
The New Table Views setting will therefore be most useful in restaurants with a single Table View and on devices that can only be used with a particular Table View (e.g. devices that will always be used in the same room or on the same floor).
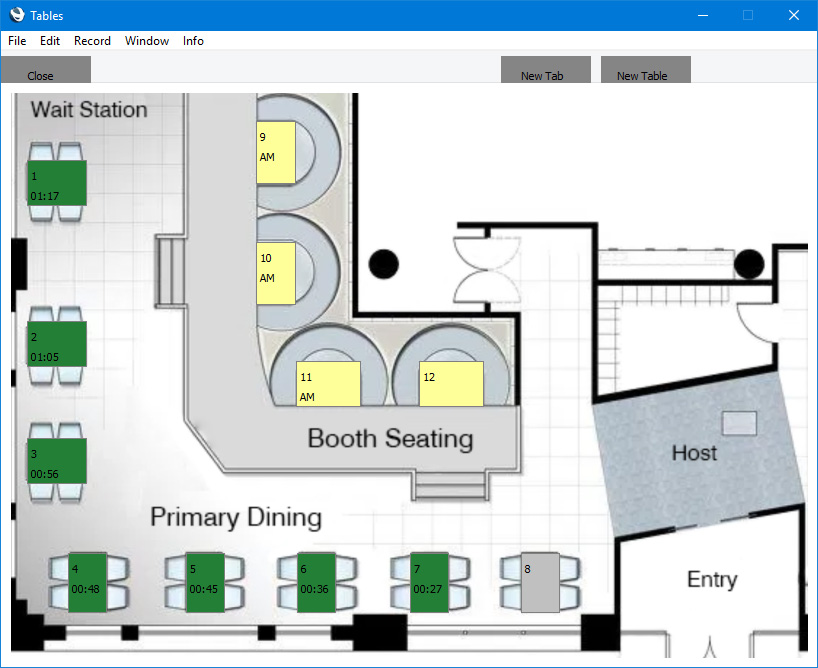
The Tables in the Table View will be colour-coded as follows:
- Grey
- Assigned to the current user (the current user has been specified as the waiter for the Table) or not assigned to a waiter.
- Unoccupied.
- Click or touch this Table to create a new Bar Tab for the Table.
- Green
- Assigned to the current user or not assigned to a waiter.
- Occupied (assigned to an open Bar Tab), with the occupation time shown underneath the Table number or Layout Name.
- Click or touch this Table to open the existing Bar Tab.
- Yellow
- Assigned to a different user.
- May or may not be occupied (if it is occupied, the responsible waiter's Signature will be shown underneath the Table number or Layout Name).
- Clicking or touching a yellow Table will have no effect: only the responsible waiter can work with it.
By default, the Tables will be identified by Table number. If you need them to be identified by name instead, enter the names in the Layout Name field in each
Table record. In the case of occupied Tables, if you need the Customer Categories of the occupying Customers to be displayed as well, select the
Display Customer Category option in the
Restaurant Settings setting. This can be useful if you need to see Tables occupied by particular types of Customer such as VIPs or corporate Customers.
Waiters and members of bar staff will also be able to create or open a Bar Tab and select a Table from the Bar Tab window if you have added a "Set Table" button to the Bar Tab window. As described in step 4 above, you can add separate "Set Table" buttons for each Table View, which will be useful for waiters who are not restricted to a particular room or floor. Alternatively or in addition, you can add a button without specifying a Table View, to open the Table View specified in the Local Machine setting.
The "Set Table" button will open a Table View as illustrated above and using the colour coding already described, with one addition. If the Bar Tab that the waiter is working from has already been assigned to a Table, that Table will be blue. The waiter should click or touch a grey Table to assign the Bar Tab to that Table.
---
Go back to:
