Receiving Gift Vouchers as Payment
This page describes receiving Gift Vouchers as payment in POS Invoices and Bar Tabs. The description assumes you have included a "Gift Voucher" button when configuring the buttons that will appear in the
POS Invoice or
Bar Tab window, as mentioned in step 4 on the
configuration page. Note that you can only receive Gift Vouchers in payment through
POS Invoices and
Bar Tabs: you cannot do so through conventional Invoices or Receipts.
The description below will describe receiving Gift Vouchers as payment using a POS Invoice as an example: the process in Bar Tabs is identical.
- Create a POS Invoice and add the Items that the Customer has purchased in the normal way.
- Click or touch the "Gift Voucher" button.
- The 'Gift Voucher Payment' window appears:

- Enter or scan the Gift Voucher Number or Barcode in the Gift Voucher field.
If the till has a touch screen but no keyboard, touch the Gift Voucher field and then use the keypad to enter the Gift Voucher Number.
You can also choose a Sold Gift Voucher using 'Paste Special'. The 'Paste Special' list shows Sold Gift Vouchers that have not yet been redeemed.
- The Amount field will show the value of the Invoice until you specify the Gift Voucher Number. It will then change to show the value of the Gift Voucher:

Depending on your Gift Voucher policies, you can change the Amount being paid by the Gift Voucher, if the value of the Gift Voucher is higher than the value of the Invoice. It may be that you must always take the full value of a Gift Voucher and give change if necessary, in which case you will not change the Amount. Alternatively, if you can take part of the Gift Voucher value and leave the remainder as a balance on the Voucher, you can change the Amount, and the balance will be recorded.
- Click or touch [Proceed] to add the Gift Voucher payment to the Invoice, or [Cancel] to abandon it. If you clicked [Proceed], providing the Gift Voucher has not expired, a line will be added to the Invoice, showing the Gift Voucher payment:
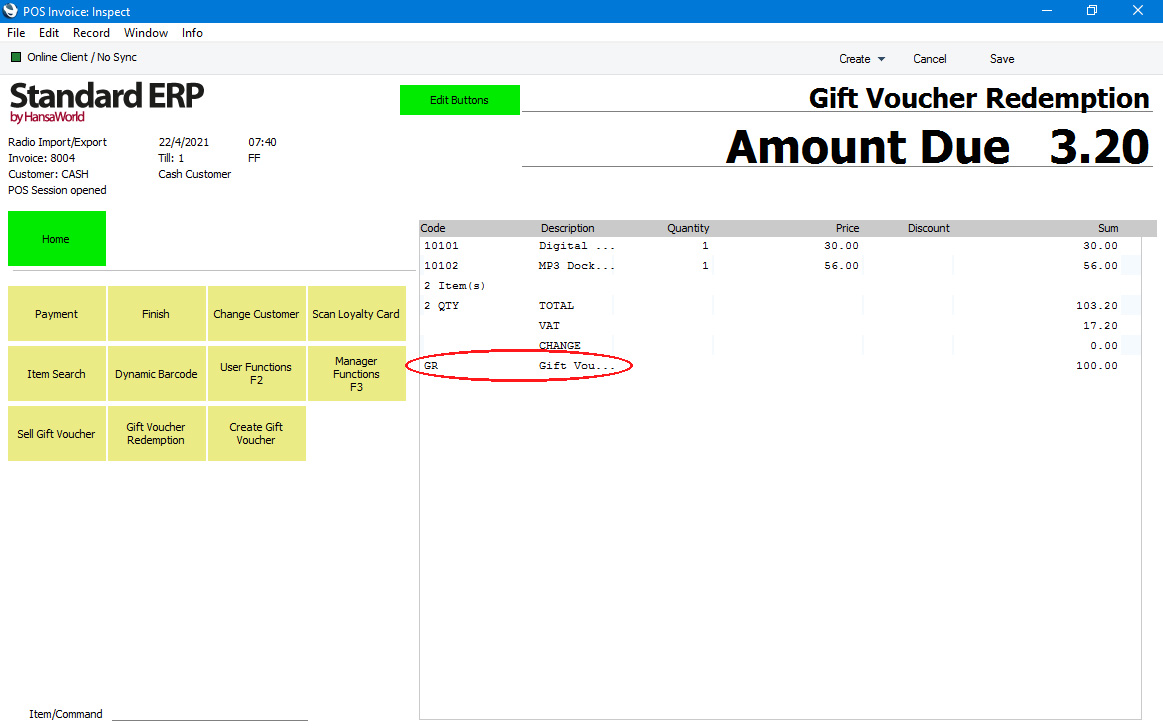
The line shows the Payment Mode and the Button Label ("Gift Voucher Redemption" in the illustration) (both from the POS Buttons setting, step 4 on the configuration page) and the amount paid by the Voucher.
- Add to the Invoice any other payments as necessary (e.g. using the "Cash" or "Credit Card" buttons) and click or touch the "Finish" button to close the POS Invoice, proceeding in the usual way.
The payment by Gift Voucher will be recorded in the Nominal Ledger as follows:
- Debit
- Account from the Payment Mode connected to the "Gift Voucher" button in the POS Buttons setting.
- Credit (Sales)
- Standard posting to Sales Account(s).
- Credit (VAT)
- Standard posting to Output VAT Account(s).
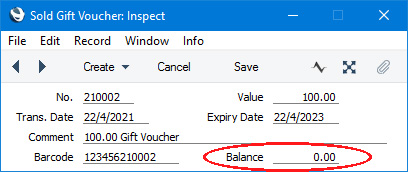
When you receive a Sold Gift Voucher as payment (i.e. when you click or touch the "Finish" button to close the POS Invoice), the Balance in the relevant record in the Gift Vouchers Sold setting will be updated (the payment will be subtracted from the previous Balance). When the Balance reaches zero, you will no longer be able to receive the Voucher in payment. In this example, the full value of the Voucher was taken in payment, so the Balance is zero:
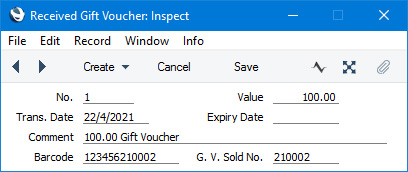
A new record will also be created in the Gift Vouchers Received setting, recording the payment. Records in this setting can't be modified.
---
Gift Vouchers in Standard ERP:
Go back to: