|
Search HansaManuals.com HansaWorld FirstOffice Start >> Transaction Registers >> Invoices Anterior Siguiente Capítulo Completo en versión p/Impresión Buscar Este texto se hace referencia a la versión del programa 4.3 Entering an Invoice FirstOffice provides several shortcuts to simplify your work with entering Invoices. You can for example bring a date into a date field using the 'Paste Special' function. You can also use this function to simplify the entering of Item Numbers, Customer Numbers, Payment Terms etc.To enter a new Invoice, first open the 'Invoices: Browse' window as described here. Then click [New] in the Button Bar or use the Ctrl-N (Windows) or ⌘-N (Macintosh) keyboard shortcut. Alternatively, select an Invoice similar to the one you want to enter and click [Duplicate] on the Button Bar. The 'Invoice: New' window is opened, empty if you clicked [New] or with a copy of the copied Invoice. In the case of the copy, the Invoice and Transaction Dates of the new Invoice will be the current date, not the date of the copied Invoice, and the Due Date will be recalculated accordingly. Complete the Invoice record as described below, then save it using the [Save] button and close the window by clicking the close box. Then, close the browse window using the close box again.
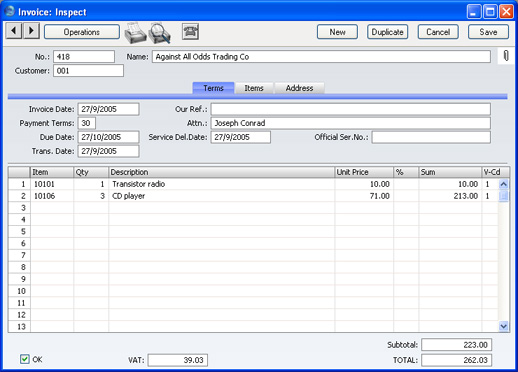
Since the amount of information stored about each Invoice will not fit on a single screen, the Invoice window has been divided into three cards. At the top of each is the header. This contains the Invoice Number, the Customer Number and Name. At the bottom of the screen is the footer, which contains various totals. There are three named buttons ('tabs') in the header.
Anterior Siguiente Arriba Capítulo Completo en versión p/Impresión |