Printing Reports
FirstOffice can produce many different reports. A detailed description of these can be found in the appropriate sections of these web pages. You should, however, always print a
Transaction Journal for the Transactions entered during one work session. The same goes for the
Invoice Journal in the Sales Ledger.
Having completed the process of entering your opening balances, you should now print a Trial Balance and compare it with a Trial Balance produced from your old system.
To print a Trial Balance, follow these steps:
- Ensure you are in the Nominal Ledger module using the [Select Module] button in the Master Control panel and click the [Reports] button, also in the Master Control panel.
- The following window is shown.
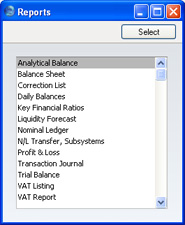
- Scroll to the bottom of the list and choose 'Trial Balance' by double-clicking, or press the "T" key twice and then press the Return or Enter key. The 'Specify Trial Balance' window appears.
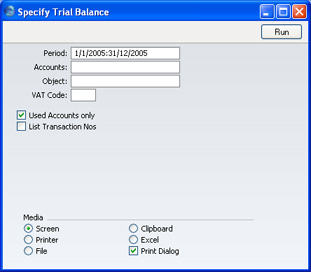
- In the 'Specify Trial Balance' window, enter the range of transactions you wish to print. To report on your opening balances, you should enter a period from the beginning of the current fiscal year to the current date. Separate the start and end dates of this period using a colon (:), as shown in the illustration. You can leave all the other fields blank, ensuring that all Accounts etc will be included in the report.
- Use the Media options at the bottom of the window to choose a print destination (for example, 'Printer' or 'Screen'), and click the [Run] button to produce the report.
- If you printed to screen and now wish to print on a printer, simply click the Printer icon in the Button Bar of the report window.