Pages Based on Device Operating System
This section describes the following Structure Type:
- Redirect to Platform specific sub page
All the settings and registers mentioned on this page are located in the Webshop and CMS module unless otherwise specified.
---
The "Redirect to Platform specific sub page" Structure Type allows you to take browser users to different pages depending on the device operating system that they are using. Follow these steps:
- Add records to the Structure register for the default versions of each page (e.g. the home page, the "contact us" page, the "about us" page, etc). Select "Redirect to Platform specific sub page" as the Type.
A "Redirect to Platform specific sub page" Structure or Node acts as a "Parent Node". Each Parent Node can have a number of Child Nodes (one for each device or operating system) which you will enter in the next step. When a browser user goes to a particular page, they will be taken to the Parent Node and then redirected to the Child Node for their operating system. If there is no Child Node for the user's operating system, they will remain at the Parent Node.
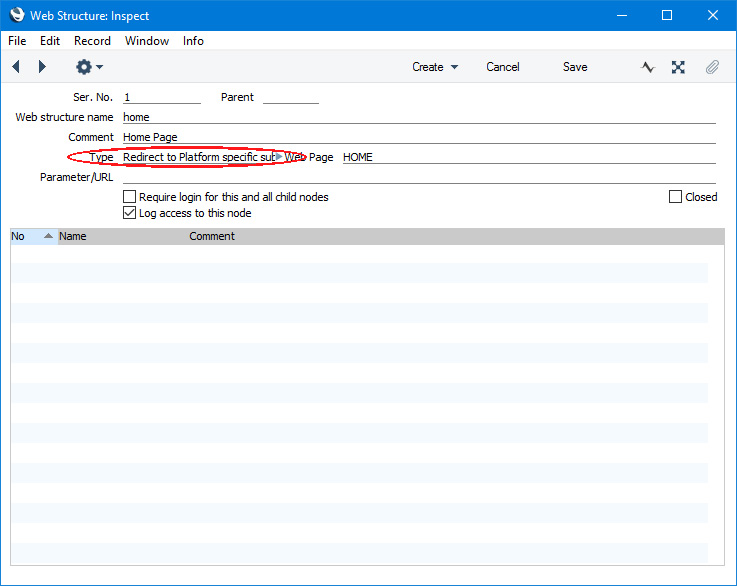
In this illustration, we have changed the Type of our existing home page from "Page" to "Redirect to Platform specific sub page":
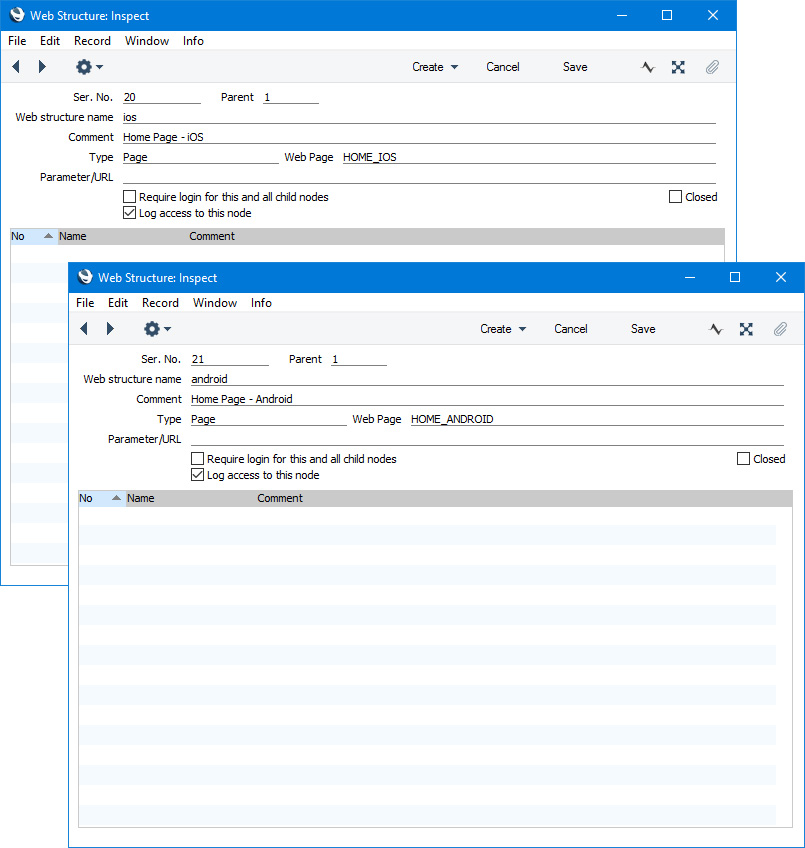
- Create separate Structure records for each Child Node:
- Parent
- Paste Special
Structure register, Webshop and CMS module
- Enter the Code of the Parent Node (i.e. the Structure record from the previous step).
You can create Child Nodes from the Parent Node by selecting 'New child node' from the Operations menu. Using this method, the Parent field will be filled in automatically.
- Web structure name
- Enter one of the following codes to represent the device or operating system:
- android
- ios
- linux
- macosx
- unix
- windows
- Type
- Paste Special
Choices of possible entries
- Set the Type in each Child Node to "Page".
- Page
- Paste Special
Page register, Webshop and CMS module
- Having a separate Structure record for each Child Node (i.e. for each country) allows you to use different Page records which in turn means you can use different templates and menus.
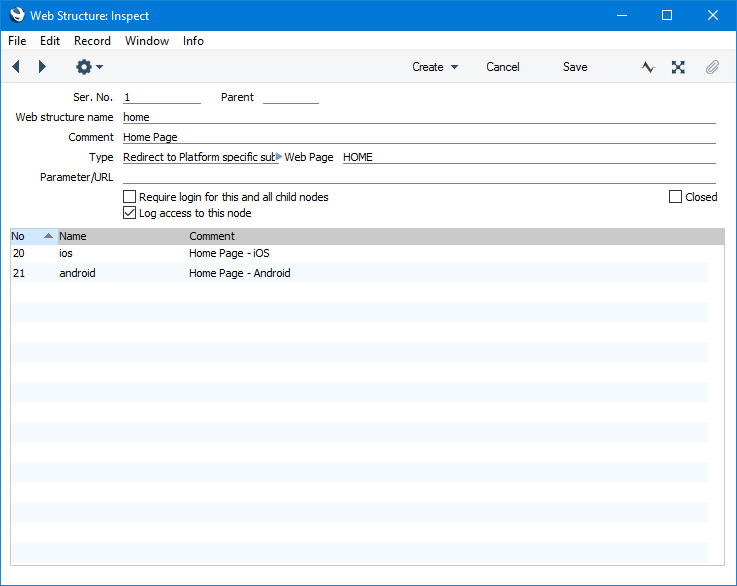
The Child Nodes will be listed at the bottom of the 'Web Structure: Inspect' window for the Parent Node. You can double-click any Child Node in the list if you need to edit it:
- In this step, enter the Pages, Elements, Translations and Menus that you need for each Child Node.
- Repeat steps 1-3 for other pages as necessary. As the Web structure name of a Child Node must be the name of a device operating system, the result will be many Child Nodes with the same Web structure names.
---
Go back to: